To turn on firewall logging, perform the following steps.
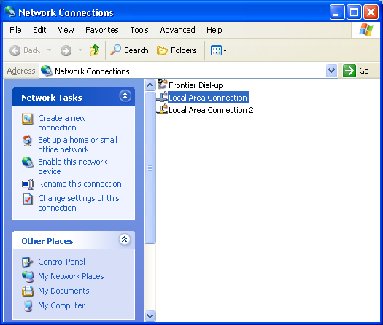
1. Right click on My Network Places and select Properties
2. Select Local Area Connection.
3. Right click and select Properties.
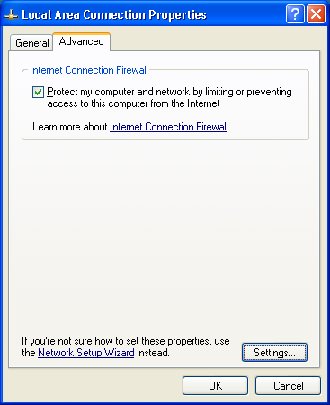
4. Select the Advanced Tab
5. Check the Protect my computer and network by limiting or preventing access to this computer from the Internet
6. Click the Settings button.
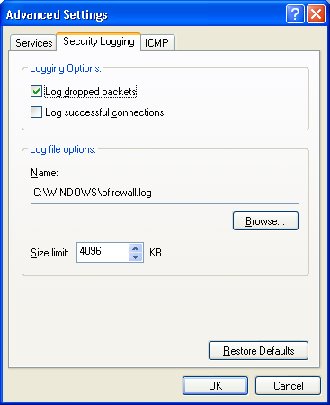
7. Select the Security Logging Tab.
8. Under Logging Options, check the Log dropped packets option.
9. Make a note of the log file name (pfirewall.log) and path for future use.
10. Click Okay as needed to close the open windows.
A log file will be created as a Microsoft Notepad file. To view the log file, follow the path that was specified in step 7 above. Using the path specified as an example, you might do the following.
1. Open My Computer
2. Select the C drive
3. Open the WINDOWS folder
4. Find the pfirewall.log file and open it.
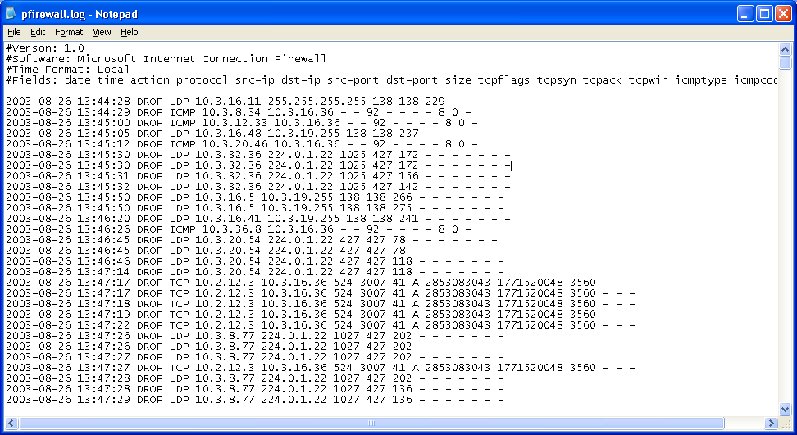
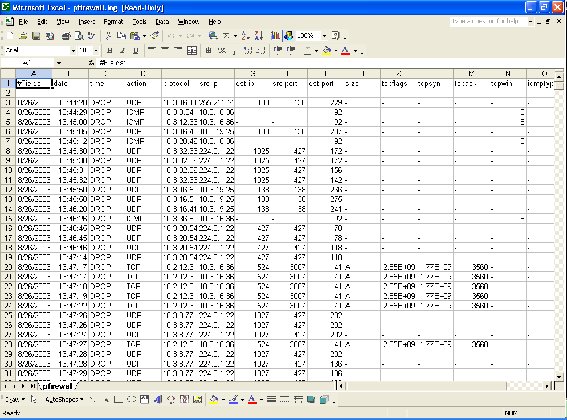
Reading the Log File
The log file will look like this in Microsoft Notepad.
Search for ICMP Action codes and a Size of 92. These are generated by machines that may have working viruses.
If the log file is large, you may wish to move the data into Microsoft Excel to use advanced sorting or filtering capabilities.
1. Open a blank spreadsheet.
2. Go to File and then select Open
3. At the bottom of the Open window, change the Files of Type dropdown window to read All Files (*.*)
4. Either enter the path and file name of the log file or use the browse features to find and select the file.
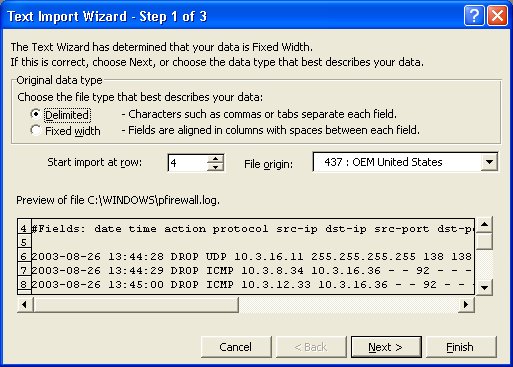
5. When Excel opens the file, it will recognize that it is not an Excel formatted file and give you the option of delineating the text with the Text Import Wizard.
6. Choose the Delimited file type and Start the import at row 4 to avoid the header information but still obtain the column names
7. Click on Next
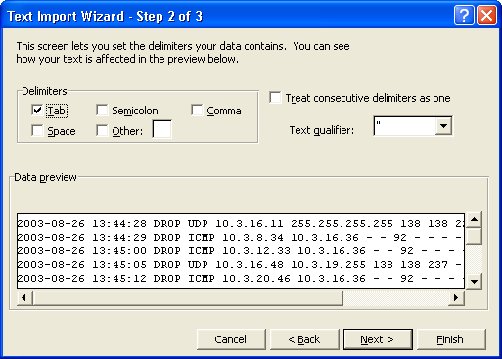
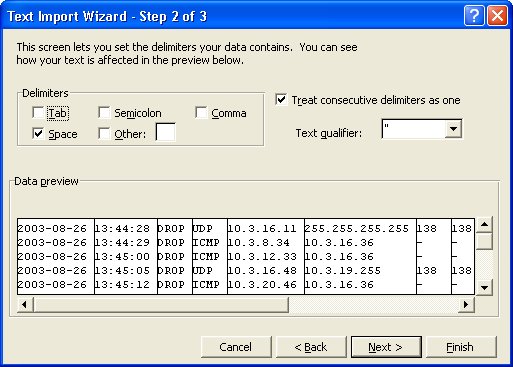
8. Now Change the Delimiters selection from Tab to Space
From This
To This
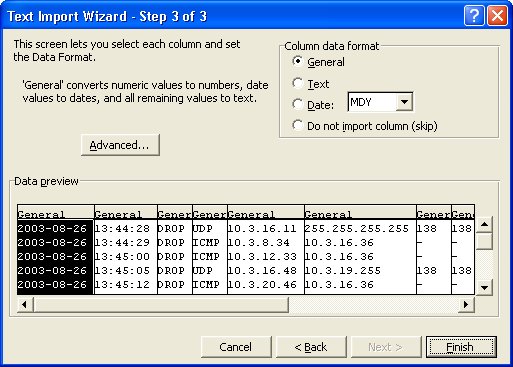
9. Now click on Next again.
10. No need to change data formats as provided by step 3 of the Wizard. Just click Finish.
The spreadsheet will open as shown.
To sort the data in Excel:
1. Select the entire spreadsheet by clicking in the upper left corner of the sheet.
2. Click on Data on the top menu and pull down to select Sort.
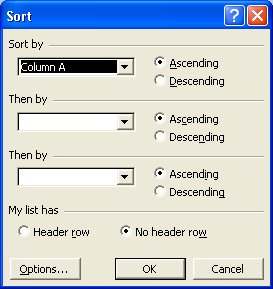
3. You will see the following window:
4. First select My list has (Header row).
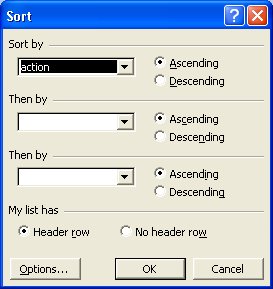
5. Now, the Sort by box will contain the column names. Select the column named Action.
It will now look like this:
6. Click on OK.
7. The columns will now be sorted by Action and the ICMP designations will all be together for easy location and further analysis.