RESET
The RESET selection permits the user to return to already entered data and make changes to that data. The RESET command will only work with data being entered on existing, open schedules. The RESET selection will not allow the user to make changes to data on closed schedules.
DELETE
The DELETE selection deletes the selected entry from the existing schedule. The DELETE command will only work with data being entered on existing, open schedules.
CANCEL
The CANCEL selection stops the current action and returns the user to the beginning of the action to start over.
EXIT
The EXIT selection returns the user to the ACCOUNTING MANAGER main screen.
Other Maneuvering Commands
In addition to the Navigation and Update Panel, ACCOUNT MANAGER will provide the user with on-screen prompts to guide the user through the program. These prompts will generally be located in the lower left hand corner of the screen, prompting the user to make a selection or strike a particular key.
When operating within data entry and query modules, the F1 and F6 function keys may also be used to maneuver through the program. These two keys do the following:
F1 - Opens online help service
F6 - Displays a list of all available items in a Look-Up browser (magnifying glass)
Functions
Functions
The ACCOUNTING MANAGER program can be broken up into five different sections or functions. Each function has its own specific purpose in the program. Similar operations have been grouped together to simplify ACCOUNTING MANAGER’S operation.
The five functions consist of routines for:
Data Entry – All data to be entered into ACCOUNTING MANAGER is input through the Data Entry functions. Individual sections are used for the input of cash receipts, cash disbursements, journal entries, purchase orders, and budget transfers.
Maintenance – The maintenance function enables the user to work with individual accounting codes and maintain the system’s schedules. The user can create, edit, and delete specific account codes, create and edit individual funds, specify special codes, and customize accounts to special needs. Schedules can be opened, edited, and closed all through the maintenance module.
Output Reports – The output reports function provides a variety of standard reports, which the user may either display, on screen, print to a text file or a printer. Output reports include appropriation and revenue status reports, trial balances, individual account code transactions, entire open or closed schedules, vendor histories, and purchase order reports.
Query Info – The query function allows the user to search for information for a specific data item or items, such as an individual cash receipt, individual check, or a series of journal entries. The user can define the search criteria to customize the search or select the built in defaults and query all data entries.
Utilities – The utilities function allows the user to run special routines, including opening entry, routine maintenance, diagnostic, custom and year-end routines.
Schedules
Schedules
The organization of data and information in ACCOUNTING MANAGER is based on the use of schedules. Schedules are the grouping of similar transactions into manageable segments, as determined by the user, for single general ledger postings. They operate similar to schedules as used in manual accounting systems.
Organization by schedules allows the user to effectively cross-reference all source transactions into the accounting system. Schedules also allow the user to concurrently maintain records for multiple accounting periods.
All schedules, for both current and past accounting periods, can be accessed with just a few simple clicks. Schedules may be printed to provide a hard copy document, as a text file or viewed visually on screen.
Schedules can be created for:
· Cash Receipts
· Cash Disbursements
· Journal Entries
· Purchase Orders
· Budget Transfers
Open and Closed Schedules
Open and Closed Schedules
Schedules may be used for any time period the user desires. All current schedules are referred to as being "open". All past schedules are referred to as being "closed", and are closed by the user periodically on the Schedule Maintenance screen (Please refer to Maintenance –> Close & Post Schedules).
Accounting Tips:
0 Although schedules may be used for any time period the users desire, it is recommended that schedules be used monthly, at most. Depending upon the size of the accounting operations of the entity, the user may require using schedules for smaller or longer time periods.
Monthly schedules, however, will ensure that transactions for the entire month are organized together and posted on a timely basis. Monthly procedures can simplify standard reporting and reconciliation to outside information. (Please refer to Appendix A, Sample Monthly Procedure)
Open schedules are generally for the current and most recent preceding period. All data entered in current schedules may be changed, edited, and corrected through the respective menus. The data entered in the current schedules remains active until the schedules are closed. When closed, all entries on the schedule are posted to their proper accounts in both the general ledger and the subsidiary ledger. A user may have an unlimited number of open schedules at any one time.
Closed schedules are schedules that have been closed by the user. Once closed, the data in a schedule CANNOT BE CHANGED. Any corrections for errors in prior, closed schedules must be recorded in the current period in an existing, open schedule, most commonly as a journal entry. Once closed, all account data is posted to the appropriate accounts. Closed schedules can be accessed for review on screen or printed at any time.
Cash Receipts
Cash Receipts
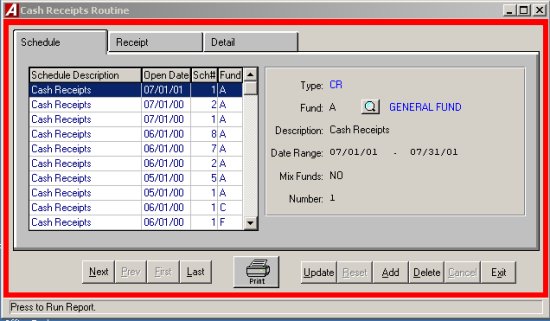
The cash receipts module is the first segment of the data entry module. This segment should be used for entering data from the treasurer’s individual cash receipts for the particular period. To enter the cash receipts module, select Data Entry then Cash Receipts from the ACCOUNTING MANAGER main menu or simply click the Cash Receipts button. For a screen image please click Cash Receipts.
Adding a new Cash Receipts Schedule
· Click the ADD button from the update panel.
· Enter the Fund type for this schedule or click the magnifying glass to select from a list of available funds.
· Enter a description for this schedule and press tab.
· Enter the date range for this schedule.
· Enter "YES" to allow the user to mix funds or "NO" for only one fund on this schedule and press tab.
· ACCOUNTING MANAGER will automatically enter the next schedule number. You can accept the number or change it to another unused reference number.
·
Click SAVE to lock in the record. Entering an Cash Receipt
·
Select an open schedule to record the cash receipts in. Use the mouse to select the desired schedule. If no schedules are open, ACCOUNTING MANAGER will direct you to open a new schedule (Adding A New Credit Receipts schedule).
Each cash receipt has two parts. The first part is the information part of the cash receipt, which records the amount, the date, the cash receipt number and a brief description. The second part is the Details tab where the account code distribution of the cash receipt takes place.
·
Click the Receipt tab.
·
Click ADD from the Update panel.
·
ACCOUNTING MANAGER will automatically enter the Cash Receipt number, the user can accept this number or enter an unused cash receipt number and press TAB (for entering a batch of cash receipts, simply enter the first cash receipt number, ACCOUNTING MANAGER will automatically enter the subsequent cash receipt numbers).
Accounting Tips:
0
An alternative system-wide default number may also be used. (Please refer to System Manager to see how to change this option)
·
Enter the Cash Receipt date and press TAB.
Accounting Tips:
0
The date of the cash receipt is the basis ACCOUNTING MANAGER uses in preparing all relevant reports. All cash receipts should be dated for the date of the actual cash receipt, and not for the date of entry into the computer system.
·
Select "YES" or "NO" to invoke the customer tracking feature. If yes, enter the customer number or click the magnifying glass to select from a list of available customers. If the customer in not in the list you can add a new customer by clicking the add button. (For more information on adding a new customer please refer to Customer Maintenance).
·
Enter the amount of the Cash Receipt and press tab.
·
Enter the description and click SAVE to lock in the record and move to the Detail tab.
Entering the Detail
·
Enter the first account to be debited and press TAB (Press F6 or double click the entry box to display a listing of available accounts).
·
Enter the first dollar amount to be debited and press enter. Accounting Manager will ask, "Liquidate an existing Purchase Order?" Click "YES" or "NO". If "YES" is clicked enter the Purchase Order Number or click the magnifying glass to select from a list of available Purchase Orders. Then enter the amount to be liquidated and click "OK". If "NO" is clicked enter the Vendor Number or click the magnifying glass to select from a list of available vendors. If the vendor is not in the list you can add a new vendor by clicking the add button. (For more information on adding a new vendor, see Vendor Maintenance).
·
Enter additional debits in the same manner.
·
Enter the first account to be credited and press TAB twice (Press F6 or double click the entry box to display a listing of available accounts).
·
Enter the first dollar amount to be credited and press TAB. Accounting Manager will ask, "Liquidate an existing Purchase Order?" Click "YES" or "NO". If "YES" is clicked enter the Purchase Order Number or click the magnifying glass to select from a list of available Purchase Orders. Then enter the amount to be liquidated and click "OK". If "NO" is clicked enter the Vendor Number or click the magnifying glass to select from a list of available vendors. If the vendor is not in the list you can add a new vendor by clicking the add button. (For more information on adding a new vendor, see Vendor Maintenance).
·
Enter additional credits in the same manner.
If the "Allow Cash Receipts Detail Descriptions" field is flagged in System Parameters—Preference Maintenance, enter a description. (Please refer to System Manager to see how to turn on the description setting.)
Accounting Tips:
0
The New York State Comptroller prescribes the use of control accounts in this case the 980 Revenue Control Account – in making entries. The control account requirement may be changed. (Please refer to System Manager to see how to change this option)
When the entry is balanced and complete ACCOUNTING MANAGER will provide the following prompt:
Distribution is Balanced Do you want to continue?
Accounting Tips:
0
ACCOUNTING MANAGER will indicate if the entry is out-of-balance by the totals bar at the right of the screen. If the entry is in balance, all three totals will indicate $0.00. If the entry is out-of-balance, the totals will indicate the dollar amount. Positive amounts indicate excessive debits while negative amounts indicate excessive credits. If the entry is left with no distribution, the receipt will appear in red on the schedule listing.
·
Click "YES" to continue adding more entries or "NO" to stop and save the information and return to the Receipts tab.
Finding an existing Cash Receipt
In order to edit/change or delete a cash receipt, it is necessary to locate it. Select the Schedules tab. Use the scroll bar to select an open schedule from the list, then click the Cash Receipt tab and use the scroll bar to select the cash receipt from the listing.
Editing/Changing a Cash Receipt
ACCOUNTING MANAGER provides the user with the ability to edit and change the information provided on individual cash receipts already entered into the current schedule.
·
Select the individual Cash receipt from the schedule listing.
·
Click the UPDATE button.
·
Press TAB until the information to be changed is highlighted.
·
Enter the correct data and click SAVE. ACCOUUNTING MANAGER will automatically replace the old data and bring you directly to the Detail tab to revise the information.
·
Select the detail line from the detail listing and click UPDATE.
·
Click the account or amount you want to change and enter the new information and click SAVE. Once the entries are in balance click "NO". ACCOUNTING MANAGER will automatically replace the old data and return to the Receipt tab.
Removing a Cash Receipt
Users can remove a cash receipt or detail line from any open schedule, essentially voiding the transaction entirely. In order to delete a Cash Receipt the user must have: 1) no detail entries or 2) delete all detail entries before they are allowed to delete the Cash Receipt.
Detail
·
Select the individual Cash Receipt from the listing.
·
Select the Detail tab. Select the Detail line you want to delete.
·
Select the DELETE button from the update panel.
·
ACCOUNTING MANAGER will ask you, "OK to delete the selected detail record?"
·
Click "YES" to remove the detail line.
·
Click "NO" to keep the detail line.
·
Repeat until all detail lines are removed
Cash Receipt
·
Select the individual Cash Receipt from the listing.
·
Select the DELETE button from the update panel.
·
ACCOUNTING MANAGER will ask you, "Delete this receipt?"
·
Click "YES" to remove the receipt.
·
Click "NO" to keep the receipt.
Accounting Tips:
0
Removing a cash receipt in ACCOUNTING MANAGER must be accomplished in these two series of steps. This safeguards accidental erasure of the entire cash receipt data in the cash receipt process.
Printing a Cash Receipt
To print a Cash Receipt click the PRINT icon located at the bottom of the screen.
·
Select the print size for the receipts.
·
Enter the receipt range or accept the default.
·
Enter the date range or accept the default.
·
Enter the number of copies of each receipt.
·
Click "OK to run the report and send it to the report viewer. Review the report for errors. When the report is ready to print click the print icon from the menu bar. Exiting the Cash Receipts Module
Selecting EXIT from the Update Panel will return the user to the ACCOUNTING MANAGER main screen.
Journal Entries
The Journal Entries function is the third segment of the data entry menu. This segment should be used for entering journal entries into the system. Built in defaults prevent the user from entering out-of-balance entries into the system. To enter the Journal Entries Module, select Journal Entries form the Data Entry menu.
Selecting a Schedule
Select an open schedule in which to record the journal entries. Use the cursor keys or the scroll bar to select the desired schedule. If no schedules are open, ACCOUNTING MANAGER will direct you to open a new schedule.
Parts of the Journal Entry
Each Journal Entry has two parts. The first part is the information part of the journal entry, which records the journal entry number, the date, the type of journal entry, and a brief description. The second part is the account code distribution of the journal entry.
Entering a Journal Entry
After selecting a schedule, ACCOUNTING MANAGER will display a listing of all journal entries in that schedule. Journal Entries displayed in RED have no detail accounting records.
·
Click ADD from the Update panel
·
A journal entry number is automatically assigned. To change from the default setting simply type in the new reference number and press TAB.
·
Enter the journal entry date.
Accounting Tip:
0
As with all data in ACCOUNTING MANAGER, the date of the journal entry is the basis for all reporting purposes. All journal entries should be dated for and correspond with the schedule it is being entered on.
·
Select the type from the drop down list. The user must choose from between a Standard, Budgetary, or Opening entry.
Types of Journal Entries:
Standard Journal Entry To record all typical journal entries occurring during the fiscal year to record or correct accounting data.
Budgetary Adjustment To record budgetary journal entries, amending the budgets of revenue and appropriation accounts.
Opening Entry – Ledger To record all opening general ledger balances.
Opening Entry – Subsidiary To record all opening subsidiary budgets and budgetary general ledger account codes.
·
Enter in a description for the entry and click SAVE.
This completes the information part of the journal entry. Click the DETAIL tab and ACCOUNTING MANAGER will advance to the second part of the journal entry to make the account distributions.
·
Select ADD from the update panel.
·
Enter the first account to be debited (Press F6 or double click the textbox to view a list of all available accounts).
·
Enter the first dollar amount to be debited and press TAB. ACCOUNTING MANAGER will ask for a vendor number for any posting to subsidiary appropriation accounts.
·
Enter additional debits in the same manner.
Accounting Tips:
0
The New York State Comptroller prescribes the use of control accounts in this case the 980 Revenue Control Account – in making entries. The control account requirement may be changed. (Please refer to SYSTEM MANAGER to see how to change this option.)
·
Enter the first account to be credited and press TAB twice, until the credit column is highlighted.
·
Enter the first dollar amount to be credited and press TAB.
·
Enter additional credits in the same manner.
·
If the description setting is turned on then enter the desired description and press SAVE (for more information, please refer to SYSTEM MANAGER, System Parameters).
When the entry is in balance and complete, ACCOUNTING MANAGER will allow you to save the entry.
Accounting Tips:
0
ACCOUNTING MANAGER will indicate if the entry is out-of-balance by the totals bar at the bottom of the screen. If the entry is in balance, all three totals will indicate $0.00. If the entry is out-of-balance, the totals will indicate the dollar amount. Positive amounts indicate excessive debits while negative amounts indicate excessive credits.
After all entries have been made click EXIT to return to the ACCOUNTING MANAGER main screen.
Find an Existing Journal Entry
In order to edit/change or delete a journal entry, it is necessary to locate it. To find an existing Journal Entry use the scroll bar to locate journal entries on open schedules.
Editing/Changing a Journal Entry
ACCOUNTING MANAGER provides the user with the ability to edit and change the information provided on an individual journal entry already entered into the current schedule.
·
Select the individual journal entry from the schedule listing.
To change the Information Part of a Journal Entry
·
Select UPDATE from the update panel to change the information part of the journal entry.
·
Press TAB until the desired information to be changed is highlighted.
·
Enter in the correct data and click SAVE. ACCOUNTING MANAGER will automatically replace the old data. The journal entry reference number cannot be changed.
To Change the Accounting Detail of the Journal Entry
·
Select the DETAIL tab to change the account detail of the journal entry.
·
Select the account line from the detail listing.
·
Select UPDATE from the update panel.
·
Press TAB until the information to be changed is selected.
·
Enter in the correct data and click SAVE. ACCOUNTIN MANAGER will automatically replace the old data and return to the detail listing.
·
Select EXIT to return to the ACCOUNTING MANAGER main screen.
Removing a Journal Entry
User can remove a journal or detail line from any open schedule, essentially eliminating the journal entry entirely. Detail
·
Select the individual journal entry from the schedule listing.
·
Select the DETAIL tab; select the detail line to be deleted.
·
Select DELETE from the update panel.
·
ACCOUNTING MANAGER will ask you, "Ok to delete the selected detail record?"
·
Click "YES" to remove the detail line.
·
Click "NO" to keep the detail line.
·
Repeat until all accounting detail lines are removed.
·
Select EXIT to return to the ACCOUNTING MANAGER main menu.
Journal Entry
·
Select the individual journal entry from the schedule listing.
·
Select DELETE from the update panel.
·
ACCOUNTING MANAGER will ask you, "Delete this entry?"
·
Click "YES" to remove the journal entry.
·
Click "NO" to keep the journal entry.
Accounting Tips:
0
Removing a journal entry in ACCOUNTING MANAGER must be accomplished in these two series of steps. This safeguards against accidental erasure of the entire journal entry.
Exiting the Journal Entry Function
Selecting EXIT from the update panel will return the user to the ACCOUNTING MANAGER main screen.
Budget Transfers
The budget transfers function is the fifth segment of the data entry menu. This segment should be used for recording budget transfers between budgetary appropriation accounts. This function is not for recording total budgetary increases or decreases, which should be made by budgetary journal entries (please refer to Data Entry – Journal Entries). To enter the Budget Transfer function, select Budget Transfer from the Data Entry menu.
Selecting a Schedule
Select an open schedule in which to record the budget transfers. Use the cursor keys or the scroll bar to select the desired schedule. If no schedules are open, ACCOUNTING MANAGER will direct you to open a new schedule.
Parts of the Budget Transfer
Each budget transfer has two parts. The first is the information part of the budget transfer, which records the budget transfer reference number, the date, and a brief explanation. The second part is the account code distribution of the budget transfer.
Entering a Budget Transfer
After selecting a schedule, ACCOUNTING MANAGER will display a listing of all budget transfers in that schedule.
·
Select ADD from the update panel.
·
Enter the budget transfer date and press TAB.
Accounting Tips:
0
As with all data in ACCOUNTING MANAGER, the date of the budget transfer is the basis for all reporting purposes. All transfers should be dated for and correspond with the schedule it is being enter on.
·
Enter an explanation of the budget transfer and click SAVE.
This completes the information part of the budget transfer. Click the Detail tab and ACCOUNTING MANAGER will advance to the second part of the budget transfer to make the appropriate account distributions.
·
Select ADD from the update panel.
·
Enter the first account that funds will be transferred out of and press TAB (press F6 or double click the textbox to view a listing of all available appropriation accounts).
·
Enter the first dollar amount of funds to be transferred out and press TAB.
·
Enter additional transfer out in the same manner.
·
Enter the first account that funds will be transferred into and press TAB twice.
·
Enter the first dollar amount to be transferred in and press TAB.
·
Enter additional transfer in by repeating the procedure.
·
If the description setting is turned on then enter the desired description and click SAVE (for more information, please refer to SYSTEM MANAGER, System Parameters).
When the transfer is in balance and complete, ACCOUNTING MANAGER will allow you to save the new entries.
Accounting Tips:
0
ACCOUNTING MANAGER will indicate if the entry is out-of-balance by the transfer total at the bottom of the screen. If the entry is in balance, the total will equal $0.00. If the entry is out-of-balance, the total will indicate the dollar amount. A positive amount indicates excessive "transfers out" while a negative amount indicates excessive "transfers in".
Fining an Existing Budget Transfer
In order to edit/change or delete a budget transfer, it is necessary to locate it. The scroll bar assists the user in locating transfers on open schedules.
Editing/Changing a Budget Transfer
ACCOUNTING MANAGER provides the user with the ability to edit and change the information provided on the individual budget transfer already entered into the current schedule.
·
Select the individual budget transfer from the schedule listing.
To Edit/Change the description part of a budget transfer
·
Click UPDATE from the update panel.
·
Press TAB until the information to be changed is highlighted.
·
Enter the correct data and click SAVE. ACCOUNTING MANAGER will automatically replace the old data.
To Edit/Change the detail item descriptions of a budget transfer
·
Click DETAIL tab.
·
Select the item line to be changed.
·
Press TAB until the desired field to be changed is highlighted.
·
Enter the correct data and click SAVE. ACCOUNTING MANAGER will automatically replace the old data and return to the item listing.
Removing a Budget Transfer
Users can remove a budget transfer from any open schedule, essentially eliminating the budget transfer entirely.
Detail Line
·
Select the individual budget transfer from the schedule listing.
·
Select the DETAIL tab.
·
Select the detail line to be deleted.
·
Click DELETE from the update panel.
·
ACCOUNITING MANAGER will ask you "Ok to delete the selected detail record?’
·
Click "YES" to remove the line.
·
Click "NO" to keep it.
Budget Transfer
·
Click the DESCRIPTION tab.
·
Select the individual budget transfer from the schedule listing.
·
Select DELETE from the update panel.
·
ACCOUNTING MANAGER will ask you "Delete the transfer?"
·
Click "YES" to remove the budget transfer.
·
Click "NO" to keep the budget transfer.
Accounting Tips:
0
Removing a budget transfer in ACCOUNTING MANAGER must be accomplished in these two series of steps. This safeguards against accidental erasure of the entire budget transfer.
Exiting the Budget Transfer Function
Selecting EXIT from hr Update Panel will return the user to the ACCOUNTNG MANAGER main screen.
Schedule Maintenance
The schedule maintenance function enables the user to open and edit schedules for the recording and organizing of accounting information.
To enter the schedule maintenance functione, select Schedule Maintenance from the Data Entry main menu.
Types of Schedules
There are five types of schedules one for each type of accounting data. They are:
·
Cash Receipts
·
Cash Disbursements
·
Encumbrances
·
Journal Entries
·
Budget Transfers
Adding a Schedule
·
Select ADD from the update panel.
·
Type in the schedule type, JE for journal entry, BT for budget transfer, CR for cash receipts, CD for cash disbursement, EN for encumbrance, or click the on the drop down list.
Accounting Tips:
0
There are only five valid types of schedules. Each schedule has its own type code and indicated above.
·
Enter the fund letter or click on the magnifying glass to view a list of available funds and press TAB.
Accounting Tips:
0
Although separate schedules are recommended for different funds, municipal entities with minimal transactions may record entries of the particular type (i.e. Cash Receipts) on a single schedule for all funds. Such multi-fund schedules should be labeled as fund A for General Fund.
·
Enter a description for the schedule (i.e. July Cash receipts).
·
Enter the opening date for the schedule and proposed closing date.
·
Enter "YES" or "NO" to indicate if data entry items from multiple funds may be placed on this schedule.
·
Enter the schedule number.
Accounting Tips:
0
As with all data in ACCOUNTING MANAGER, the opening date of a schedule becomes a basis for all reporting purposes. All schedules should be opened as of the first date of the reporting period (see also Appendix A – Sample Monthly Procedures).
After entering the new schedule, click SAVE to save the new entry and return to the Open Schedule listing screen.
Editing/Changing a Schedule
ACCOUNTING MANAGER provides the user with the ability to edit and change schedule descriptions and dates for any open schedules.
·
Select the individual schedule from the listing.
·
Click UPDATE from the update panel.
·
Press TAB until desired information to be changed is highlighted.
·
Enter in the correct data and click SAVE. ACCOUNTING MANAGER will automatically replace the old data and return to the listing.
Exiting the Schedule Function
Selecting EXIT from the update panel will return the user to the ACCOUNTING MANAGER main screen.
Close and Post Schedules
The close & post procedures module enables the user to close and post schedules to the appropriate ledger accounts. This closing and posting procedure is similar in nature to the footing, cross-footing, and posting of a manual set of ledgers.
To enter the close & post procedures module, select the Post tab from the Schedule Maintenance menu.
Selecting an Schedule
·
Select the schedule type to be closed.
·
Select the open schedule to be closed from the listing.
·
Enter date of the closing for the schedule. The default date will be the ending day of the month.
Accounting Tips:
0
As with all data in ACCOUNTING MANAGER, the closing date of the schedule becomes the basis for all reporting purposes. All schedules should be closed as of the last date of the reporting period (see Appendix A – Suggested Monthly Procedures). If the schedule is not closed, as of the ending date of the period, general ledger detail accounts will not correspond to closed & posted balances.
Closing a Schedule
·
After selecting and dating the schedule, click CLOSE. ACCOUNTING MANAGER will ask you, "Are You Sure You Want To Close This Schedule?"
·
Click "YES" to close the schedule.
·
Click "NO" to leave the Schedule Open.
·
Repeat the closing routine for each schedule to be closed.
Accounting Tips:
0
Once a schedule is closed it cannot be edited or changed. Only open schedules may be edited or changed.
Accounting Tips:
0
ACCOUNTING MANAGER will allow the user to only close one schedule at a time. This safeguard prevents the user from erroneously closing an open schedule.
Cash Disbursement
The cash disbursement function is the second segment of the data entry menu. This segment should be used for entering data, recording of manual checks, the preparation and printing of computer-generated checks, the distribution of payroll expenses and the creation of expense warrants. To enter the cash disbursement function, select Data Entry then Cash Disbursements from the ACCOUNTING MANAGER main screen.
The cash disbursement function contains its own menu for data entry of different cash disbursement activities. It is separated into check routines, which handle the information recording of the individual cash disbursements, and reports, which allow the user to control the physical output of cash disbursements.
The menu items are:
·
Manual Checks
·
Computer Checks
·
Void Checks
·
Validate Checks
·
Print Disbursement Checks
·
Payroll to General Ledger Distribution
·
Trust and Agency Payment Processing
·
Reimbursement Payments Menu
Manual Checks
Parts of a Manual Cash Disbursement
Each cash disbursement, just like the cash receipt, has two parts. The first part is the information part of the cash disbursement, which records the check number, disbursement date, complete vendor information, disbursement amount, and a brief description of the payment. The second part is the account code distribution of the cash disbursement.
Selecting a Schedule
Select an open schedule to record the manual/hand drawn cash disbursements in. Use the cursor keys or mouse to select the desired schedule and click the Manual Checks tab.
Entering the Manual Check
After selecting a schedule, click the Manual Check tab.
·
Select ADD from the Update Panel.
·
Enter the manual check number and press TAB (For entering a batch of manual cash disbursements, simply enter the first check number, ACCOUNTING MANAGER will automatically enter the subsequent check numbers).
·
Enter the check date and press TAB.
Accounting Tips:
0
The date of the cash disbursement, just as with a cash receipt, is the basis ACCOUNTING MANAGER uses in preparing all disbursement warrants and reports. All checks should be dated for the date of the actual cash disbursement and should correspond with the current schedule.
·
Enter the vendor number or press the magnifying glass to display a listing of all vendors. If the vendor is not in the list you can add a new vendor by pressing the ADD button.
Accounting Tips:
0
ACCOUNTING MANAGER requires a vendor be assigned to each cash disbursement. This assignment aids in maintaining accurate vendor files for both internal and external reporting. (Please refer to Vendor History)
·
Enter the total amount of the check and press TAB.
·
Enter the description for the disbursement and click SAVE and you will automatically be brought to the Detail tab.
This completes the information part of the manual cash disbursement.
Entering the Detail Information
·
Select ADD from the Update Panel.
If it is a direct pay
·
Enter the first account to be debited or expensed and press TAB (Press F6 or double click the text box to view a listing of all available accounts).
·
Enter the dollar amount to be paid
If a purchase order is being paid
·
Enter the first purchase order number being paid.
·
Enter the first account to be debited or expensed and press TAB (Press F6 or double click the text box to view a listing of all available accounts. If a purchase order number was entered you can press F8 to display all accounts listed on that purchase order).
·
Enter the dollar amount to be paid
If a purchase order is being liquidated
·
Enter the dollar amount to be liquidated and press TAB.
·
If the selected account code was not encumbered on the original purchase order, ACCOUNTING MANAGER will indicate that no liquidation may take place.
·
Enter the dollar amount being paid and press TAB. ACCOUNTING MANAGER will make the respective debit or expense entry for the select account.
·
Enter the invoice/reference number and press TAB. A warning will be displayed if this is a duplicate invoice number for this vendor.
Accounting Tips:
0
ACCOUNTING MANAGER automatically credits the default cash account for the respective fund (i.e. A200 – General Fund Cash is credited for the total of General Fund expenditures/debits). No credit entry is necessary. (Please refer to File Maintenance-Funds)
·
After entering the final cash disbursement click SAVE to lock in the new entries and to return to the Manual Check listing.
Finding an existing Cash Disbursement
In order to edit/change or delete a cash disbursement, it is necessary to locate it.
·
Select the open cash disbursement schedule from the Open Disbursement Schedules list
·
Select the appropriate Cash Disbursement.
Editing/Changing a Cash Disbursement
ACCOUTING MANAGER provides the user with the ability to edit and change the information provided on individual manual checks already entered into the current schedule.
·
Select the individual check from the schedule listing.
To Edit/Change the information part of a manual check
·
Click Update from the Update Panel
·
Press TAB until the desired information to be changed is highlighted.
·
Enter in the correct data and click SAVE. ACCOUNTING MANAGER will automatically replace the old data. If the amount was changed you will automatically be bought to the Detail screen.
To Edit/Change the account distribution of a manual check
·
Select the DETAIL tab.
·
Select the account code line to be changed.
·
Click UPDATE from the update panel.
·
Click the text box of the data to be changed.
·
Enter the correct data and click SAVE. ACCOUNTING MANAGER will automatically replace the old data and return to the Manual Check tab.
Removing a Cash Disbursement
Users can remove a manual check or detail line from any open schedule, essentially voiding the transaction out entirely. In order to remove a manual check you must remove all detail lines first.
Detail
·
Select the individual check from the schedule listing.
·
Select the DETAIL tab.
·
Select the detail line to delete.
·
Click the DELETE button from the Update panel.
·
ACCOUNTING MANAGER will ask you "Delete this check Detail?"
·
Click "YES" to remove the line.
·
Click "NO" to keep the line.
·
Repeat until all detail lines are removed.
·
Select the Manual Check tab to continue deleting the manual check.
Check
·
Select the individual check from the schedule listing.
·
Click the DELETE button from the Update panel.
·
ACCOUNTING MANAGER will ask you "Delete this Manual Check?"
·
Click "YES" to remove the disbursement.
·
Click "NO" to keep the disbursement.
Accounting Tips:
0
What is the difference between removing a check and voiding a check?
0
Only checks in the current, open schedule that have not been physically disbursed may be removed from the accounting system. Checks that are from prior accounting periods or that have been physically disbursed should be voided out. (Please refer to Cash Disbursements- Voiding a Check)
Exiting the Manual Cash Disbursements Function
Selecting EXIT from the Update panel will return the user to the ACCOUNTING MANAGER main screen.
Computer Generated Checks
To produce and record a computer generated check; select Computer Checks from the Cash Disbursement Menu.
Parts of the Computer Generated Cash Disbursement
Each computer generated cash disbursement has two parts. The first part is the information part of the computer generated cash disbursement which records the purchase order number, disbursement date, payment amount, and complete vendor information. A temporary check number is assigned to each disbursement. When the checks are printed the temporary check numbers are replaced with the actual check numbers. The second part is the account code distribution of the cash disbursement. For a screen image please click Computer Generated Checks.
Entering a Computer Generated Cash Disbursement
After selecting a schedule, ACCOUNTING MANAGER will display a listing of all cash disbursements in that schedule.
·
Select ADD from the Update Panel.
·
Enter the purchase order number, if applicable, or leave blank for a direct payment and press TAB.
·
Enter the Check date and press TAB.
Accounting Tips:
0
The date of the cash disbursement, just as with cash receipt, is the basis ACCOUNTING MANAGER uses in preparing all disbursement warrants and reports. All checks should be dated for the date of the actual cash disbursement/warrant and should appropriately correspond with the current cash disbursement schedule.
·
Enter the net payment amount and press TAB.
·
Enter the vendor number. Click the magnifying glass to see and alphabetical listing of all vendors. Click ADD from with in the vendor listing to add a new vendor to the vendor list. (If a purchase order is being liquidated, the vendor information will be automatically listed)
Accounting Tips:
0
ACCOUNTING MANAGER requires a vendor be assigned to each cash disbursement. This assignment aids in maintaining accurate vendor files for both internal and external reporting. (Please refer to Vendor History)
·
Click the Detail tab.
·
Click ADD from the Update panel.
·
Enter the first account to be debited or expensed and press TAB (press F6 or double click in the textbox to view all available accounts, ACCOUNTING MANAGER will ask for the type of account and fund letter).
·
Enter the invoice/reference number and press TAB. A warning will be displayed if this is a duplicate invoice number for this vendor.
For general ledger/revenue accounts to be debited
·
Enter the dollar amount to be debited and click SAVE.
For appropriation accounts to be expensed
·
Enter the amount to be expensed and click SAVE.
·
If insufficient funds are available, the system will prompt if OK to overspend.
·
If a purchase order is to be liquidated, enter the dollar amount to liquidated and click SAVE.
·
Enter additional debits/expenses in the same manner.
For All Entries
·
If the description setting is turned on then enter the desired description (for more information, please refer to SYSTEM MANAGER, System Parameters).
Accounting Tips:
0
ACCOUNTING MANAGER automatically credits the default cash account for the respective fund (i.e. A200 – General Fund Cash is credited for the total of General Fund expenditures/debits). No separate credit entry to the cash account is necessary. (Please refer to File Maintenance – Funds)
After entering the final cash disbursement of the batch, click SAVE to save the entries and return to the cash disbursements listing.
Finding an Existing Computer Generated Disbursement
In order to edit/change or delete a cash disbursement, it is necessary to locate it. To find the appropriate cash disbursement select it from the list by using the scroll bar.
Editing/Changing a Computer Generated Disbursement
ACCOUNTING MANAGER provides the user with the ability to edit and change the information provided on computer generated checks on the current schedule provided that have not yet been printed.
·
Select the individual check from the schedule listing.
To Edit/Change the information part of a computer check
·
Select UPDATE from the Update panel.
·
Press TAB until the desired information to be changed is highlighted.
·
Enter in the correct data and click SAVE. ACCOUNTING MANAGER will automatically replace the old data.
To Edit/Change the account distribution of a computer check
·
Click the DETAIL tab.
·
Select the account code line to be changed.
·
Click UPDATE from the Update panel.
·
Press TAB until the desired information to be changed is selected.
·
Enter in the correct data and click SAVE. ACCOUNTING MANAGER will automatically replace the old data and return to the listing.
Removing a Computer Generated Cash Disbursement
Users can remove a computer generated check or detail line from any open schedule, provided the checks have not yet been printed.
·
Select the individual check from the schedule listing.
·
Click the DETAIL tab. Select the Detail line.
·
Click DELETE from the Update panel.
·
ACCOUNTING MANAGER will ask you "Ok to delete the selected detail record?"
·
Click "YES" to remove the first line.
·
Click "NO" to keep the disbursement.
·
Repeat until all detail lines are removed.
Exiting the Computer Generated Disbursements Function
Selecting EXIT from the Update Panel will return the user to the ACCOUNTING MANAGER main screen.
Voiding Computer Generated Cash Disbursements
To void any checks, either computer or manually prepared, that have already been entered into ACCOUNTING MANAGER and are not on a current schedule, select Void Checks from the Cash Disbursement Menu.
The Void Check Routine screen will appear.
·
Enter the check number and the check’s original issue date and press TAB.
·
ACCOUNTING MANAGER will display the check information and ask if this is the check to be voided.
·
Select an open warrant to place the void check record.
·
Enter the date (this is the date that you are voiding the check NOT the date the check was written).
·
Click "OK" to void the check.
·
ACCOUNTING MANAGER will ask "ARE YOU SURE?"
·
Click "YES" to void the check.
·
Click EXIT to return to the ACCOUNTING MANAGER main screen.
Validate Computer Generated Checks
Before printing a warrant of computer generated checks, the user may want to validate the checks to ensure all selected checks have been properly distributed to account codes. To validate check prior to printing, select Validate Checks from the Cash Disbursement menu.
·
Select the cash disbursement schedule to validate.
·
Click the VALIDATE button.
·
ACCOUNTING MANAGER will validate all of the checks on the selected schedule/warrant. If there are any errors, ACCOUNTING MANAGER will display errors on screen for review and correction.
Printing Computer Generated Checks
To print computer-generated checks that have already been entered into the current disbursement warrant, select Print Disbursement Checks from the Cash Disbursement Menu. ACCOUNTING MANAGER will display the Check Print Parameters screen.
All of the account distribution information was entered on the schedule through the Computer Generated Cash Disbursements module (Please refer to Computer Generated Cash Disbursements – Schedules). Through the check printing routine of ACCOUNTING MANAGER, the user can enter the date of the warrant, the actual check numbers, and the range of temporary check to print.
Updating the Check Printing Options
·
Select a schedule or warrant to print and press TAB.
Accounting Tips:
0
The difference between a Warrant and a Cash Disbursement Schedule: A warrant is comprised solely of computer generated checks while a cash disbursement schedule consists of all cash disbursements, including manual checks, computer generated, and payroll expense distributions, for a particular period. A Cash Disbursement Schedule may include more that one Warrant.
·
Enter the date to be printed on the checks and press TAB.
·
Enter the check entry date range to be printed and press TAB.
Accounting Tips:
0
The ability to select a date entry range provides the user the ability to print a smaller subset of the selected schedule/warrant. This will allow users to maintain multiple warrants, based upon the date the checks were printed, within each schedule.
·
Enter the check number of the first check in the printer. The actual check number will replace the temporary check numbers that were originally assigned by ACCOUNTING MANAGER when the cash disbursement information was entered onto the current schedule.
·
If you are using a third-party laser printing option, enter the output destination.
Printing Accounts Payable Checks
Accounting Tips:
0
The user should load the blank computer checks into the desired printer prior to selecting the Print Checks routine.
After updating the Cash Disbursement Check Printing Options, the user can proceed to print the checks by selecting the PRINT button from the Cash Disbursement Check Printing Options screen.
·
ACCOUNTING MANAGER will validate the current check run to ensure they have been properly prepared. If any errors exist, the user will be prompted to correct the error before printing.
·
If printing checks, the system will prompt the user to align the checks in the printer
·
After the checks are aligned, click "YES": to confirm and begin printing checks.
Re-Running Checks
After printing the checks, the user has the option of voiding and re-running the checks in case of errors during the printing process. To re-run the checks, click RE-RUN from the Cash Disbursement Check Printing Options screen.
ACCOUNTING MANAGER will review the checks that have been sent to the printer to determine if all checks or if only a portion is printed. The range of check numbers assigned to checks will be displayed on screen. The user may select to re-run all checks or only a selected range of check numbers.
·
Selected to re-run All or a Range and press TAB.
·
If a range, enter the number range to re-run and press TAB.
·
Click "YES" to re-run the selected range.
Posting Checks
Once the checks have been printed and determined to be accurate, the checks must be posted. Posting the checks records the payment permanently in the accounts payable file. To post the checks click POST from the Cash Disbursement Check Printing Options screen.
·
Read the check posting message that appears on screen.
·
Click "YES" to post the payroll checks.
·
Click "NO" to leave the routine and not post the payroll checks.
To record a period’s payroll expenses from an outside program, select the General Ledger Distribution or Trust & Agency Processing from the Cash Disbursement Menu.
Payroll to General Ledger Distribution
Entering the Payroll Check Information
·
Select Payroll to general Ledger Distribution from the Cash Disbursement menu to record the payroll accounting data.
Selecting a Schedule
Select an open schedule to record the payroll distribution. Use the cursor keys or the scroll bar to select the desired schedule and press TAB. If no schedules are open, ACCOUNTING MANAGER will direct you to open a new schedule.
·
Enter in the Reference/Check numbers used for the particular payroll (If checks are not used, enter in appropriate reference numbers, i.e. bank wire reference numbers).
·
Enter the date of the payroll.
·
Enter the reference number of the payroll.
·
Enter in a description of the payroll.
·
Enter the total payroll expense for the payroll.
Accounting Tips:
0
The Total Payroll Expense of any payroll period is equal to the total gross payroll for the period plus the entity’s share of the payroll taxes. Gross payroll is the total net payroll and all employee deductions (i.e. Federal Withholding Taxes, New York State Withholding Taxes, FICA Withholding, etc.). Payroll taxes are those taxes (i.e. FICA tax, Unemployment tax, etc.) that the entity, as an employer, must pay to the respective federal and state governments.
Importing the Payroll to General Ledger
Click IMPORT from the Payroll Distribution Screen to import the payroll data from PAYROLL MANAGER. The date Criteria screen will appear and allow the user to select the appropriate payroll dates to import.
·
Enter in the starting and ending payroll check dates and click "OK". ACCOUNTING MANAGER will import in the appropriate payroll budget information.
Distributing the Payroll to Budget Accounts
Click DISTRIBUTE from the Update panel to distribute the payroll expenses to the appropriate budget accounts. The payroll Distribution screen will appear and allow the user to distribute the payroll to predefined general ledger accounts (for more information, please refer to SYSTEM MANAGER: Payroll Parameters).
·
Enter in the appropriate debits and credits to the predetermined accounts. The accounts will be listed in numeric order.
After all accounts have been entered, ACCOUNTING MANAGER will display the Expense Distribution screen.
·
Select the first expense account to be distributed to (Please see below on Using the SORT feature to select an Account).
·
Select UPDATE from the Update panel.
·
Enter the appropriate debit or credit to the expense account.
·
ACCOUNT MANAGER will keep a running total of distributed expenses at the bottom of the screen.
·
Repeat until all payroll expenses are distributed.
·
Select EXIT to return to the ACCOUNTING MANAGER main screen.
ACCOUNTING MANAGER will proceed to each fund, in alphabetical order, to distribute multiple fund payrolls.
To Use the SORT Feature to Select an Account
The SORT feature assists the user in locating expense accounts with five search options.
KEY Allows the user to type in the expense account number being searched
FIRST/LAST Selects the first or last expense account in the system
NXTPAGE Proceeds to the next screen of expense accounts
PRVPAGE Proceeds to the previous screen of expense accounts.
Posting the Payroll Information
Click Post from the Payroll Distribution screen to post the payroll accounting data. ACCOUNTING MANAGER will display each account as it is posted and will respond "PAYROLL POSTING COMPLETED" when the routine is finished.
Trust and Agency Payment Processing
The Trust & Agency Payment Processing routine will automatically summarize the information for a payroll process for each vendor to be paid. The summarized data may be reviewed and modified before processing for payment. In addition, selected payments may be held for future processing, delaying until the appropriate time.
Each payroll deduction code must be maintained to identify the vendor to be paid and the appropriate account codes to use for making each entry. Once entered, the desired settings will remain for each code.
Maintain Trust & Agency Codes
Select Trust & Agency Codes and Payment Warrants from the Cash Disbursements menu to maintain and add trust & agency codes.
Adding a Code
·
Select ADD from the Update Panel.
·
Enter the T&A code or click the magnifying glass to see a list of payroll deductions and press TAB.
·
Choose the pay method from the drop down list and press TAB.
·
Select the type (C) Consolidated-1 check or (S) Singular – Individual checks.
·
Enter the individual employee’s number, or press the magnifying glass to select from the listing of employees.
·
Enter the Vendor number, or press the magnifying glass to see an alphabetical listing of all vendors with city and state.
·
Enter the account to be debited or click the magnifying glass to see a list of accounts.
·
Enter the account to be credited or click the magnifying glass to see a list of accounts.
·
Click SAVE to save the new information.
Finding a Code
In order to edit/change or delete a code, it is necessary to locate it. The SORT feature assists the user in locating codes on open schedules by three search options.
CODE Allows the user to have the listing arranged by code number
DESCRIPTION Allows the user to have the list arranged by description
TYPE Allows the user to search by code type
Editing/Changing a Code
ACCOUNTING MANAGER provides the user the ability to edit and change the information provided on individual codes already entered.
·
Select the code from the listing.
·
Select UPDATE from the Update pane.
·
Press TAB until the information to be changed is highlighted.
·
Enter in the corrected data. Click SAVE and ACCOUNTING MANAGER will automatically replace the old data.
Removing a Code
User can remove a code from any open listing.
·
Select the individual code from the schedule listing.
·
Select DELETE from the Update panel.
·
ACCOUNTING MANAGER will ask you "Delete this trust?"
·
Click "YES" to remove.
·
Click "NO" to keep the code.
Review Payment
Users can update the payment amount or the hold status.
·
Click the Review Payment tab.
·
Select the payment from the listing.
·
Click the UPDATE from the Update panel.
·
Enter the new amount.
·
Select the holding status. Click the check to place the payment on hold or leave blank to allow the payment.
·
Click SAVE to save the new information.
Exit the Code Function
Selecting EXIT from the Update panel will return the user to the ACCOUNTING MANAGER main screen.
Summarize Payroll Information
Selecting Summarize Payroll Information from the Cash Disbursements then Trust and Agency Payment processing menu to generate a summary of trust and agency information.
·
Enter the starting payroll check date and press TAB.
·
Enter the ending payroll check date and press "OK" to run the Summarize Payroll Information Report.
Generate a Cash Disbursement Run
When the Trust & Agency data is summarized and reviewed, the data can be used to make computer generated checks. These checks are placed on an open cash disbursement schedule and may be printed as normal computer generated checks. The routine will validate that records are complete (i.e. Vendor still exits and is active and/or account is still open).
Select Generate a Cash Disbursement Run from the Trust and Agency Payment Processing Menu to generate a check run.
·
Select an open schedule in which to record the Trust and Agency cash disbursements. Use the cursor or scroll bar to select the desired schedule and press TAB. If no schedules are open ACCOUNTING MANAGER will direct you to open a new schedule.
·
Enter the payment date for these checks
·
Click "OK".
·
If any errors are found the Progress editor will display the error report on screen. These errors must be corrected and then run the routine again.
·
The checks may now be printed as normal (for more information please refer to Printing Computer Generated Checks).
Reimbursement Payments Menu
The Reimbursement Payments function is used to process recurring, repetitive payments to numerous vendors. Each vendor is created in the system and the type of payment they receive is maintained. When the time for payment occurs, each vendor in the reimbursement payments file is given a payment for a fixed amount.
To enter reimbursement payments, select Data Entry
ŕ
Cash Disbursement
ŕ
Reimbursement Payments menu.
Selecting a Reimbursement Category
In order to make a payment, you must select an active category. This category will remain selected until the user leaves the Reimbursement Payments Menu.
·
To select an active category, choose the desired category by scrolling through the listing.
Maintaining Reimbursement Categories
In addition to selecting a category, you may also maintain categories, define new ones, and assign coverage rates.
·
To add a category, click ADD from the update panel. Enter the category code and description.
·
To modify a category code and description, select UPDATE from the update panel.
·
To define coverage and set rates, TAB to the Coverage information. Enter the coverage type and the current rate. Each category may have up to 6 coverage types and rates.
·
Select DELETE from the update panel.
Adding/ Maintaining Reimbursement Candidates
Vendors may be maintained as reimbursement candidates in the selected category for any of the six coverage types. Candidates may be made active or inactive at any time. Only active candidates will be processed for payments.
To work with candidates, select the Candidates tab from the Reimbursement Maintenance screen.
Adding a Candidate
·
To add a candidate, select ADD from the Update panel.
·
Select the desired vendor or click the magnifying glass to view a list of available vendors.
·
Select the desired coverage or click the magnifying glass to view a list of available coverage types for the selected category.
Modifying a Candidate
·
To modify a candidate, Select UPDATE from the update panel.
·
Press Tab until the information to be changed is highlighted.
·
Enter the new information and click SAVE. ACCOUNTING MANAGER will automatically replace the old data.
Removing a Candidate
·
To delete a candidate, select the candidate, click DELETE from the update panel.
·
ACCOUNTING MANAGER will ask, "Delete this reimbursement candidate?"
·
Click "YES" to remove the candidate or click "NO" to keep the candidate.
Generating a Cash Disbursement Run
To create a Cash Disbursement Run, Select Generate a Cash Disbursement Run from the Reimbursement Payments Menu.
·
Select the active cash disbursement schedule in which to place the checks.
·
Enter the date the checks will be printed.
·
Enter the account number to change for the expense or click the magnifying glass to see a list of available account codes.
·
ACCOUNTING MANAGER will create a disbursement check for each active candidate based on the rate of his or her coverage. Checks may be printed as part of the remaining cash disbursement process.
Produce Candidate Mail Labels
To produce candidate mail labels select Produce Candidate Mail Labels from the Reimbursement Payments Menu.
·
Select the Reimbursement Categories and press TAB.
·
Select the coverage type.
·
Select the Status (A) Active, (I) Inactive, or (B) Both.
·
Select the Printer type (L) Laser or (D) Dot Matrix and click "OK".
Encumbrance
The Encumbrances function ids the fourth segment of the data entry menu. This segment should be used for entering data for the recording of manual purchase orders, the preparation and printing of computer-generated purchase orders, the liquidation and cancellation of purchase orders, the increase of purchase orders and the creation of vendor histories and encumbrance listings.
To enter the encumbrance function, select Encumbrance form the Data Entry Menu.
Accounting Tips:
0
What is an Encumbrance?
0
An encumbrance is a temporary budgetary entry, which encumbers, or sets aside, a portion of a budget to satisfy an incoming obligation for a specific purpose. The portion of the budget set aside is said to be encumbered. These encumbered funds are used in the purchasing process to maintain appropriations within a budget. They are used to pay an obligation to be received in the future for an order placed by the entity.
The encumbrance function contains its own menu for data entry, which handles the recording of the individual purchase order and budgetary encumbrances, reports, which provide organized information on all encumbrances and queries, which provides rapid inquiry capability into specific encumbrance and vendor related items.
Manual Purchase Orders
Manually prepared purchase orders are where departments and buildings physically type their purchase request on an actual preprinted purchase order form. The typed form is then sent through the approval process, with all noted signatures being made directly on the purchase order. Once signed by the purchasing, agent it becomes a valid purchase order and must now be encumbered in the accounting system.
To record a manually prepared purchase order, select Manual PO from the Encumbrance menu.
Selecting a Schedule
Select an open schedule to record the manual purchase order in. Use the cursor keys or scroll bar to select the desired schedule. If no schedules are open, ACCOUNTING MANAGER will direct you to open a new schedule.
Parts of the Manual Purchase Order
Each purchase order has two parts. The first part is the information part, which records the purchase order number, the purchase order date, complete vendor information and the encumbrance amount. The second part is the account code distribution of the purchase order.
Entering a Purchase Order
After selecting a schedule, ACCOUNTING MANAGER will display a listing of all purchase order in that schedule.
·
Click ADD from the update panel.
·
Enter the purchase order number and press TAB (For entering a batch of manual purchase orders, simply enter the first purchase order number, ACCOUNTING MANAGER will automatically enter the subsequent purchase order numbers in order).
·
Enter the purchase order date and press TAB.
Accounting Tips:
0
Purchase orders should be dated for the date the order or commitment to purchase goods and services is made. Proper dating of purchase orders will result in accurate comparison to budget reports.
·
Enter the vendor number or click the magnifying glass to see an alphabetical listing of all vendors with city and state.
·
Enter the total amount of the manual purchase order.
·
Enter an explanation of the manual purchase order, if any, and press SAVE.
Detail Account Numbers
·
Select the Detail tab.
·
Select ADD from the update panel.
·
Enter the first appropriation account to be encumbered and press TAB (Select F6 or double click the textbox to view all available appropriation accounts).
·
Enter the dollar amount to be encumbered by the purchase order and press SAVE.
·
If there are insufficient funds in the selected appropriation account, ACCOUNTING MANAGER will prompt the user if you want to override the transaction. The ability to override the transaction is based upon a permission level set by the System Administrator and may have been restricted to selected personnel.
·
Enter additional encumbrances in the same manner.
When the entry is in balance and complete, ACCOUNTING MANAGER will allow you to save the new entries.
Finding an existing Purchase Order
In order to edit/change or delete a purchase order, it is necessary to locate it. The scroll bar is used to assist the user in locating purchase orders on open schedules.
Editing/Changing a Purchase Order
ACCOUNTING MANAGER provides the user with the ability to edit and change the information provided in the individual manual purchase orders already entered into the current schedule provided they have not yet been printed.
·
Select the individual purchase order from the schedule listing.
To Edit/Change the description part of a manual Purchase order
·
Click UPDATE from the update panel.
·
Press TAB until the information to be changed is highlighted.
·
Enter in the correct data and click SAVE. ACCOUNTING MANAGER will automatically replace the old data and return to the item listing.
To Edit/Change the detail items of a manual purchase order
·
Select the DETAIL tab from the update panel.
·
Select the item line to be changed.
·
Press TAB until the desired information to be changed is highlighted.
·
Enter in the correct data and click SAVE. ACCOUNTIN MANAGER will automatically replace the old data and return to the item listing.
Remove a Purchase Order
User can remove a manual purchase order from any open schedule, essentially deleting it entirely. If the schedule has been closed, the purchase order can only be canceled (for more information, please refer to Purchase Order Routines: Canceling a Purchase Order).
Detail
·
Select the individual purchase order from the schedule listing.
·
Select the DETAIL tab.
·
Select the line to be deleted.
·
Click DELETE from the update panel.
·
ACCOUNTING MANAGER will ask you, "Ok to delete the selected detail entry?"
·
Click "YES" to remove the line.
·
Click "NO" to keep the line.
Purchase Order
·
Select the individual purchase order from the listing.
·
Click DELETE from the update panel.
·
ACCOUNTING MANAGER will ask you, "Delete this PO?"
·
Click "YES" to remove the purchase order.
·
Click "NO" to keep the purchase order.
Exiting the Manual Purchase Orders Module
Selecting EXIT from the update panel will return the user to the ACCOUNTING MANAGER main screen.
Computer Generated Purchase Orders
Computer generated purchase orders are where all of the information, including items and their associated costs are entered into the system. Once entered, the purchase orders are encumbered against the system. Then at a specified point in time, the entered purchase orders are printed onto preprinted purchase order forms. After printing, the purchase orders are then sent to the respective vendor for processing.
To produce a computer generated purchase order; select Computer PO from the Encumbrance menu.
Selecting a Schedule
Select an open schedule in which to record the purchase order. Use the cursor keys or scroll bar to select the desired schedule. If no schedules are open, ACCOUNTNG MANAGER will direct you to open a new schedule.
Parts of the Computer Generated Purchase Orders
Each computer generated purchase order has two parts. The first part is the information part, which records a temporary purchase order number, the encumbrance, date, complete vendor information and building and contact address. A temporary purchase order number is assigned to each encumbrance.
Enter a Computer Generated Purchase Order
After selecting a schedule, ACCOUNTING MANAGER will display a listing of all computer generated purchase orders in that schedule.
·
Click ADD from the update panel.
·
A temporary number will be assigned to the purchase order and the number of the selected schedule will be displayed.
·
Enter the entry date and press TAB.
Accounting Tips:
0
Computer Generated Purchase Order may be dated for the entry date to simplify the review process. Once printed, the printing date will represent the date the order or commitment to purchase goods and services is made. Proper dating of the purchase orders will result in accurate comparison to budget reports.
·
Enter the vendor number or click the magnifying glass to see an alphabetical listing of all vendors.
·
Enter the Building bode to designate a place of delivery, if necessary. (Please refer to File Maintenance: Buildings)
·
Enter the name of the contact, or "ATTN:" person to appear on the purchase order, in the "Req. By:" box.
·
Enter in the explanation.
·
Click the Detail tab and ACCOUNTING MANAGER will proceed to the Purchase Order Items screen.
·
Select ADD from the Update Panel.
·
Enter the first appropriation account to be encumbered and press TAB, click the magnifying glass to view all available accounts). The account code will be used as the default account code on all subsequent lines, unless changed.
·
Enter the quantity to be ordered and press TAB. For a single item with no unit price, enter a quantity of zero (0).
·
If the quantity was given, enter the per unit price for the goods/services and press TAB.
·
If no quantity was given, enter the extended price for the goods/services and press TAB.
·
If there are insufficient funds in the selected appropriation account, ACCOUNTING MANAGER will prompt the user if you want to override the transaction. The ability to override the transaction is based upon a permission level set by the System Administrator and may have been restricted to selected personnel.
·
Enter the description of the item of good/services to be ordered and press TAB.
·
Click SAVE to save the new entries.
·
Enter additional items in the same manner.
Accounting Tips:
0
ACCOUNTING MANAGER automatically credits the reserve for the encumbrance account in the General Fund. No additional journal entry is necessary to record the encumbrance.
After entering the final item on the purchase order, select EXIT from the update panel to return to the ACCOUNTING MANAGER main screen.
Finding an Existing Computer Generated Purchase Order
In order to edit/change or delete a purchase order, it is necessary to locate it. The scroll bar assists the user in locating purchase orders on open schedule.
Editing/Changing a Computer Generated Purchase Order
ACCOUNTING MANAGER provides the user with the ability to edit and change the information provided on computer generated purchase orders on the current schedule, provided they have not yet been printed.
·
Select the individual purchase order from the schedule listing.
To Edit/Change the description part of a computer generated purchase order
·
Click UPDATE from the update panel.
·
Press TAB until the information to be changed is highlighted.
·
Enter in the correct data and click SAVE. ACCOUNTING MANAGER will automatically replace the old data.
To Edit/Change the detail item descriptions of a computer generated purchase order
·
Select the DETAIL tab.
·
Select the item line to be changed.
·
Select Update from the update panel.
·
Press TAB until the desired information to be changed is highlighted.
·
Enter in the correct data and click SAVE. ACCOUNTING MANAGER will automatically replace the old data and return to the item listing.
Removing a Computer Generated Purchase Order
Users can remove a computer generated purchase order for any open schedule, provided the purchase order has not yet been printed. If the purchase order has been printed, it can only be canceled (please refer to Purchase Order Routines: Canceling a Purchase Order).
Detail
·
Select the individual purchase order from the schedule listing.
·
Select the DETAIL tab.
·
Select the detail line to delete.
·
Click DELETE from the update panel.
·
ACCOUNTING MANAGER will ask you, "Delete this PO item?"
·
Click "YES" to remove the detail line.
·
Click "NO" to keep the item.
Purchase Order
·
Select the Description tab.
·
Select the purchase order to be deleted.
·
Click DELETE from the update panel.
·
ACCOUNTING MANAGER will ask you, "Delete this PO?"
·
Click "YES" to remove the purchase order
·
Click "NO" to keep the purchase order.
Exiting the Computer Generated Purchase Order Module
Selecting EXIT from the update panel will return the user to the ACCOUNTING MANAGER main screen.
Cancel or Partially Liquidate a Purchase Order
To fully cancel or partially liquidate a purchase order from either and open or a closed schedule, select Liquidate from the Encumbrance menu.
Selecting a Schedule
Select an open schedule in which to record the cancellation/liquidation of the purchase order. Use the cursor keys or mouse to select the desired schedule. If no schedules are open, ACCOUNTNG MANAGER will direct you to open a new schedule.
Selecting a Purchase Order
·
Enter the purchase order number or click the magnifying glass to view a listing of available Purchase Orders.
·
Enter the effective date of the cancellation or liquidation.
·
In the action section select to cancel or partially liquidate the PO, then click "OK".
Canceling a Purchase Order
When the user selects the option of canceling the purchase, ACCOUNTING MANAGER will display a purchase order detail breakdown. ACCOUNTING MANAGER will ask the user if they want to cancel the entire remaining amount. Selecting "YES" will cancel the entire purchase order. Selecting "NO" will escape from the routine and return the user to the initial prompt.
Partially Liquidating a Purchase Order
When the user selects a purchase order, ACCOUNTING MANAGER will display the reference number and the vendor name of the purchase order on screen.
·
Enter the PO description.
·
Enter the amount to be liquidated and click "OK".
·
ACCOUNTING MANAGER will display each account code on the purchase order. The user must distribute the total amount to be liquidated to the account codes.
·
Enter the amount to be liquidated and click "OK".
·
Repeat for each desired account code.
Increase Purchase Orders
In addition to issuing, canceling, and partially liquidating purchase orders, ACCOUNTING MANAGER also increases purchase orders, either in one of the existing account codes on the purchase order or on an entirely new account. To increase an existing purchase order, select Increase PO from the Encumbrance menu.
Selecting a Schedule
Select an open schedule in which to record the increase of the purchase order. Use the cursor keys or scroll bar to select the desired schedule. If no schedules are open ACCOUNTING MANAGER will direct you to open a new schedule.
Selecting a Purchase Order
·
Enter the purchase order number or click the magnifying glass to view a list of purchase orders.
·
Enter the effective date of the increase and click "OK".
ACCOUNTING MANAGER will display the purchase order data on screen for the purchase order number entered.
·
Enter an explanation for the increase.
·
Enter the amount to increase.
·
Click "OK" to continue.
Adding a New Account to the Purchase Order
·
Select the NEW ACCOUNT button.
·
Enter the appropriation account o be added and press TAB (select F6 or double click the textbox to view all available accounts).
·
Enter the amount of increase and click "OK".
ACCOUNTING MANAGER will maintain a running total of the increase at the bottom of the screen.
Increase the Purchase Order
Once an account has been found or added, it may be increased at any time in the increase routine.
·
Select the desired account by using the cursor keys or the scroll bar.
·
Enter the amount of the increase and press "OK".
·
Increase each desired account in a similar manner.
Printing the Purchase Order
To print purchase orders from the current schedule, select Print Purchase Orders from the Encumbrance Menu.
ACCOUNTING MANAGER will display the Purchase Order Parameters screen.
All of the purchase order information was entered on the schedule through the Computer Generated Purchase Orders module (please refer to Computer Generated Purchase Orders: Schedules). Through this printing routine of ACCOUNTING MANAGER, the user can enter the date of the purchase orders and the actual physical purchase order numbers.
Accounting Tips:
0
The user should load the blank purchase orders into the desired printer prior to selecting the Print Purchase Order function.
·
Select the encumbrance schedule from which to print.
·
Enter the date to be printed on the purchase orders.
·
Enter the number of the first purchase order in the printer. That actual purchase order numbers will replace the temporary purchase order numbers that were originally assigned by ACCOUNTING MANAGER.
·
Click "OK" to print the purchase orders.
Accounting Tips:
0
The difference between a Printed Purchase Order report and the Encumbrance Schedule: Printed Purchase Orders are only those generates in ACCOUNTING MANAGER while an encumbrance schedule consists of all purchase orders, both manual and computer generated, for a particular period.
·
ACCOUNTING MANAGER will ask if the purchase orders have been loaded into the printer and set to a starting position. Answer "YES". If there is any problem with the current batch of purchase orders, ACCOUNTING MANAGER will indicate them and direct the user to fix them.
·
After the purchase orders are printed, ACCOUNTING MANAGER will ask if the PO’s printed correctly. Answering "NO" will allow the user to reprint the purchase orders. Answering "YES" will post all encumbrance data to the appropriate files. During posting, all account code detail data will be summarized into a single entry per account code. Be sure to wait until all purchase orders have printed to respond to this question.
Encumber Payroll
ACCOUNTING MANAGER allows PAYROLL MANAGER users to automatically encumber the remaining contractual and supplemental employee pay at any time during the year. Users may update the payroll encumbrance an unlimited number of times to reflect changes in contractual payroll obligations. To encumber payroll information, select Encumber Payroll from the Encumbrance menu.
Verifying & Reviewing the Contractual Amounts
To use the payroll-based utility to verify the contractual payroll amounts, select Data Entry
ŕ
Encumbrance
ŕ
Encumber Payroll
ŕ
Verifying and Reviewing the Contractual Amounts. A report of any error will be printed.
Once verified, you may review the contractual amount data with two reports. Select Contractual Amounts by Account report or the Contractual Amounts by Employee report.
Creating the Payroll Encumbrance Amounts
To begin the payroll encumbrance process, the information must be created and summarized. To create the information select Data Entry
ŕ
Encumbrance
ŕ
Encumber Payroll
ŕ
Create Payroll Encumbrance Amounts.
·
Select "YES" or "NO" to include Supplemental Earnings.
·
Select "YES" or "NO" to include Temporary Employees.
The status bar on screen will show the creation of the amounts. To view or change these amounts please refer to Changing the Payroll Encumbrance Amounts.
Changing the Payroll Encumbrance Amounts
Once summarized the user may change or modify the information before it is posted. To change the information, select Encumbrance
ŕ
Encumber Payroll
ŕ
Change Payroll Encumbrance Amounts.
Adding a Payroll Encumbrance Amount
·
Click ADD from the update panel.
·
Enter the account number or click the magnifying glass to view a list of available accounts.
·
Enter the amount to place in this account.
·
Click Save to save the new information.
Finding an Encumbrance Amount
The Sort feature assists the user in locating appropriation accounts with two search option.
ACCOUNT Allows the user to type the account number being searched
AMOUNT Allows the user to type in the encumbrance amount being searched.
Editing/ Changing the Payroll Encumbrance Amounts
·
Select the entry from the listing.
·
Click the UPDATE button.
·
Press TAB until the information to be changed is highlighted.
·
Enter the correct data and click SAVE. ACCOUNTING MANAGER will automatically replace the old data.
Contractual Amounts by Account
The Contractual Amounts by Account is a report that lists the remaining contractual amount to be paid to employees by account number. To generate the report select, Contractual Amounts by Account form the Encumber Payroll menu.
·
Select "YES" or "NO" to include temporary employees in the report.
·
The status report will show the progress of the report and the report will be displayed on screen.
Contractual Amounts by Employee
The Contractual Amounts by Employee is a report that lists the remaining contractual amount to be paid to employees by account number. To generate the report select, Contractual Amounts by Employee form the Encumber Payroll menu.
·
Select "YES" or "NO" to include temporary employees in the report.
·
The status report will show the progress of the report and the report will be displayed on screen.
Produce Payroll Purchase Order
To produce a payroll purchase order, select Data Entry
ŕ
Encumbrance
ŕ
Encumber Payroll
ŕ
Produce Payroll Purchase Order
ŕ
Create New Purchase Order.
·
Select an open schedule in which to record the purchase order. Use the cursor or scroll bar to select the desired schedule. If no schedules are open ACCOUNTING MANAGER will direct you to open a new schedule.
·
Enter the effective date of this payroll purchase order.
·
Click "OK".
·
ACCOUNTING MANAGER will ask, "ARE YOU SURE" you want to create this payroll purchase order.
·
Click "YES" to create the new purchase order.
·
Click "NO" to cancel.
Accounting Tips:
0
The effective date is the date funds will be encumbered. Be sure NOT to attempt to encumber payroll during the middle of a payroll process. If the payroll checks have been posted in PAYROLL MANAGER, but not distributed in ACCOUNTING MANAGER, the routine encumbrance totals will not be correct.
The file maintenance option is the first segment of the maintenance function. This function enables the user to work with the individual accounting codes, individual funds, and special codes. The user can customize accounts to their special needs. The user may also print lists of the customized features from this functionmodule.
To enter the file maintenance function, select maintenance from the ACCOUNTING MANAGER main menu. ACCOUNTING MANAGER will display the Maintenance Menu.
Chart of Accounts
The chart of accounts provides the user with the ability to create, edit, and define the individual account codes used within its system. Select Chart of accounts from the Maintenance Menu to enter the chart of accounts. The Chart of Accounts Maintenance Screen will be displayed.
Adding an Account
·
Click the ADD button from the update panel.
·
Type the account number and press TAB.
Accounting Tips:
0
Account numbers should begin with the individual funds letter followed by the account number as indicated by the New York State Uniform Chart of Accounts. Your fund’s specific account number format is designated under the specifications of each fund. (Please refer to Maintenance – Funds.) Be sure to follow your account code format.
·
Enter the account name and press TAB.
·
Enter the fund or click the magnifying glass to select from the fund listing.
·
Enter the account type or select from the drop down list and press TAB. Enter "G" for General Ledger account, "S" for subsidiary revenue account, or "S" again for subsidiary appropriation account.
·
Enter the account status. Select from the drop down list, or type "A" for Active or "I" for Inactive, press TAB.
·
Enter the State Consolidation Account Code to consolidate the account for New York State reporting purposes or click the magnifying glass to select from the listing
After entering the final new account code, click SAVE to save the new entries and to return to the Chart of Account main screen.
Accounting Tips:
0
What does the State Consolidation Code do?
0
The State Consolidation Code tells ACCOUNTING MANAGER what valid State reporting code to classify the account to for annual reports that conform to the state’s requirements.
0
Am I limited to using the State Consolidation Codes as my account codes?
0
No. Users may use any account codes they need to meet their internal and external reporting needs. The State Consolidation feature of ACCOUNTING MANAGER allows multiple account codes to be used and later consolidated to meet state reporting requirements.
0
How will using more account codes help our record keeping?
0
Using multiple variations of account codes will allow users to maintain more detail accounting records than required by state reporting requirements.
Finding an Existing Account
In order to edit/ change or remove an account code, it is necessary to locate it. The SORT feature assists the user in locating account codes by three search options.
ACCOUNT Allows the user to type in the account number being searched
NAME Allows the user to type in the name being searched
TYPE Allows the user to select the type of accounts to be displayed in the listing
STATUS Allows the user to select the status of the account being searched
Editing/changing an Account
ACCOUNTING MANAGER provides the user with the ability to edit and change account codes.
·
Select the individual account code from the schedule listing.
·
Click UPDATE from the update panel.
·
Press TAB until the information to be changed is highlighted. The account number cannot be changed for audit control purposes. Additionally, users cannot change account type once entries exist.
·
Enter in the correct data and click SAVE. ACCOUNTING MANAGER will automatically replace the old data and return to the item listing.
Removing an Account
Unused account codes may be removed from the system provided no activity exists in the account history.
·
Select the individual account code from the schedule listing.
·
Click DELETE from the update panel.
·
ACCOUNTING MANAGER will ask you "Delete this account?"
·
Click "YES" to remove the code.
·
Click "NO" to keep the code.
Existing the Chart of Accounts Module
Selecting EXIT will return the user to the ACCOUNTING MANAGER main screen.
Funds Function
Funds are used to segregate individual operating segments of the multiple entity. The funds maintenance function provides the user with the ability to create, edit, and define the individual funds used for different purposes within its accounting system. Select Funds from the Maintenance Menu to enter the funds module. The Fund Maintenance screen will be displayed, listing all funds in alphabetical order.
Adding an Fund
·
Click ADD from the update panel.
·
Type the fund letter and press TAB. The fund may be up to four alphanumeric characters long.
Accounting Tips:
0
Individual fund letters should follow the New York State Uniform Chart of Accounts and precede account numbers for that fund. Variations of fund letters may be adopted for internal reporting purposes.
·
Enter the fund name and press TAB.
·
Indicate if the fund is a multi-project special fund and press TAB.
·
Indicate if the system should check account code remaining balances for detail line entries and press TAB.
·
Enter the cash account number and press TAB. The account should begin with the fund letter and be the general ledger account code to be credited for all cash disbursements from the fund.
·
Enter the bank that holds the funds cash account and press TAB.
·
Enter the bank account number and press TAB.
·
Enter the account number length for each segment. This will define the format of each part of the account code (please refer to Accounting Tips: Account Codes).
After entering the new fund, click SAVE to save the new entries and to return to the Fund Maintenance screen.
Editing/Changing a Fund
ACCOUNTING MANAGER provides the user with the ability to edit and change funds.
·
Select the individual fund from the schedule listing.
·
Click UPDATE from the update panel.
·
Press TAB until the desired information to be changed is highlighted.
·
Enter the correct data and click SAVE. ACCOUNTNG MANAGER will automatically replace the old data and return to the listing.
Removing a Fund
·
Select the individual fund from the schedule listing.
·
Click DELETE from the update panel.
·
ACCOUNTING MANAGER will ask you, "Delete this fund?"
·
Click "YES" to remove the fund.
·
Click "NO" to keep the fund.
Exiting the Funds Maintenance Function
Selecting EXIT from the update panel will return the user to the ACCOUNTING MANAGER main screen.
Account Group Headings
Account group headings are the description of the function segment of the account codes. Users may want to create and maintain account group headings to enhance the relevance of reports generated by ACCOUNTING MANAGER. The account group headings replace the numeric totals on appropriation status reports.
The account group headings module provides the user with the ability to create, edit, and define account group headings used within the system. Select Account Group Headings from the Maintenance Menu. The Account group Headings screen will be displayed, listing all account group headings in numerical order.
Adding an Account Group Heading
·
Click ADD from the update panel.
·
Enter the account group and press TAB. The account group should be the four-character function code of the particular account group heading.
·
Enter the account group heading name.
·
After entering the new account group heading, click SAAVE to save the new entries and to return to the Account group Headings screen.
Finding an Existing Account Group Heading
In order to edit/change or remove an account group heading, it is necessary to locate it. The SORT feature assists the user in locating account group headings by two search options.
GROUP Allows the user to type in the group being searched
NAME Allows the user to type in the name being searched
Editing/Changing an Account Group Heading
ACCOUNTING MANAGER provides the user with the ability to edit and change account group headings.
·
Select the individual heading from the schedule listing.
·
Click UPDATE from the update panel.
·
Enter in the correct name. ACCOUNTING MANAGER will automatically replace the old name and return to the listing.
Importing
·
Allows the user to import New York State standard headings for the Municipality.
·
Click the IMPORT button to import the defaults.
Removing an Account Group Heading
·
Select the individual account group heading from the schedule listing.
·
Click DELETE from the update panel.
·
ACOUNTING MANAGER will ask you "Delete this account heading?"
·
Click "YES" to remove the heading.
·
Click "NO" to keep the heading.
Exiting the Account Group Headings Maintenance Function
Select EXIT from the update panel will return the user to the ACCOUNTING MANAGER main screen.
Departments
A department is an individual segment, specific division, of the municipal entity that is segregated for reporting purposes. Users may want to create and maintain departments to enhance the relevance of data in ACCOUNTING MANAGER.
The departments file maintenance function provides the user with the ability to create, edit, and define department codes used within its system. Select Departments from the Maintenance Menu. The Department Maintenance screen will be displayed, listing all department codes in alphanumerical order.
Adding a Department
·
Click ADD from the update panel.
·
Enter the department number or code and press TAB.
·
Enter the department name.
After entering the new department code, click SAVE to save the new entries and to return to the Department Maintenance screen.
Finding an Existing Department
In order to edit/change or remove a department code, it is necessary to locate it. The SORT area assists the user in locating department codes.
CODE Allows the user to sort the listing by department code
NAME Allows the user to sort the listing by department name
Editing/Changing a Department Name
ACCOUNTING MANAGER provides the user with the ability to edit and change department names. Department codes cannot be edited.
·
Select the individual department from the schedule listing.
·
Click UPDATE from the update panel.
·
Enter in the correct name and click SAVE. ACCOUNTING MANAGER will automatically replace the old name and return to the listing.
Removing a Department
·
Select the individual department from the schedule listing.
·
Click DELETE from the update panel.
·
ACCOUNTING MANAGER will ask you, "Delete this department?"
·
Click "YES" to remove the department.
·
Click "NO" to keep the department.
Exiting the Department File Maintenance Function
Selecting EXIT from the update panel will return the user to the ACCOUNTING MANAGER main screen.
Buildings
The building listing provides the user with the ability to create, edit, and define the individual building codes used within the system. Select Buildings from the Maintenance Menu to enter the Building Maintenance screen, which lists all building codes in alphanumerical order.
Adding a Building
·
Click ADD from the update panel.
·
Enter the building code number and press TAB.
·
Enter the building name and press TAB.
·
Enter the building address and press TAB. This address should be the shipping and/or mailing address of the building.
·
Enter the primary contact person at the building.
After entering the new building code, click SAVE to save the entry and return to the Building Maintenance screen.
Finding an Existing Building
In order to edit/change or remove a building code. It is necessary to locate it. The SORT feature assists the user in locating building codes.
CODE Allows the user to sort the listing by building code
NAME Allows the user to sort the listing by building name
Editing/Changing a Building
ACCOUNTNG MANAGER provides the user with the ability to edit and change building names and addresses. Building codes cannot be edited.
·
Select the individual building code from the schedule.
·
Click UPDATE for the update panel.
·
Press TAB until the desired information to be changed is selected.
·
Enter in the correct data and click SAVE. ACCOUNTING MANAGER will automatically replace the old data and return to the listing.
Removing a Building
·
Select the individual building code from the schedule.
·
Click DELETE from the update panel.
·
ACCOUNTING MANAGER will ask you, "Delete this building?"
·
Click "YES" to remove the building.
·
Click "NO" to keep the building.
Accounting Tips:
0
ACCOUNTING MANAGER will only allow the user to delete the building if it is not attached to an employee or requisition.
Exiting the Building File Maintenance Function
Selecting EXIT for the update panel will return the user to the ACCOUNTING MANAGER main screen.
Vendors
The vendor maintenance function provides the user with the ability to create, edit, and define the individual vendor files used within its system. Select Vendors from the Maintenance Menu to enter the vendor maintenance module. The Vendor Maintenance screen will be displayed, listing all vendors in alphabetical order.
Adding a Vendor
·
Click ADD from the update panel. ACCOUNTING MANAGER will automatically assign a vendor number.
Accounting Tips:
0
Although the user may enter in new vendors using the Add/Change Vendor screen, new vendors may be added to the system directly in the cash disbursement module. All cash disbursements must be attributable to a vendor. ACCOUNTING MANAGER allows the user to save time by entering new vendors directly into the system without having to exit the cash disbursements module.
Purchasing Information
·
Enter the customer ID number.
·
Enter the purchasing information, including vendor name, address, and phone number and press TAB after each line item.
·
Click SAVE to save the new entry.
Payment Information
·
Click the Payment tab.
·
If the payment information is the same as the invoicing information, click the "Copy Purch" button, to have that information brought into this screen. To enter in different payment information, click in the desired field and enter in the payment information.
Profile Information
·
Click the Profile tab.
·
Enter the vendor’s status.
·
Enter the vendor category or type and press TAB. This field may be used to categorize vendors into any subgroups the user needs to help segregate vendors.
·
Enter the default discount %, default shipping number and percentage, entity type and prior system vendor number.
·
Indicate if the vendor is to receive an Internal Revenue Service Form-1099 at the end of the calendar year for tax reporting purposes.
·
If the vendor is to receive a Form-1099, indicate the vendor’s federal ID number.
·
After entering the new vendor, click SAVE to save the new entry and return to the Vendor Maintenance screen.
Finding an Existing Vendor
In order to edit/change or remove a vendor file, it is necessary to locate it. The SORT feature assists the user in locating vendor files.
NAME Allows the user to sort the listing by vendor name
NUMBER Allows the user to sort the listing by vendor number
STATUS Allows the user to have the display vendors that are active, inactive or all vendors
Editing/Changing a Vendor
ACCOUNTING MANAGER provides the user with the ability to edit and change vendor files.
·
Select the individual vendor code from the schedule listing.
·
Click UPDATE from the update panel.
·
Press TAB until the desired information to be changed is selected.
·
Enter in the correct data and click SAVE. ACCOUNTING MANAGER will automatically replace the old data after the last information is entered and return to the vendor listing.
Removing a Vendor
·
Select the individual vendor code from the schedule listing.
·
Click DELETE from the update panel.
·
ACCOUNTING MANAGER will ask you, "Remove this Vendor?"
·
Click "YES" to remove the vendor.
·
Click "NO" to keep the vendor.
Accounting Tips:
0
Only vendors with no detail activity for the current year may be removed form the system. ACCOUNTING MANAGER will prohibit the removal of any vendor with activity during the year.
Exiting the Vendor File Maintenance Function
Selecting EXIT from the update panel will return the user to the ACCOUNTING MANAGER main screen.
The output feature provides a variety of standard reports, which the user may, either display or printout. Output reports include appropriation and revenue status reports, trial balances, individual account code transactions, entire open or closed schedules, vendor histories and encumbrance reports. Examples of selected reports are included in Appendix B – Sample Output reports.
To enter the output report module, select Output Reports from the ACCOUNTNG MANAGER main screen.
Checks Waiting to Print
The Checks Waiting to Print report generates a listing of the checks waiting to print for each desired schedule.
To enter the Checks Waiting to print report, select Output Reports then Checks Waiting to Print.
·
Select the schedule from the listing using the scroll bar.
·
Enter the date range for the report.
·
Select the report method from the drop down list, Summary or Detail.
·
Select the report order from the drop down list; either have the report sorted by the vendor name or the order the reports were entered into the system.
·
Click "OK" to run the report.
Print Warrants
The Print Warrant report generates a listing of warrants for each desired schedule. To enter the Print Warrant report, select Output Reports then Print Warrants.
·
Select type of schedule, open or closed.
·
Select the schedule from the listing using the scroll bar.
·
Select the warrant type from the drop down list, Detail or Summary.
·
Enter "YES" or "NO" to include descriptions in the report.
·
Click "OK" to run the report.
Purchase Orders to Print
The Purchase Order to Print report will generate a listing of the purchase orders that are waiting to print. Selecting the Purchase Orders to Print from the Output Reports menu will generate the report.
Purchase Order Contact Listing
The Purchase Order Contact Listing report generates a listing of purchase orders based on contact information. To enter the Purchase Order Contact Listing Report screen, select Output Reports then Purchase Order Contact Listing.
·
Enter the starting and ending name range or leave blank to select all names.
·
Enter the purchase order range or leave the default range to select all (click the4magnifying glass to view a listing of available purchase orders).
·
Select "YES" or "NO" to have each contact printed on separate pages.
·
Click "OK" to run the report.
Appropriation Status Report
The Appropriation Status Report includes a detail of the individual appropriation accounts with respect to the current adjusted budget, fiscal year-to-date expenses, current encumbrances and current unencumbered balance.
The appropriation status report has five different variations of the report:
·
Appropriation Status Report By Function
·
Appropriation Status Report By Object
·
Appropriation Status Report By Function and Object
·
Appropriation Status Report By Location and Function
·
Appropriation Status Report By Program and Object
To create an Appropriation Status Report, select Appropriation status from the Output Reports Menu.
·
Select the funds to include on the report. Click the select all funds check box to select all funds.
·
If more than one fund is selected, indicate if the report is to be merged together.
·
Select the date range to be reported and press TAB.
·
Select the desired report choice from the dorp down list.
·
Select the report type from the drop down list, "S" for summary or "D" for detail.
·
Enter the beginning and ending values for each category.
·
Click the check boxes to include null accounts and the report pages break by totals.
·
Enter the title for the report.
·
Click "OK" to run the report.
Accounting Tips:
0
Selection Criteria may be used for any single or up to all four variables. The beginning and ending limits should be entered. If no limits are entered, ACCOUNTING MANAGER will use all available accounts.
Revenue Status Report
The Revenue Status Report includes a detail of the individual revenue accounts with respect to the current adjusted budget, revenue earned during the fiscal year-to-date, and current unearned revenue.
To create a Revenue Status Report, select Revenue Status from the Output Reports menu.
·
Select the funds to include on the report by using the scroll bar and mouse.
·
If more than one fund is selected, indicate if the report is to be merged together by clicking the "Merge Funds" check box.
·
Select the period to be reported and press TAB.
·
Enter in the beginning and ending values for the categories.
·
Select the "Include Null Accounts" check box to include Null Accounts in the report.
·
Click "OK" to create the report.
Accounting Tips:
0
Selection Criteria may be used for any single or up to all four variables. The beginning and ending limits should be entered. If no limits are entered, ACCOUNTING MANAGER will use all available accounts.
Trial Balance
The Trial Balance Report provides a current trial balance for the selected funds. The report may merge the selected funds together, such as for federal projects where separate funds are used to track each projects.
To create a Trial Balance, select Trial Balance from the Expenditure Detail menu.
·
Select the fund by using the scroll bar and the mouse.
·
Click the "Select all Funds" check box to include al funds in the report.
·
If more than one fund is selected indicate if the report funds are to be merged together by clicking the "Merge Funds" check box.
·
Select the date range to be reported and press TAB.
·
Select Single to show just the debits and credits or select both to show debits, credits and balances.
·
Select the "Include Null Accounts" check box to include Null Accounts in the report.
·
Click "OK" to run the report.
Vendor Listing 1099's
The Vendor Listing for 1099’s query provides a hard copy printout of vendors who will require the filing of Form-1099 with the Internal Revenue Service.
To print a list of the vendors that will require a Form-1099, select Vendor Listing (1099) from the Output Reports Menu.
·
Enter the desired date range and press TAB.
·
Enter the vendor name range or click the magnifying glass to select from a list of all Vendors and press TAB. Leave both ranges blank to select all vendors.
·
Indicate the type of vendors to appear on the report, all that qualify or only those with over $600.00 in the date range.
·
Click "OK" to run the report.
Vendor Mailing Labels
The Vendor Mailing Labels produce mailing labels for the selected range of vendors. To print Vendor Mailing Labels, select Vendor Mailing Labels from the Output Reports Menu.
·
Indicate the sorting method, either by vendor name or vendor number and press TAB.
·
Enter the vendor name range or click the magnifying glass to select from a list of all Vendors.
·
Leave both ranges blank to select all vendors.
Custom Report Menu
The Custom Reports Menu allows each user to call upon special custom reports provided to the user by FINANCE MANAGER.
To run a Custom Report, select Custom Reports from the Output Reports Menu.
·
Select the desired report by using the mouse or cursor keys.
·
Click the "RUN" button to run the report.
Expenditure Detail
The Expenditure Detail report has four different variations of the report:
·
Expenditure Detail By Object Within Function
·
Expenditure Detail Summarized By Function
·
Expenditure Detail Summarized By Object
·
Expenditure Detail Analysis By Month
By Object Within Function
To create an Expenditure Detail By Object Within Function report, select By Object Within Function from Output Reports then Expenditure Detail menu.
·
Select the fund by using the mouse
·
In the Expenditure Criteria section enter the beginning and ending date range and press TAB.
·
Enter the beginning and ending function value.
·
In the report criteria section, to modify the title select "YES" to change the Title, select "NO" to keep the same title and press TAB.
·
To include Null Accounts select "YES", to exclude Null Accounts select "NO".
·
Click "OK" to run the report.
Summarized by Function
To create an Expenditure Detail Summarized By Function, select Summarized By Function from the Output Reports then Expenditure Detail menu.
·
Select the fund by using mouse.
·
Enter the beginning and ending date range.
·
Select "YES" to modify the Title, select "NO" to keep the default Title.
·
Click "OK" to run the report.
Summarized by Object
To create an Expenditure Detail Summarized By Object, select Summarized By Object from the Output Reports then Expenditure Detail menu.
·
Select the fund from the listing.
·
Enter the date range.
·
Select "YES" to modify the Title or "NO" to keep the default.
·
Click "OK" to run the report.
Analysis By Month
To create an Expenditure Detail Analysis by Month, select Analysis by Month from the Expenditure Detail menu.
·
Select the fund by using the scroll bar and mouse.
·
Enter the beginning and ending date range and press TAB.
·
Enter the Function range and press TAB.
·
Select "YES" to modify the existing title or select "NO" to keep the default title and press TAB.
·
Select "YES" to include Null Accounts, or "NO" to exclude the Null Accounts.
·
Select the report type either Detail or Summary.
·
Click "OK" to run the report.
Schedules
The Schedule Reports allows the user to run reports based upon the user-created schedules. Reports can be generated for either open or closed schedules.
To create a Schedule Report, select Schedules from the Output Reports menu.
·
Select the type of schedule to be reported from the Schedules menu.
The six types of reports are:
Cash Receipts
Cash Receipts with Distributions
Cash Disbursements
Encumbrances
Journal Entries
Budget Transfers
Cash Receipts
The Cash Receipts report displays a listing of cash receipts by number with description and amount.
·
Select the type of schedule open or closed.
·
Select the schedule to be reported.
·
Enter in the specific criteria for each report.
·
Click "OK" to run the report
Cash Receipts with Distributions
The Cash Receipts displays a listing of cash receipts with description, amount, and account code distribution.
·
Select the type of schedule open or closed.
·
Select the schedule to be reported.
·
Enter in the specific criteria for each report.
·
Click "OK" to run the report
Cash Disbursements
The Cash Disbursements displays a listing of cash disbursements by check number, account code, and amount.
·
Select the type of schedule open or closed.
·
Select the schedule to be reported.
·
Enter in the specific criteria for each report.
·
Click "OK" to run the report
Encumbrances
The Encumbrance report displays a listing of encumbrances by purchase order number, vendor, and account code.
·
Select the type of schedule open or closed.
·
Select the schedule to be reported.
·
Enter in the specific criteria for each report.
·
Click "OK" to run the report
Journal Entries
The Journal Entries report a listing of journal entries by journal entry number, account code and amount.
·
Select the type of schedule open or closed.
·
Select the schedule to be reported.
·
Enter in the specific criteria for each report.
·
Click "OK" to run the report
Budget Transfers
The Budget Transfers report a listing of budget transfers by reference number, account code, and amount.
·
Select the type of schedule open or closed.
·
Select the schedule to be reported.
·
Enter in the specific criteria for each report.
·
Click "OK" to run the report.
Account Transactions
The account transactions report provides a detail activity report for a selected individual or range of accounts. A listing of accounts with negative balances may also be generated. To create an Account transaction Report, select Account Transactions from the Output Reports menu.
Accounting Tips:
0
Account Codes must be entered in the correct account code format, including the respective fund letter.
Individual Account Transactions
To run the report for a single account, select Individual Account from the Account Transactions menu.
·
Select the desired account type, General Ledger, Revenue, Appropriations or all.
·
Select the Desired account from the listing.
·
Enter the desired delete range and press TAB.
·
Select "YES" to have the Detail Line Description displayed on the report, or select "NO" to turn that function off.
·
If a general ledger account is selected, indicate either "S" for summary, which lists posted items rolled into a single total as with a manual set of general ledger records, or "D" for detail, which replaces the summary total with each individual detail record represented by the summary total.
·
If the account is an appropriation account, select the method of display. Date entered will display the account transactions in chronological order. Purchase Order will display the account transactions in order by purchase order number.
·
Click "OK" to run the report.
Multiple Account Ranges
To print a report for a range of account codes, select Multiple Account Ranges from the Account Transactions menu.
·
Select the desired fund from the list or click the Select All Funds check box to select all funds.
·
Enter the desired date range and press TAB.
·
Enter the beginning and ending value for the category.
·
Enter the desired account type and press TAB.
·
Select "YES" to have the records printed on separate pages.
·
Click "OK" to run the report.
Accounts with Negative Balances
To run a report of all account codes with negative balances, select Accounts with Neg. Amounts from the Account Transactions menu.
·
Select the desired fund from the list.
·
Enter the desired date range and press TAB.
·
Enter the desired account type.
·
Click "OK" to run the report.
Encumbrances Outstanding
The Encumbrance Outstanding report Menu provides a listing of detail reports related to currently outstanding purchase orders. Reports can be sorted by purchase order number or vendor name. Reports detailing the vendor history can also be created.
To create one of the Encumbrance Outstanding Reports, select Encumbrance Outstanding from the Output Reports Menu.
To create a report by encumbrance number, select By Encumbrance Number from the Encumbrances Outstanding Menu.
·
Enter the desired purchase order number or click the magnifying glass to select the purchase order from the list.
·
Enter the desired date range.
·
Click "OK" to run the report.
Range By Encumbrance Number
To create a report of a range of purchase order numbers by purchase order number, select Range By Encumbrance Number from the Encumbrance Outstanding Menu.
·
Enter the range of funds to report and press TAB.
·
Enter the desired purchase order range (click the magnifying glass to select from a listing) and press TAB. Leave both ranges blank to select all purchase orders.
·
Enter the desired date range and press TAB.
·
Indicate the type of purchase orders, open or all, to be shown on the report and press TAB.
·
Select "YES" to include the Account Distribution.
·
Click "OK" to run the report.
By Vendor
To create a report by vendor, select By Vendor from the Encumbrance Outstanding Menu.
·
Enter the vendor number or click the magnifying glass to select from a list of vendors.
·
Enter the desired date range and press TAB.
·
Select "YES" to list open purchase orders only.
·
Click "OK" to run the report.
PO Analysis Report
The PO Analysis report allows the user to print the detail of all purchase orders created during a specified period, the creation date range, and view what has occurred to them during a different period, the transaction date range. Using this report, the user can review all purchase orders created in January, where the creation date range is 01/01/99 to 01/31/99, to determine what balances should be liquidated or canceled.
To create a PO Analysis Report, select PO Analysis from the Encumbrances Outstanding Menu.
·
Enter the range of funds or click the magnifying glass to select from the listing and press TAB.
·
Enter the desired purchase order range or click the magnifying glass to select from the listing and press TAB. Leave both ranges blank for all purchase orders.
·
Enter the PO Creation Date Range and press TAB. This date range will determine the purchase order that will appear on the report.
·
Enter the Transaction Date Range and press TAB. This date range will determine the range of activity to print in the report.
·
Indicate the type of purchase orders, open or all, to be shown on the report.
·
Click "OK" to run the report.
Vendor History
The vendor history displays the detail of every financial transaction, purchase orders, cash disbursements, cash receipts, and journal entries that impact on the vendor’s records.
To create a vendor history report, select Vendor History from the Encumbrance Outstanding Menu. For a screen image please click Vendor History.
·
Indicate the sorting method, either by vendor name or vendor number and press TAB.
·
Enter the vendor name or number range or click the magnifying glass to select from a listing of all vendors.
·
Enter the desired purchase order range or click the magnifying glass to select from a list of all PO’s and press TAB. Leave both ranges blank to select all purchase orders.
·
Enter the desired date range and press TAB.
·
Select "YES" to have the pages separated by Vendor.
·
Click "OK" to run the report.
Payment History
The payment history displays the checks and temporary checks for the vendor in reverse chronological order.
To create a payment history report, select Vendor Payment History from the Encumbrance Outstanding Menu.
·
Indicate the sorting method, either by vendor name or vendor number and press TAB.
·
Enter the vendor name or number range or click the magnifying glass to select from a list of all Purchase Orders and press TAB. Leave both ranges blank for all purchase order.
·
Enter the desired date range and press TAB.
·
Select "YES" to have the pages separated by Vendor.
·
Click "OK" to run the report.
Accounting Tips:
0
What does the Vendor History Show Me?
0
The Vendor History displays the type of transaction (Encumbrance, Cash Disbursement, Cash Receipt, or Journal Entry), the purchase order number, if any, the date of the transaction, the invoice and check number, if applicable, and the amounts encumbered and/or paid under the designated account code. The transactions are provided in Purchase Order number to allow items to be found easily.
Range of PO #'s – by Account
To create a report on a range of purchase order numbers by account, select Range of PO 3’s from the Encumbrances Outstanding Menu.
·
Enter the desired date range and press TAB.
·
Enter the fund range or click the magnifying glass to select from the list and press TAB.
·
Enter the beginning and ending value for each category.
·
Indicate the type of purchase orders, open or all, to be shown on the report.
·
Click "OK" to run the report.
Range of PO #'s – by Vendor
To create a report on a range of purchase order number by vendor, select Range of PO #’s from the Encumbrance Outstanding Menu.
·
Enter the vendor name range or click the magnifying glass to see a listing of all vendors.
·
Enter the desired purchase order range or click the magnifying glass to select from the list and press TAB. Leave both ranges blank for all purchase orders.
·
Enter the desired date range and press TAB.
·
Indicate the type of purchase orders, open or all, to be shown on the report.
·
Click "OK" to run the report.
State Consolidation
The State Consolidation Report allows the user to generate the state financial reports, Annual Reports for municipalities and the ST-3 for school districts, from the accounting data. The report is based upon the state compilation code entered in for each account. The State Compilation Codes will be updated by FINANCE MANAGER once they are announced by the state at the fiscal year end. An associated edit listing allows the user to easily review the state compilation codes and the account codes assigned to them.
To access the State Consolidation Report Menu, select State Consolidation form the Output Reports Menu.
Printing Account Code Review Listing
To print a listing of the consolidation account codes and the chart of accounts assigned to it, select Account Code Review Listing.
·
Select the desired fund(s) by using the displayed list. To select all funds click the Select All Funds check box.
·
Select the desired type(s) of account by using the displayed pick list.
·
Click "OK" to run the report.
Generate Report Detail
To actually consolidate the account codes for an entire fund, select Generate ST-3 Report Detail.
·
Select the desired fiscal year from the list displayed. Once selected, the desired fiscal year will become the default fiscal year for all funds.
·
Select the desired fund(s) from the pick list presented. NOTE: If more than one fund, as defined in FINANCE MANAGER, will be consolidated into a single fund on the consolidation (i.e. funds E and F will consolidate into Fund F on the consolidation), you MUST select both of those funds when generating the report detail, otherwise only the last fund will be consolidated.
·
Click "OK" to run the report.
·
The utility will check all account codes for the fund to ensure a valid consolidation code has been assigned. IF A CONSOLIDATION CODE HAS NOT BEEN ASSIGNED, THE ROUTINE WILL STOP. An error listing is generated for all account codes that do not have a valid consolidation code. The listing may be displayed or printed.
·
A display bar, showing the status of the consolidation, will be displayed through the process.
Calculating Report Totals
Before generating review reports, select Calculate ST-3 Report Totals. This routine will make the appropriate totals and sub-totals on the consolidated report.
·
Click "YES" to Calculate ST-3 Report Totals.
·
The consolidated report code and page number will be displayed in a running manner on screen to show the progress of the calculation.
·
After the Calculations are completed click "OK" to return to The ACCOUNTNG MANAGER main screen.
Print Consolidated Reports
Once consolidated, the consolidated amounts may be reviewed in a series of reports. The available reports are:
Consolidated Trial Balance The balance sheet
Consolidated Revenue Report The revenue accounts
Consolidated Appropriations The appropriation accounts
·
Select ST-3 Consolidation Reports.
·
Indicate the reports desired.
·
Select the desired fund(s) from the pick list or select the Select All Funds check box to select all funds.
·
Click "OK" to run the report.
Data Import Files
For consolidation state reports that must be filed electronically, select Create ST-3 Data Import File.
·
Enter in the six digit District SED Code.
·
Enter the desired file name or click the folder button to search for the directory to save the file.
·
You may use any file name you wish for the file. An error will result if the directory indicated does bot exist.
·
Click "OK" and the file will be created automatically.
Importing New Definitions
The first State Consolidation Report Utility allows the user to import the state definitions, as provided by FINANCE MANAGER.
·
Select Import New ST-3 Definitions to load the data.
·
Insert the provided disk into drive A:
·
Enter the drive letter (A:) or click the folder to select the location of the file.
·
Click "OK" and the utility will automatically import the data files.
Assigning Consolidation Codes
Once the data files are imported, each chart of accounts must be assigned a valid consolidation account code. The codes may be assigned manually or automatically.
Manually Assigning Consolidation Codes
Consolidation codes may be assigned manually on the Chart of Accounts screen. (Please refer to Maintenance – File Maintenance – Chart of Accounts.)
Automatically Assigning Consolidation Codes
FINANCE MANAGER has created a utility that will automatically assign a valid consolidation code to each chart of accounts based upon the fund, function, and object of the chart of account. The utility has been developed to determine which consolidation code to assign for the majority of account codes.
The utility has some basic guidelines for other common accounting items:
·
Fund E will be consolidated to Fund F – Special Aid Fund.
·
Fund I and J will be consolidated to Fund H – Capital Funds.
·
Object "5" codes will be consolidated to "45" codes.
·
The encumbrance (521), expenditure (522), and revenue (980) control accounts will be consolidated into the unreserved fund balance account.
However, not every account code can be automatically determined, and will result in an error listing. The accounts noted in the error listing will also provide a specific reason and MUST be assigned manually.
·
Select Assign ST-3 Codes to Chart of Accounts.
·
If you want to replace all consolidation codes, answer, "YES". Replace all consolidation codes will ignore the currently assigned code and assign one based upon the fund, function, and object of the account code.
·
Click "OK" to run the routine.
·
The utility will continue for every chart of account.
·
If an error occurs, the system will beep and upon completion, will display an error listing. The err messages are:
INVALID FUND-NOT IN ACCOUNTS The fund for this account does not exist in the consolidation Report
INVALID FUNCTION FOR FUND The function of the account does not exist in the consolidation for this fund
INVALID OBJECT FOR FUNCTION The object of the account does not exist in the consolidation for this function
UNDETERMINED ERROR IN ACCOUNT The fund, function, and object does not exist in the consolidation report
Accounting Tips:
0
Just because an error is not reported does not mean that every account code has been assigned to where you want it to go, simply that it is assigned to a valid consolidation code. Please be sure to review the consolidation code.
The query information functions allow the user to obtain accounting data information without requiring the user to generate an entire report. The user can search for information for a specific data item or items, such as an individual cash receipt, an individual check, or series of journal entries by user-defined search criteria.
To enter the query information functions, select Query Info from the ACCOUNTING MANAGER main screen.
View Purchase Order
To view a Purchase Order, select View Purchase Orders from the Query-Information menu.
·
Enter the Purchase Order number or click the magnifying glass to select from a list of all purchase orders.
·
Enter the date range and Click "OK" to view the purchase order (If there are Duplicate purchase orders found then enter the selection number of the purchase).
Reprint Purchase Orders
To reprint a Purchase Order, select Reprint Purchase Order from the Query Information menu.
·
Enter the Purchase Order range or click the magnifying glass to select from a list of all Purchase Orders.
·
Click "OK" to run the report.
Account Budgetary Status
The Account Budgetary Status allows the user to check the budget status of a single budgetary account on-screen with respect to the opening budget, current adjusted budget, fiscal year-to-date expenses or revenue, current encumbrances for expenses, and current unencumbered balance or unearned revenue.
To view an Account Budgetary Status, select Account Budgetary Status from the Query Information Menu.
·
Select the account type, Revenue, Appropriation or both.
·
Select the desired account code by using the scroll bar or mouse.
·
Enter the desired date range.
·
Click "OK" to run the report.
Purchase Orders
The Purchase Order query provides the detail of specific purchase orders by either number or date. The query can be displayed on the screen or printed on the printer.
To create a Purchase Order Query, select Purchase Orders from the Query Information Menu.
·
Enter purchase order number or click the magnifying glass to select from a list of all purchase orders and press TAB.
·
Enter the date range.
·
Click "OK" to initiate the query.
Cash Disbursements
The Cash Disbursements query provides a detail of specific cash disbursement by either check number or date. The query can be displayed on the screen or printed on the printer.
To create a Cash Disbursement Query, select Checks from the Query Info Menu.
·
Enter the cash disbursement range or click the magnifying glass to select from a list of all cash disbursements and press TAB.
·
Enter the date range.
·
Click "OK" to initiate the query.
Cash Receipts
The Cash Receipts query provides the detail of specific cash receipts by either cash receipt number or date. The query can be displayed on the screen or printed on the printer.
To create a Cash Receipt Query, select Cash Receipts form the Query Info Menu.
·
Enter in the cash receipt number or click the magnifying glass to select from a list of all cash receipts and press TAB.
·
Enter the date range.
·
Click "OK" to initiate the query.
Budget Transfers
The Budget Transfer query provides the detail of specific journal entries by either budget transfer number or budget transfer date. The query can be displayed on the screen or printed on the printer.
To create a Budget Transfer query, select Budget Transfer from the Query Information Menu.
·
Enter in the budget transfer number or click the magnifying glass to select from a list of all reference numbers and press TAB.
·
Enter in the date range.
·
Click "OK" to initiate the query.
Journal Entry
The Journal Entry query provides the detail of specific journal entries by either journal entry number or journal entry date. The query can be displayed on the screen or printed on the printer.
To create a Journal Entry Query, select Journal Entry from the Query Information Menu.
·
Enter the journal entry number or click the magnifying glass to select from a list of all Journal Entries and press TAB.
·
Enter the date range.
·
Click "OK" to initiate the query.
Payment History
The Payment History query provides the detail of specific payment history either by vendor number or vendor name. The query can be displayed on screen or printed on the printer.
To create a Payment History Query, select Payment History from the Query Information Menu.
·
Indicate the sorting method, either by vendor name or vendor number and press TAB.
·
Enter the vendor name or number range or click the magnifying glass to select from a list of all vendors and press TAB.
·
Enter the desired purchase order range or click the magnifying glass to select from a list of all Purchase Orders and press TAB. Leave both ranges blank to select al purchase orders.
·
Enter the desired date range and press TAB.
·
Select "YES" to have the pages separated by vendor.
·
Click "OK" to run the report.
Vendor History
The Vendor History query provides the detail of specific vendor history either by vendor number or vendor name. The query can be displayed on screen or printed on the printer.
To create a Vendor History Query, select Vendor History from the Query Information Menu.
·
Indicate the sorting method, either by vendor name or vendor number and press TAB.
·
Enter the vendor name or number range or click the magnifying glass to select from a list of all vendors and press TAB.
·
Enter the desired purchase order range or click the magnifying glass to select from a list of all Purchase Orders and press TAB. Leave both ranges blank to select al purchase orders.
·
Enter the desired date range and press TAB.
·
Select "YES" to have the pages separated by vendor.
·
Click "OK" to run the report.
The utilities module allows the user to run special routines, including opening entry, routine maintenance, diagnostic, custom and year-end routines.
General Routines
Custom Utilities
The Custom Utility allows each user to call upon special custom utilities provided to the user by FINANCE MANAGER. To run a Custom Utility, select Custom Utility from the Utilities Menu.
·
Select the desired utility by using the mouse.
·
Click the "RUN" button to run the utility.
Supervisor Diagnostics
The Supervisor Diagnostics are a series of utilities to be used by trained technical support staff personnel or only upon the instruction of the FINANCE MANAGER Support Staff. A Supervisor password is required for access.
Maintenance Routines
ACCOUNTING MANAGER provides users with maintenance routines to perform selected tasks. These maintenance items will perform large batch processes to change data and settings. Ample time should be left for each procedure. Select Maintenance Routines from the Utility Menu to access the Maintenance Routine Menu.
Remove Account Codes That Have No Entries
Select Purge Account Codes That Have No Entries from the Maintenance Routine Menu to purge any unused account codes. Any account code used in the past 2 fiscal years may not be purged.
·
Enter the fund or press the magnifying glass to select from a list of al funds.
·
Select the account type from the drop down list, either General Ledger, Revenue or Expenditure.
·
Select the account(s) or click the Select All Accounts check box to select all accounts.
·
Click "OK" to run the routine. ACCOUNTING MANAGER will ask you, "Are you sure you want to permanently remove the selected accounts?"
·
Click "YES" to remove the accounts or Click "NO" to keep the accounts.
Change Vendor on PO Prior To any Payment
Select Change Vendor on PO Prior to any Payment from the Maintenance Routine Menu to change the vendor on a purchase order. The vendor may be changed provided no payments or other purchase order activity has occurred on the purchase order. Once activity has occurred, no changes will be permitted to the vendor issued the purchase order to maintain audit control over the document.
·
Select the sorting method, either by PO# or by Vendor#.
·
Select the Fiscal Year.
·
Select the PO and Vendor from the list.
·
Enter the new Vendor number or click the magnifying glass to select from a list of all vendors.
·
Click "OK" to run the routine.
·
ACCOUNTING MANAGER will ask you, "Change PO#___from Vendor#___ to Vendor#___?"
·
Click "YES" to change the vendor # or Click "NO" to keep the existing vendor #.
Review Vendors That Have No Entries
The Review Vendors That Have No Entries utility allows the user to generating a listing of all vendors that have no entries. To generate the report select review Vendors That Have No Entries form the Maintenance Menu.
Check Routines
Check Reconciliation File
The check reconciliation file generates and prepares a file of issued checks to be provided to a financial institution that provides bank reconciliation services. Select Check Reconciliation from the Check Routines Utility Menu to access the Check Reconciliation Utility.
Voided Check Report
The void check report generates a report of Voided Checks for the selected date range. Select Voided Check Report from the Check Routine Menu to run the Void Check Report.
·
Enter the date range.
·
Click "OK" to run the report.
Opening Entry Routines
The Utilities Menu enables the user to directly enter the opening budgetary entries for each fiscal year. These opening budgetary entries should be derived from the initial opening budget.
The user may enter in the appropriation and revenue budgets through the utility menu. The user may then separately post the budgetary opening entries.
Entering the Appropriation Entries
To enter the opening appropriation entry, select Appropriations from the Opening Entry Routines Menu.
·
Select the desired fund.
·
Select the budgetary fiscal year to be opened.
·
Select the account code and press OUTPUT to run the report.
·
Repeat the process for each budgetary account code.
Entering the Revenue Entries
To enter the opening revenue entry, select Revenues from the Opening Entry Routines Menu.
·
Select the desired fund.
·
Select the budgetary fiscal year to be opened.
·
Select the account code.
·
Click OUTPUT to run the report.
·
Repeat process for each budgetary account code.
Posting the Opening Entries
To post both the opening appropriation and revenue entries, select Post Opening Budgets from the Opening Entry Routines Menu. The opening entries will be automatically posted to all subsidiary account codes.
·
Select the desired fund.
·
Select the desired schedule.
·
Enter the effective date for the opening entries or accept the default.
·
Click "OK" to post the entries.
General Ledger Opening Entries
This utility will summarize a trial balance for a selected fund and make a journal entry to record the opening balances. To make the entry, select General Ledger Balances from the Open Entry Routines Menu. The opening entry will be automatically posted to all ledger codes.
·
Select the desired fund or click the Select All Funds check box to select all the funds. If more that one fund is selected click the Merge Funds check box to merge the funds.
·
Select the desired schedule.
·
Enter the date range.
·
Select "YES" to include null accounts on the report.
·
Click "OK" to run the report.
·
ACCOUNTING MANAGER will display the opening ledger balances and ask if the totals should be posted.
·
Click "YES" to post the opening general ledger entry for the selected fund.
·
Click "NO" to leave the opening general ledger entry unposted.
Year End Routines
ACCOUNTING MANAGER provides users with series of routines to handle all year end routines, such as carrying forward purchase orders for the fiscal year and reporting Form-1099 information at the calendar year end.
Carry Forward POs
To carry forward the open purchase orders into the new fiscal year, select Carry Forward PO’s from the Year End Routines Menu.
·
Select the desired fund.
·
Select the date range of the purchase orders to carry forward. The date range should correspond to prior fiscal year for most operating funds.
·
Click "OK" to run the routine.
·
ACCOUNTING MANAGER will check each existing open purchase order and carry them forward into the new fiscal year. The routine will automatically create an encumbrance schedule in the new fiscal year for items carried forward.
Special Fund Carry Forward Budget
To carry forward the ending budgetary balances, select Special Fund C/F Budget from the Year End Routines Menu.
·
Select the desired special fund. Only special funds will be displayed (please refer to Maintenance: Funds, for more information).
·
Select the Journal Entry schedule in which to make the entry.
·
Enter the effective date of the opening entry.
·
Click "YES" to carry Forward Negative Accounts.
·
Click "OK" to run the report.
·
The fund will be summarized and displayed on screen. Click "YES" to post the entry.
Form 1099 Preparation
To produce a file used to create the 1099 forms, select 1099 Tax Info from the Year End Routines. This routine will create a file for the creation of the 1099 forms. Please have a floppy disk ready or request that the system administrator creates a special sub-directory on the system to hold the file.
·
Enter the file destination and name or click the folder to search for the destination.
·
Click "OK" to run the routine. ACCOUNTING MANAGER will create the 1099 file in the specified directory.
0
1
Journal Entries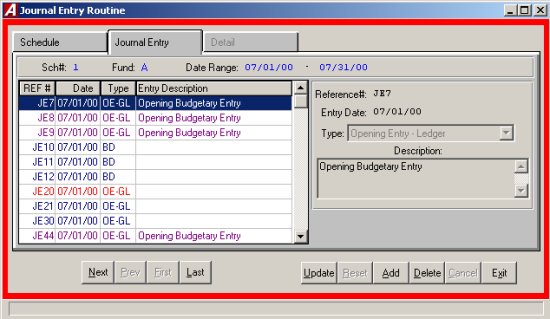
Types of Journal Entries:
Budget Transfers
Schedule Maintenance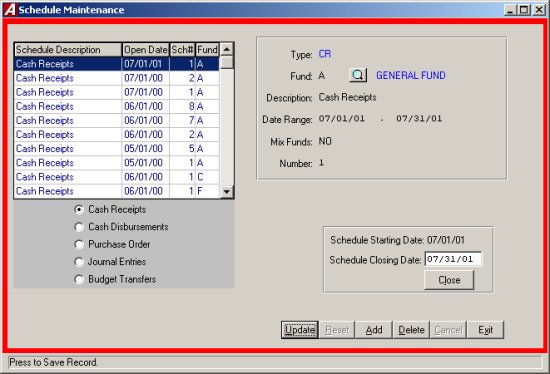
Close and Post Schedules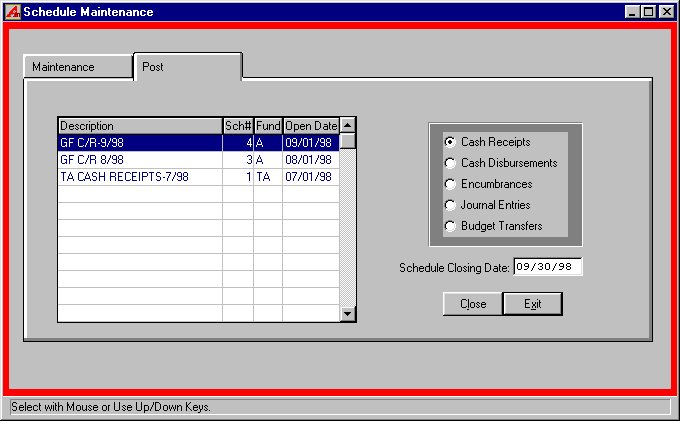
Cash Disbursement
Manual Checks 
To Edit/Change the information part of a manual check
Check
Computer Generated Checks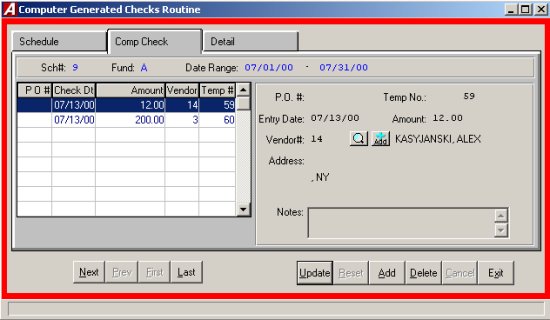
Voiding Computer Generated Cash Disbursements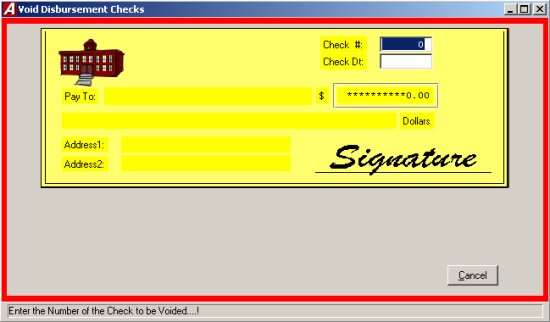
Validate Computer Generated Checks
Printing Computer Generated Checks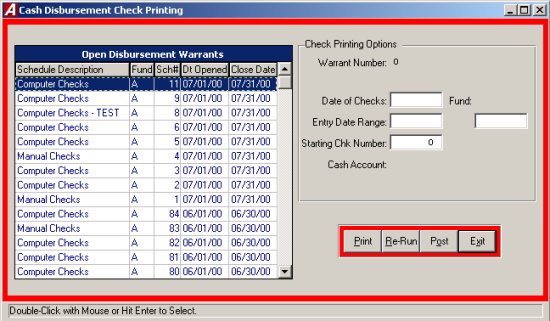
Payroll to General Ledger Distribution
Trust and Agency Payment Processing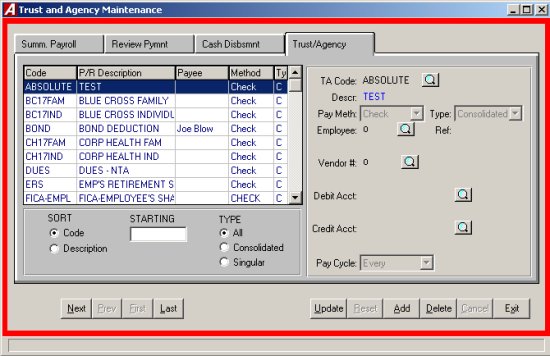
Summarize Payroll Information
Generate a Cash Disbursement Run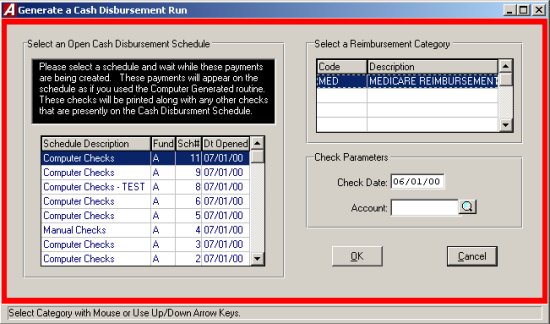
Reimbursement Payments Menu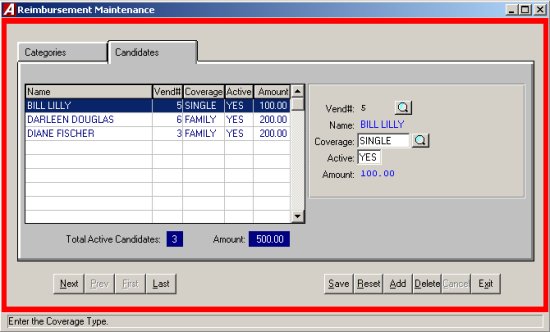
Generating a Cash Disbursement Run
Produce Candidate Mail Labels
Encumbrance
Manual Purchase Orders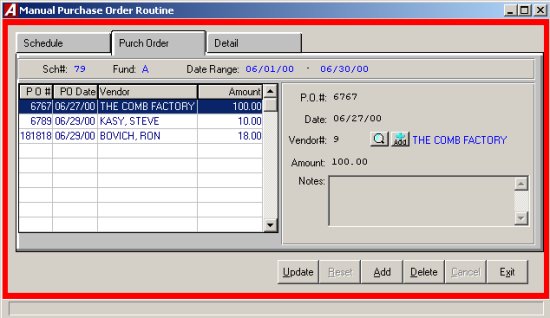
ACCOUNTING MANAGER provides the user with the ability to edit and change the information provided in the individual manual purchase orders already entered into the current schedule provided they have not yet been printed.
Computer Generated Purchase Orders
Cancel or Partially Liquidate a Purchase Order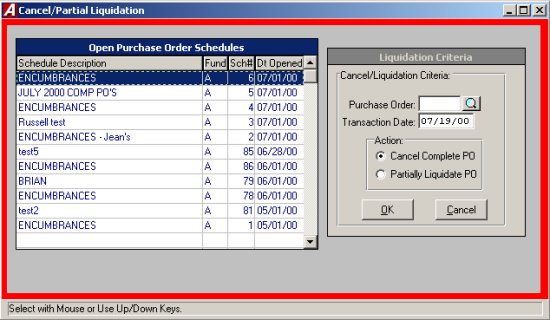
Increase Purchase Orders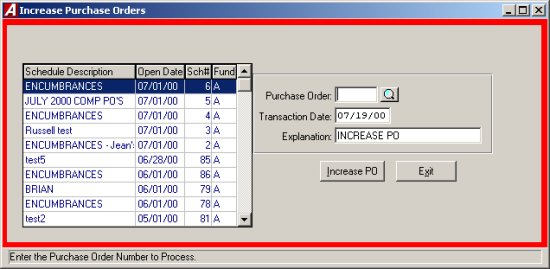
Printing the Purchase Order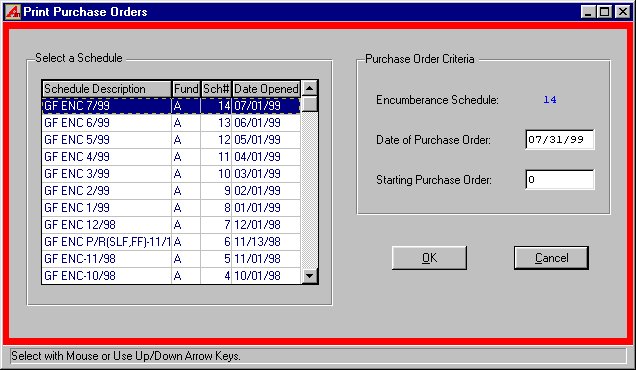
Encumber Payroll
Verifying & Reviewing the Contractual Amounts
Creating the Payroll Encumbrance Amounts
Changing the Payroll Encumbrance Amounts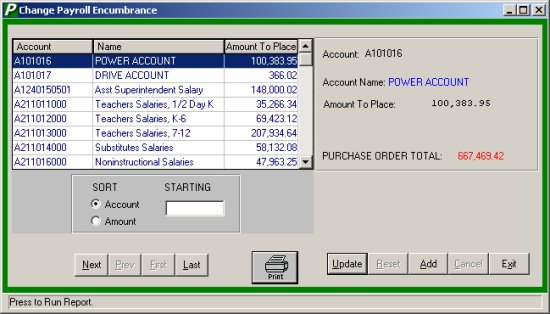
Contractual Amounts by Account
Contractual Amounts by Employee
Produce Payroll Purchase Order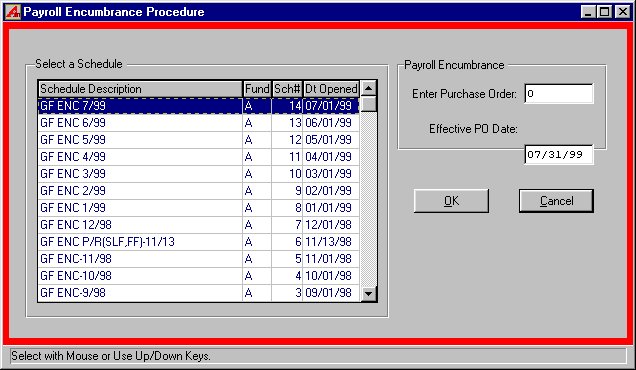
Maintenance
Chart of Accounts
Funds Function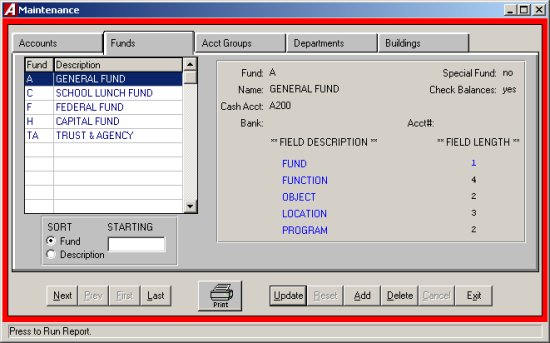
Account Group Headings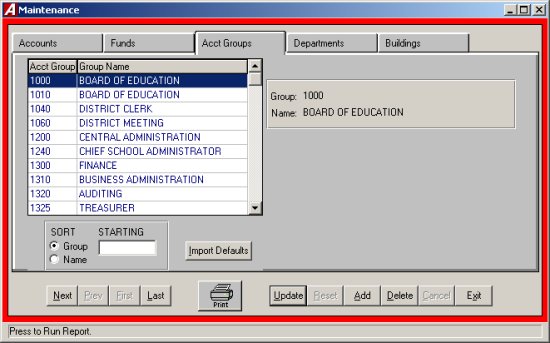
Departments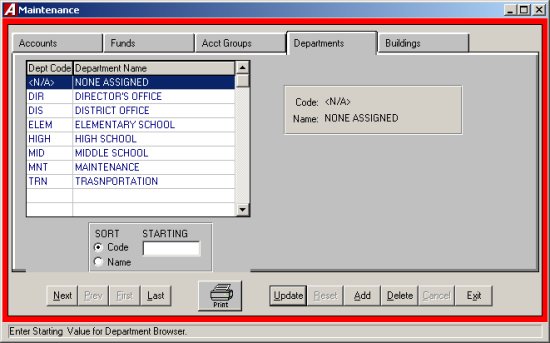
Buildings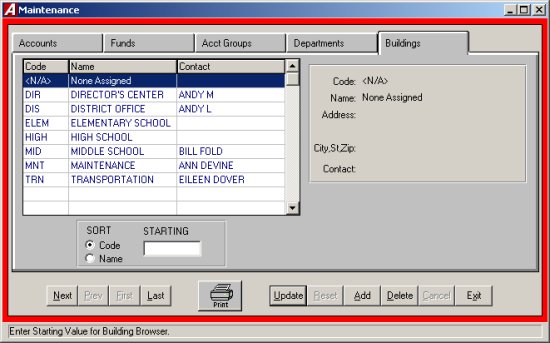
Vendors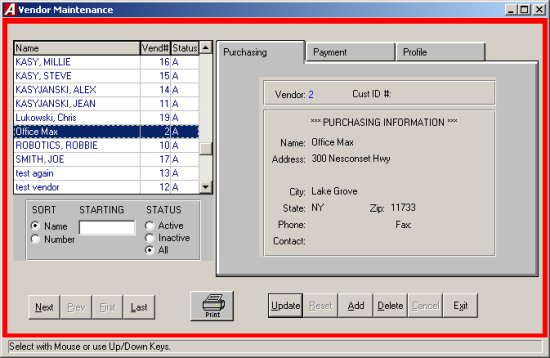
Output Reports
Checks Waiting to Print
Print Warrants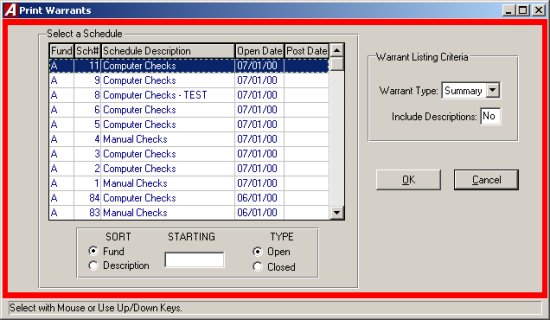
Purchase Orders to Print
Purchase Order Contact Listing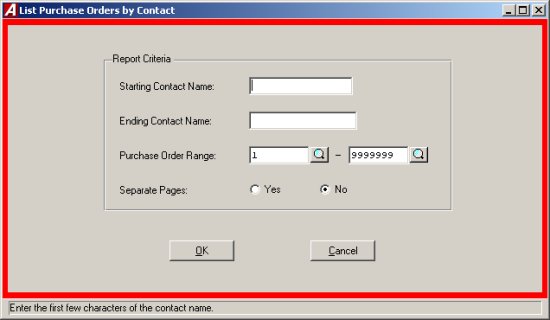
Appropriation Status Report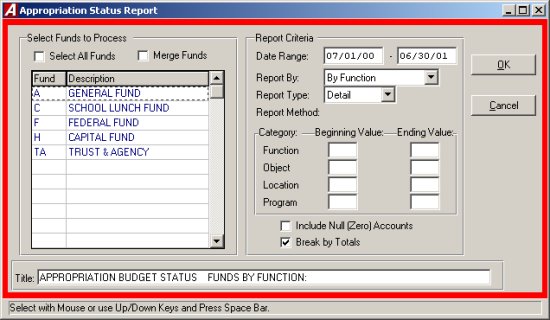
Revenue Status Report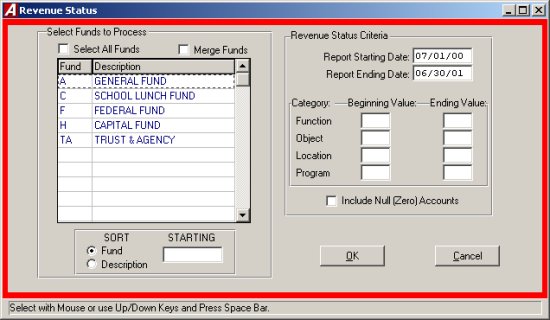
Trial Balance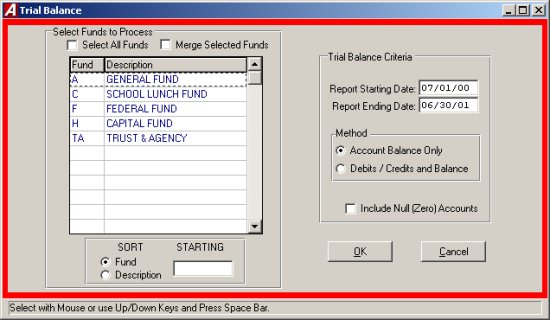
Vendor Listing 1099's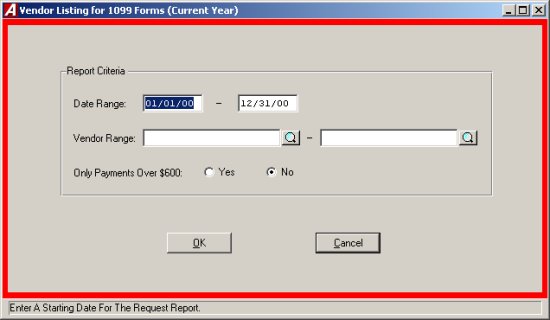
Vendor Mailing Labels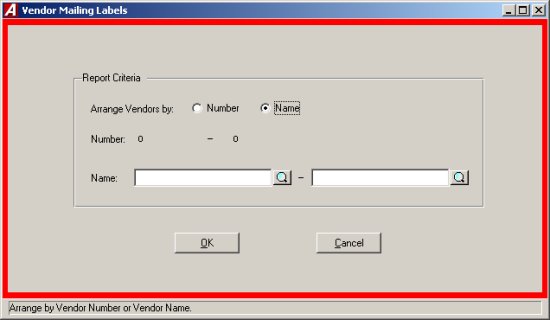
Custom Report Menu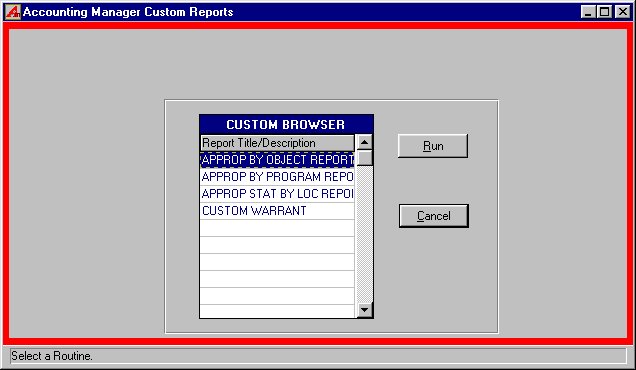
Expenditure Detail
By Object Within Function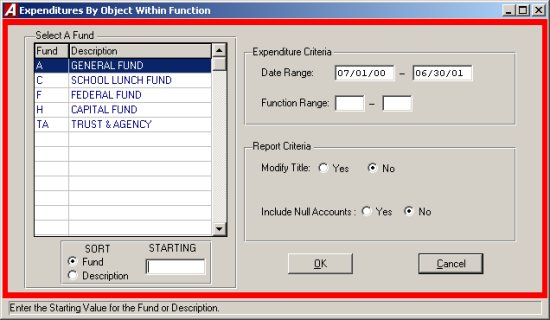
Summarized by Function
Summarized by Object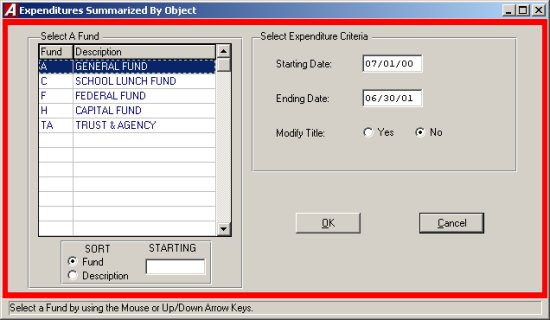
Analysis By Month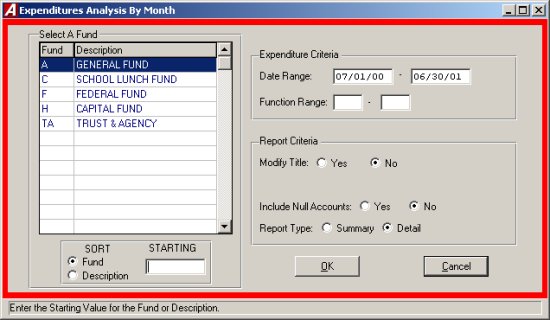
Schedules
Cash Receipts
Cash Receipts with Distributions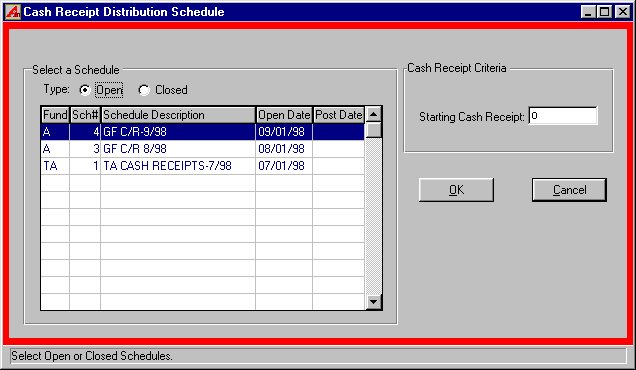
Cash Disbursements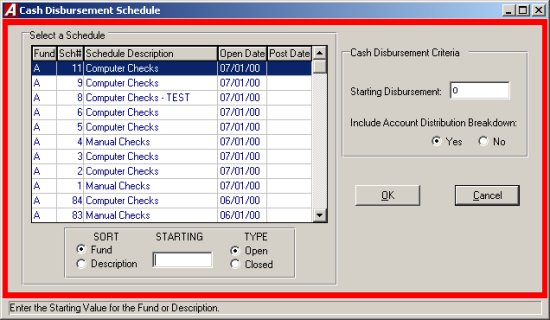
Encumbrances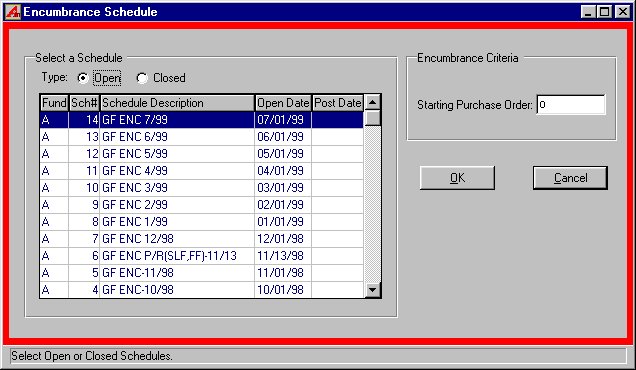
Journal Entries
Budget Transfers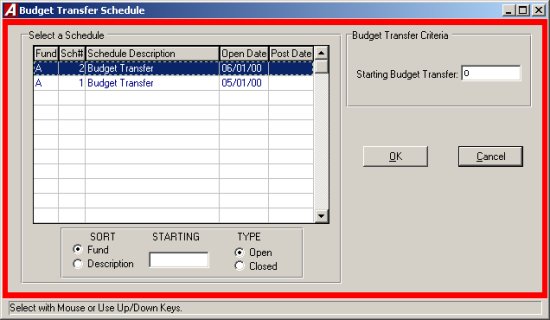
Account Transactions
Individual Account Transactions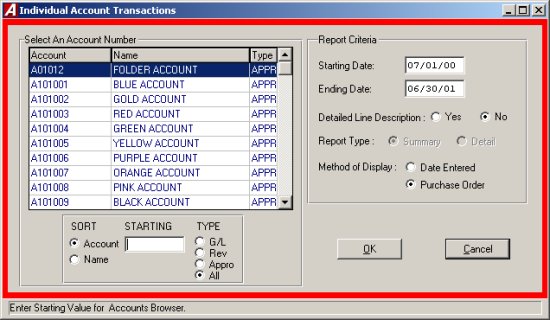
Multiple Account Ranges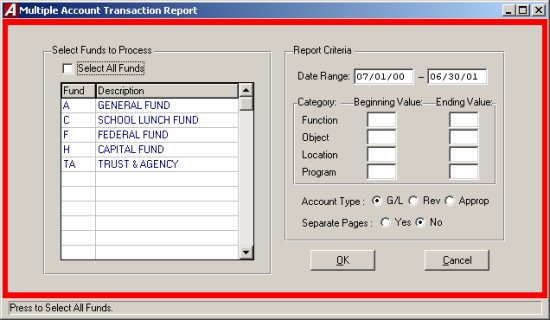
Accounts with Negative Balances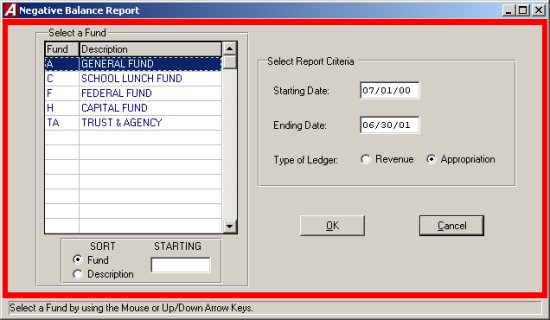
Encumbrances Outstanding
By Encumbrance Number 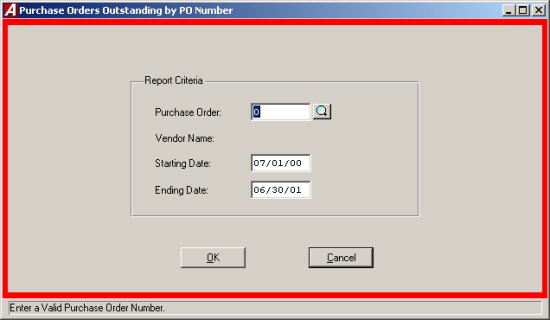
Range By Encumbrance Number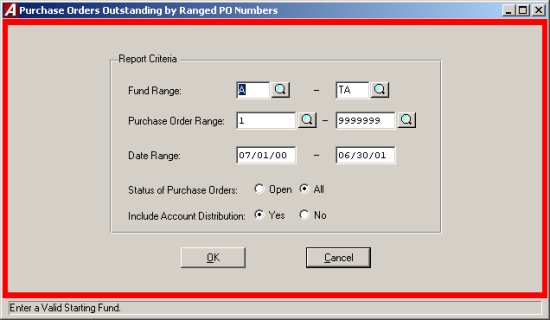
By Vendor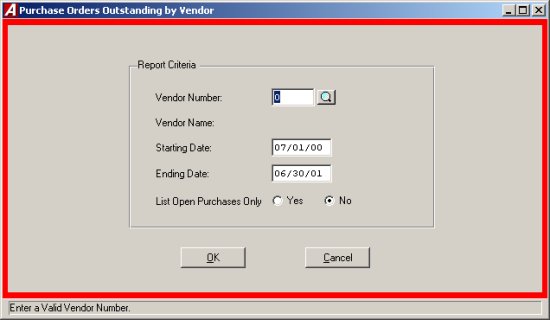
PO Analysis Report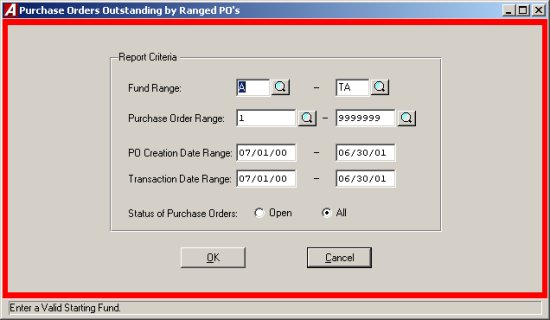
Vendor History
Payment History
Range of PO #'s – by Account
Range of PO #'s – by Vendor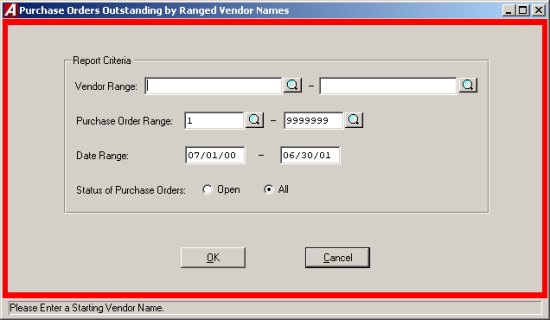
State Consolidation
Printing Account Code Review Listing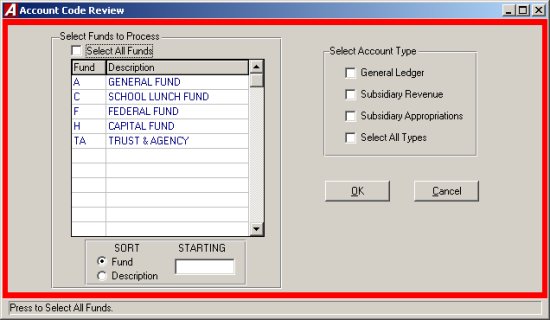
Generate Report Detail
Calculating Report Totals
Print Consolidated Reports
Data Import Files
Importing New Definitions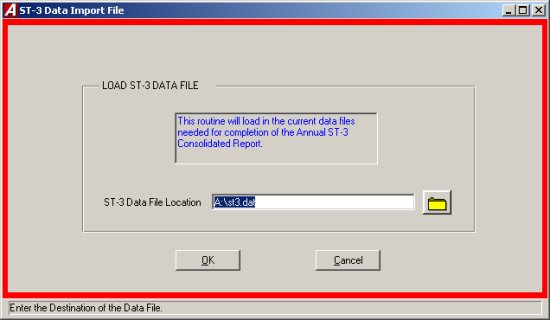
Assigning Consolidation Codes
Query Info
View Purchase Order
Reprint Purchase Orders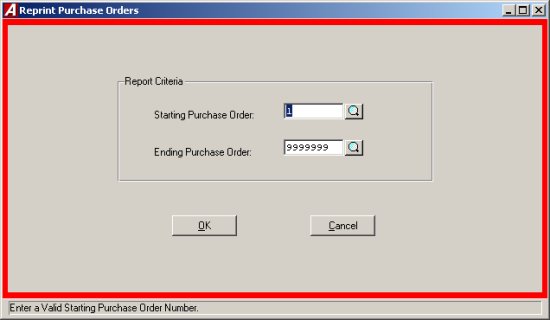
Account Budgetary Status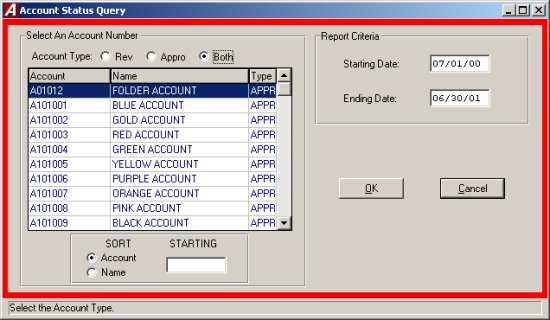
Purchase Orders
Cash Disbursements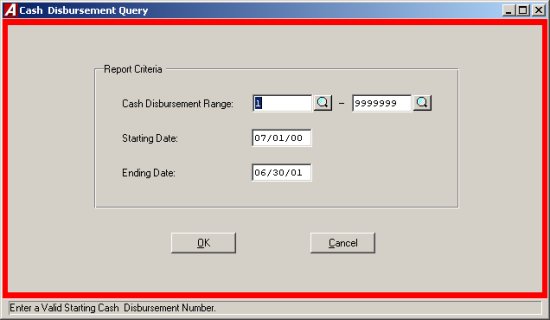
Cash Receipts
Budget Transfers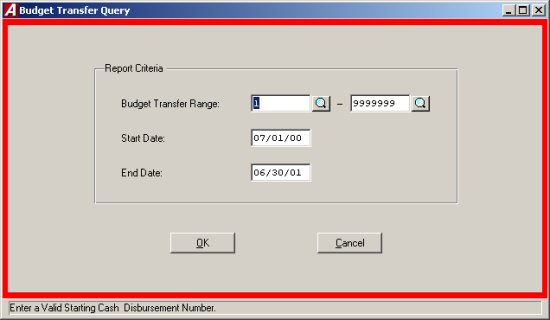
Journal Entry
Payment History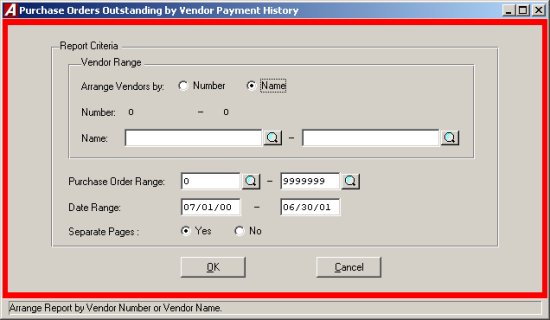
Vendor History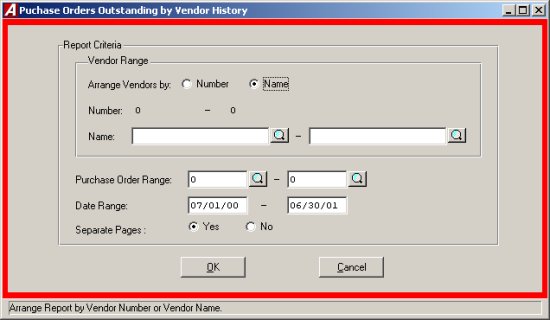
Utilities
General Routines
Custom Utilities
Supervisor Diagnostics
Maintenance Routines
Remove Account Codes That Have No Entries
Change Vendor on PO Prior To any Payment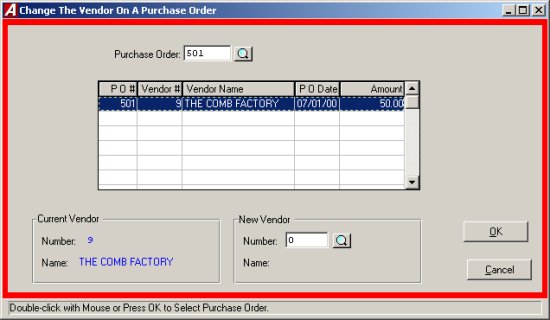
Review Vendors That Have No Entries
Check Routines
Check Reconciliation File
Voided Check Report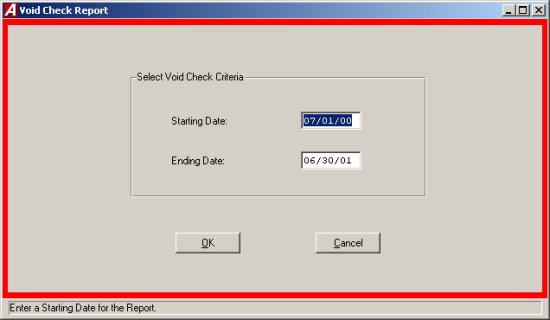
Opening Entry Routines
Entering the Appropriation Entries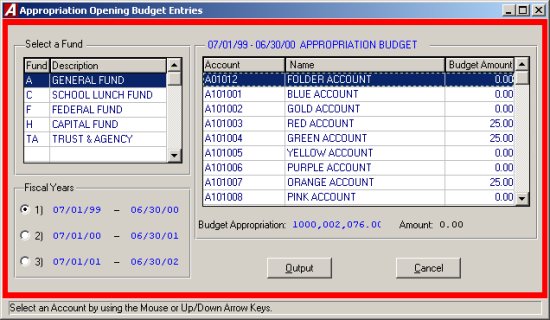
Entering the Revenue Entries
Posting the Opening Entries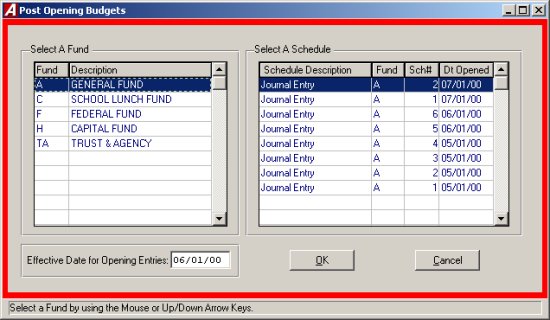
General Ledger Opening Entries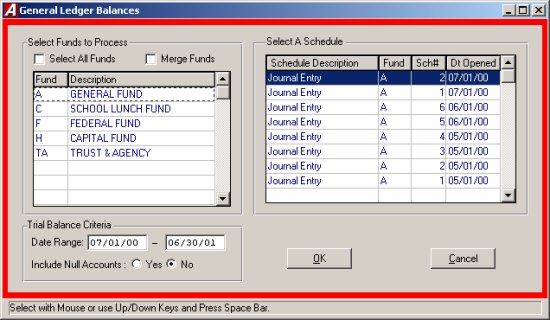
Year End Routines
Carry Forward POs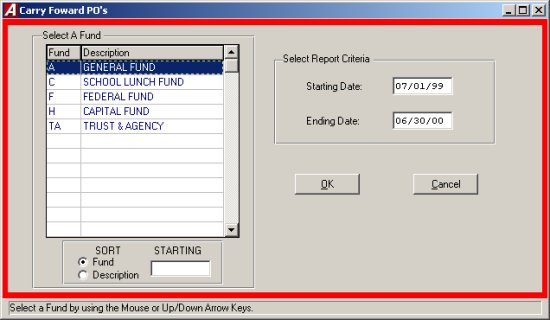
Special Fund Carry Forward Budget
Form 1099 Preparation