Scanning Images
NB: Basically there are two kinds of scanning: scanning pictures and scanning text. It is important that
you understand that there is difference.
Scanning Pictures
Click SCAN and then click Save As…
You will need to tell the computer three things:
Scanning pictures is easier than scanning text.
Quite simply a scanner takes a picture of what’s on
the scanner bed, very much like a copy machine
does. A scanner translates the image into an
electronic file. That file can be used on a web page,
in a word processing document, sent with an email,
or just for printing.
1.
Where you want to save the file,
2.
What you want to name the file, and
3.
What format you want the file to be.
Procedure
:
Log on
to the network before proceeding.
Place the document to be scanned face down on the
scanning bed. Make sure that it’s flat or the image
will be distorted.
Open the scanning software.
Click on the preview button
.
This process will scan the entire page. Often we do
not want the entire page just part of it.
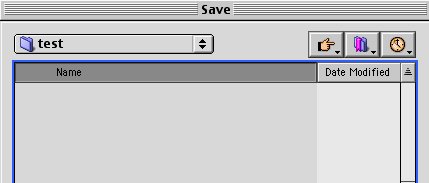
Where to save
: Your home directory (the one with
your last name and first initial) on the server is the
best place to save these picture files.
The next step is to “outline” the desired area. After
the scanned image appears you will see a + on the
screen and moving your mouse should move the +.
Place that + just
above
and to the
left
of the image
you wish to capture. Holding down the mouse
button drag the + to the lower right corner of the
image you wish to capture. A dotted rectangle
should appear around this image.
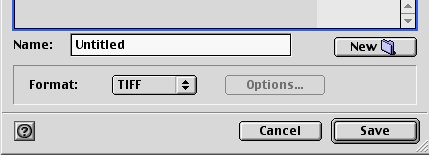
Name
: You may call the file anything you like but
the name should not include any punctuation—no
periods, commas, slashes, etc.
Format
: GIF and JPG both work great for sending
via email, placing on a web page, or importing into
HyperStudio or AppleWorks. TIFF files are okay
but are large and cannot be read by just any
computer.
Adjusting the outline: Using the mouse point to the
right side of the rectangle until it looks like an
double pointed arrow (
↔
), click and hold the
mouse button down then move that edge just to the
right of the desired portion. Adjust the left (
↔
),
top (
↕
) and bottom (
↕
) sides until the dotted
rectangle contains only desired area. You can click
on the
button to zoom in on the rectangular
region for finer adjustments.
Clicking Save at this point will scan the portion of
the image that you have outlined and save with the
name that you gave it.
See reverse for more tips on images and computers.
Pictures and Files
The size of an electronic image is a very important
element in good scanning. Files that are too large
are difficult to work with. Large files can take
forever to download from email or the Internet.
Files that are too small are often too grainy to look
at.
There are three elements that effect the size of the
picture file. They are the size of the item to be
scanned, the format of the saved image and the
resolution or number of dotsperinch that you
choose when you scan.
You really can’t do much about the size of the
image to be scanned but you can control the file
format and number of Dots Per Inch—DPI.
The larger the dpi the larger the file. 72 or 144 dpi
is best for placing pictures on web pages and
sending email but pictures scanned at 72 dpi can
look grainy.
You can scan up to 1200 dpi but that will create a
very large file that will take a long time to move on
the Internet or email. 1200 dpi files (unless from
tiny pictures) cannot be imported into AppleWorks
or HyperStudio.
You can change the dots per inch by clicking on
Tools
menu and then clicking
Resolution
. This will
but a box on the tool bar that will allow you do
adjust the dpi.
The file formats of JPG and GIF are usually the
smallest. With TIF (TIFF) being the largest. The
same picture scanned at the same dpi can be ten
times larger in TIF then in JPG.
At the bottom of the scan window there is an
indicator of the size of the file. Files going out on
the Internet should be kept under 200k. Files larger
that 1,000k (1.0 M) can take a long time to down
load from a home computer using a dial up line and
should be avoided if possible.
Back to top