Directions for using DocuShare
What is Docushare?
Docushare is a program based at the WayneFingerlakes BOCES that allows people to share
documents. Because it can be accessed from the Internet you can share documents with people
anywhere in the world, including those people we call students. They can get these documents
from any computer at school or at home. If you post your assignments, worksheets, vocabulary
lists, etc. then students who lose theirs can go to the DocuShare website and get a new one.
What kind of documents can be posted?
Almost any kind of document can be put on DocuShare—word processing, spreadsheet,
HyperStudio projects, PowerPoint presentations, etc. However, if you are using
MacIntoish
computer there are some things that you need to learn before posting anything. Please see the
last section labeled
Notes about Files.
How do I get a DocuShare account?
DocuShare accounts are created by BOCES. To get an account you should contact your
Technology Coordinator and tell him/her that you would like an account.
How do I get to DocuShare?
There are several ways to get to DocuShare. The easiest is to go to the NRW homepage
(www.nrwcs.org
) and click on:
•
Educational Resources, then
•
NRW DocuShare
You could also go to the Edutech Home Page (www.edutech.org
) and follow the links to
DocuShare, school districts, North RoseWolcott.
\\Nrw_hs\VOL2\Users\FSobierajski\help document\Docushare_directions2.doc
1
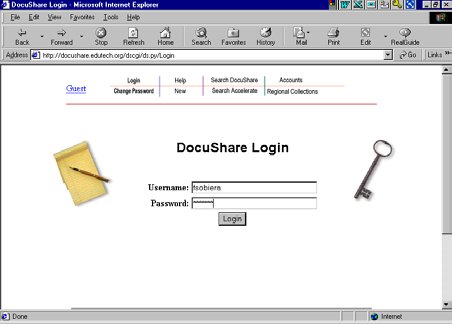
How do I login?
Once on a DocuShare screen, click on the
login button near the top.
Type in your username and password— both
are case sensitive—then click
Login
.
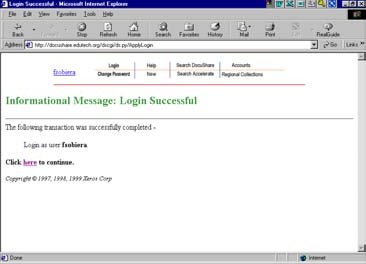
If successful the following screen will appear:
Click on the word “here.” This should then take you back to the orginal screen. You will then notice that the
word “Guest” has been replaced with your login name.
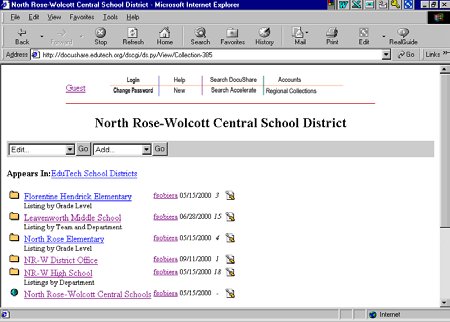
Open your Collection to the World
You will need to start by allowing “anyone” to view your
folder. To accomplish this first find your collection by going
to the appropriate building and grade level/subject area in
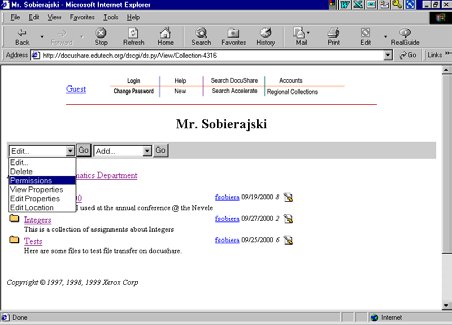
which your collection was created. Once at that collection
(folder)—look for your name at the top. Click on the triangle
next to the label “Edit”. Scroll down to “Permissions.”
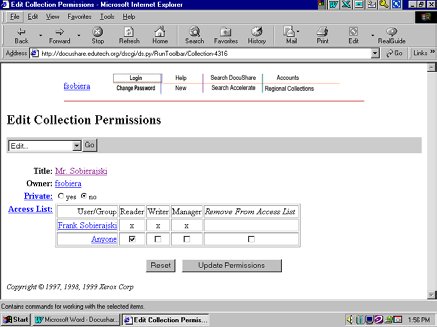
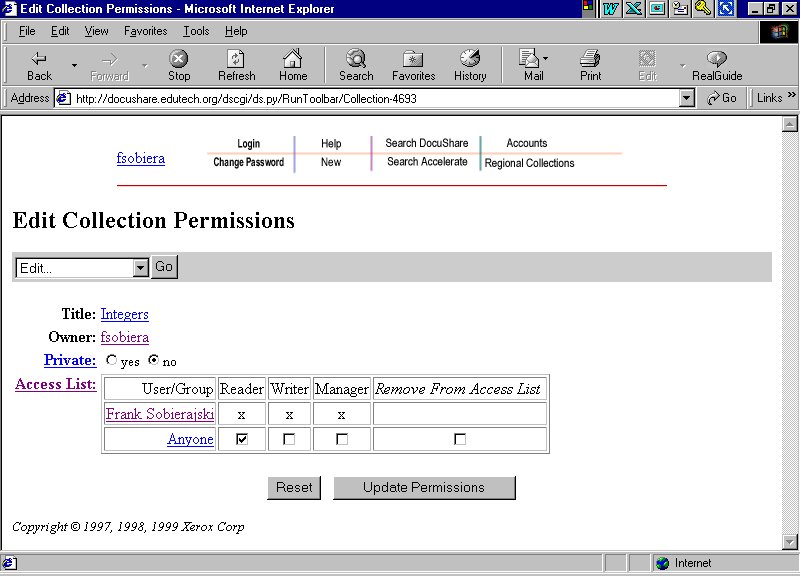
The following screen should appear:
Here you will see that you
are a reader, writer, and manager of
your collection. If you check the box under reader/next to
Anyone
then “anyone” can read (see) your collection. Click
Update
Permissions
. (Without a check here your collection is invisible to
all who are not marked as readers.)
\\Nrw_hs\VOL2\Users\FSobierajski\help document\Docushare_directions2.doc
2
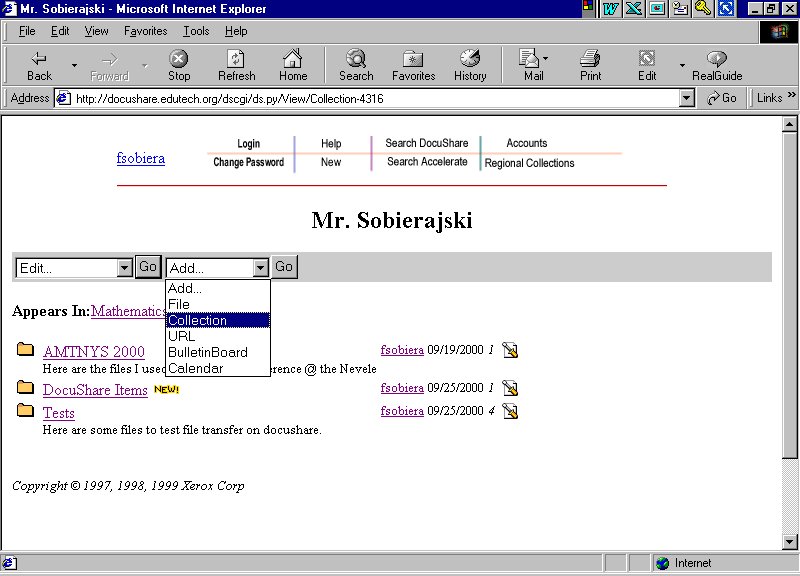
Start a collection within my collection (folder):
Find your collection by going to the appropriate building and grade level/subject area in which your account
was created. Once at that collection (folder)—look for your name at the top. Click on the triangle next to the
label “Add”. Scroll down to “Collection.”
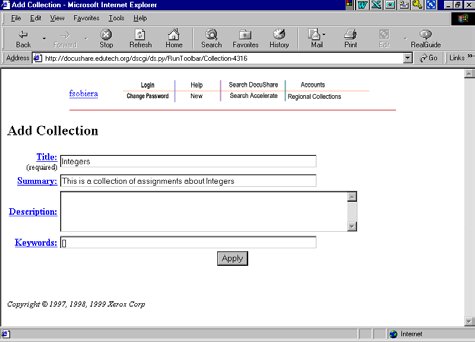
This will bring up a screen called Add Collection. You will need to give your collection a name and a summary
if you wish. The
Title
is required—other fields are optional. Click “
Apply
” and your collection will be created.
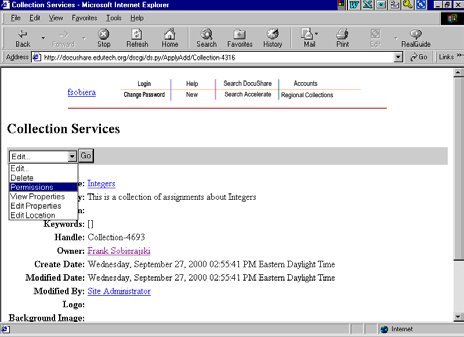
After that screen a screen called
Collection Services
will appear:
This is where you edit the permissions. Click on the triangle next to the word
Edit
. Scroll down to
Permissions
.
\\Nrw_hs\VOL2\Users\FSobierajski\help document\Docushare_directions2.doc
3
A screen similar to this one should appear:
Here is where you can give other people access to this collection. If you wish to add others to the list, under
Edit
you can scroll to
Add to Access List
. Once the list appears—and it will take a while—you may select
someone else on the list to have access. You will then need to give them certain rights to read/view or write to
your collection. Then click
Update Permissions
.
Note: Your students would be the “
Anyone”
referred to in the list. Do not remove “
Anyone
” from the list. If
you wish to hide the collection from them simply made sure that “
Anyone”
is not a reader of the collection.
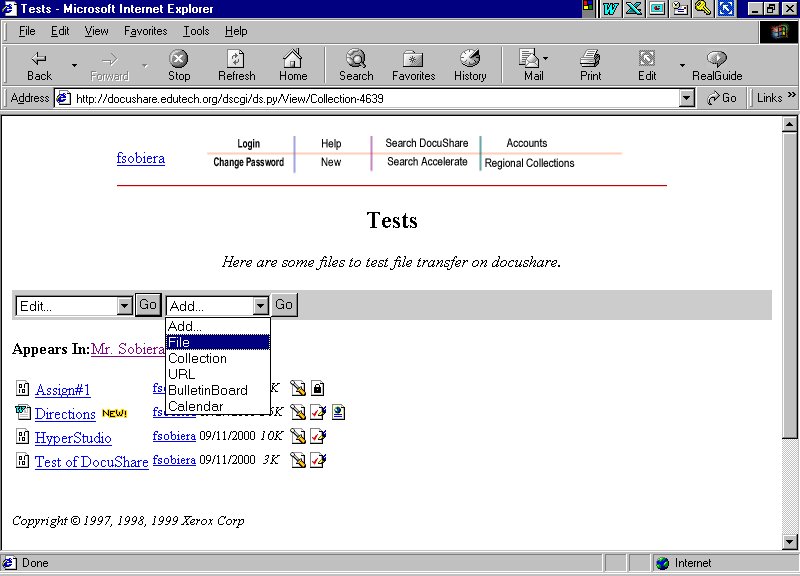
How do I post a file?
Find your collection (folder) in which you would like to post your file. Then click “
Add
.” Scroll down to
File
.
\\Nrw_hs\VOL2\Users\FSobierajski\help document\Docushare_directions2.doc
4
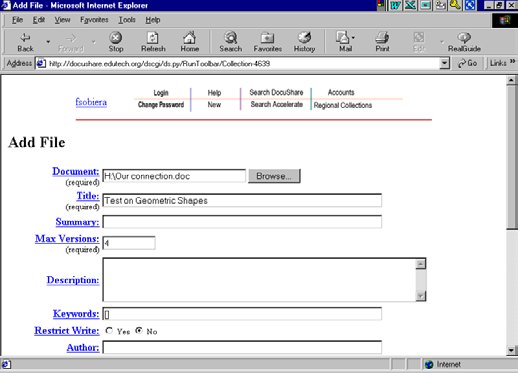
Click on
Browse
to find the file you wish to post. Highlight that file and click OPEN. This will place your file’s
name and path in the first box. In the
Title
box place the title that you wish students to see when they view your
collection. Scroll down to the “
Apply
” button and click it. Unless you are involved in a BOCES working
group—ELA, Math, MST, etc.—many of the boxes in between will not be relevant to you. Leave Max versions
at 4.
How do I delete something from DocuShare?
Next to each file and collection is an icon of a push pin.
If you click on this icon a screen for Collection
Services will come up. Under Edit you will find Delete. Clicking on this will bring up a Confirm Delete
screen. Make sure that you are deleting just a file and not the whole collection (unless of course you want to
delete a whole collection.)
Notes about Files
Files are computergenerated documents (edocuments). They can be Word documents, Excel Spreadsheets, AppleWorks
documents, PowerPoint presentations, HyperStudio projects, Web Addresses, calendars, etc. There are two things that
you need to know.
•
All documents posted on DocuShare are required to have a threeletter extension on their file names. PC
users do not need to worry about these because all Windows programs automatically add them to your
file names. Apple users on the other hand need to add these extensions manually. All AppleWorks files
need to have .cwk added to their names. All HyperStudio files need to have .stk added to their name. In
addition, file names should not contain any periods (other than the period with the extension) nor any of
these symbols: / \ , * . This syntax will confuse a PC. These extensions are necessary for the
receiving computer to open the correct program for viewing.
•
Not all computers will have the necessary software to view AppleWorks files that you post. Therefore,
it would be wise to print then scan your documents as Adobe Acrobat files (PDF—Portable Document
Format). All computers, Mac or PC, have the ability to read PDF files. Make sure when saving the file
that you add the .pdf to the end of the file name.
\\Nrw_hs\VOL2\Users\FSobierajski\help document\Docushare_directions2.doc
5
Back to top