1. New Features
  2. Table of Contents
  3. FM2000 Main Menu
  4.   
  5. Accounting Manager Main Menu
  6. New ACCOUNTING MANAGER Icons
  7. Screen Style Standards
    1. Browser Sorting Options
    2. Search Feature
    3. Standard Navigation and Maintenance Panels
  8. Cash Receipt Entry
  9. Cash Receipt Detail
  10. Manual Check Entry
  11. Manual Check Detail
  12. The status of the account distribution displays in the status bar at the bottom of the window.
  13. Computer Check Entry
  14. Computer Check Detail
  15. The status of the account distribution displays in the status bar at the bottom of the window.
  16. Budget Transfer Entry
  17. Budget Transfer Detail
  18. Journal Entry
  19. Journal Entry Detail
  20. Manual Purchase Order Entry
  21. Manual Purchase Order Entry Detail
  22. Void Checks
  23. Schedule Maintenance
  24. Chart of Account Maintenance
  25. Fund Maintenance
  26. Account Group Maintenance
  27. Vendor Maintenance
  28. Vendor Maintenance (cont’d)
  29. Customer Maintenance
  30. Building Maintenance
  31. User Account Chart Range
  32. Checks Waiting to Print Report
  33. Purchase Order Contact Listing
  34. Purchase Order Outstanding by PO Number
  35. Purchase Order Outstanding by Vendor
  36. Vendor History
  37. Vendor Listing
  38. Appropriation Status Report
  39. Appropriation Status Report (cont’d)
  40. Cash Balance Report
  41. Bank Reconciliation
  42. Year End Routines


New Features


Finance Manager
 
© Copyright 2002 by Finance Manager
 
Published by Finance Manager
 
All rights reserved
 
Software Version 9.1d
Documentation Revision 9.1d
 
 
Reproduction or translation of any part of this work without the prior written permission of the copyright owner is unlawful. Requests for permission should be directed to Finance Manager, 45 Research Way, Suite 207, East Setauket, New York 11733.
 
This publication is designed to provide accurate and authoritative information in regard to the subject matter covered. Finance Manger provides this document subject to specific contractual obligations and/or warranties only. OTHER EXPRESSED OR IMPLIED WARRANTIES OR MERCHANTABILITY AND FITNESS FOR A PARTICULAR PURPOSE ARE HEREBY EXCLUDED. Finance Manager may make improvements and/or changes in the document at any time without notice.


Finance Manager
45 Research Way, Suite 207
East Setauket, New York 11733
Telephone: (631) 941-1313
Fax: (631) 941-3690


Back to top


Table of Contents
 
FM2000 Main Menu  1
Accounting Manager Main Menu  2
New Accounting Manager Icons  3
Screen Style Standards  4
Cash Receipt Entry  6
Cash Receipt Detail  7
Manual Check Entry  8
Manual Check Detail  9
Computer Check Entry  10
Computer Check Detail  11
Budget Transfer Entry  12
Budget Transfer Detail  13
Journal Entry  14
Journal Entry Detail  15
Manual Purchase Order Entry  16
Manual Purchase Order Detail  17
Void Checks  18
Schedule Maintenance  20
Chart of Account Maintenance  21
Fund Maintenance  22
Account Group Maintenance  23
Vendor Maintenance  24
Customer Maintenance  26
Building Maintenance  27
User Account Chart Range  28
Checks Waiting to Print Report  29
Purchase Order Contact Listing  30
Purchase Order Outstanding by PO Number  31
Purchase Order Outstanding by Vendor  32
Vendor History  33
Vendor Listing  34
Appropriation Status Report  35
Cash Balance Report  37
Trial Balance Diagnostics  38
Bank Reconciliation  39
Year End Routines  40


Back to top


FM2000 Main Menu


This is the new main window for FM2000. The GASB 34 button was added in anticipation of our new product. The main window reflects the name of the user who is currently logged into the system. The window will also indicate that the user who is logged in has requisitions that are waiting to be approved.
 
From the FM2000 main window, the user can press Ctrl-L to display the Re-Login window. This enables the user to log into the system with a different user ID and password.
 

Back to top


Back to top


Accounting Manager Main Menu


This is the new ACCOUNTING MANAGER main window. All of the Accounting routines are divided into categories on the menu based on the type of action being performed – Data Entry, Maintenance, Reporting, Query, Utilities. To see the options that are under each category, open each tree by pressing the plus sign that precedes the name of the routine that you wish to perform.
 

Back to top


New A CCOUNTING MANAGER Icons
The icons at the top of the ACCOUNTING MANAGER main window allow you to perform the most commonly used routines. They are as follows:
 
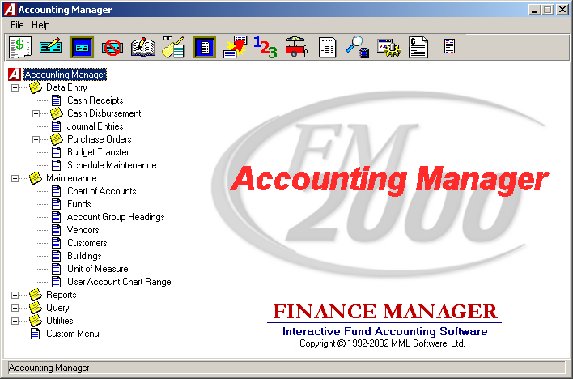
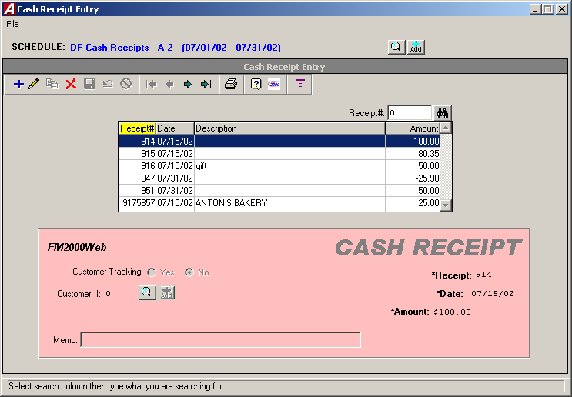
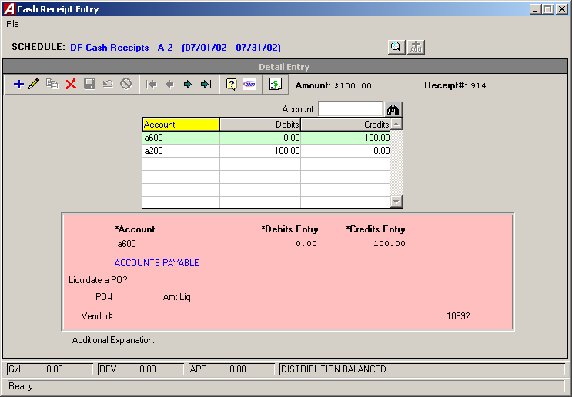
Cash Receipts – Accessed through the button or from the Data Entry menu tree.
   
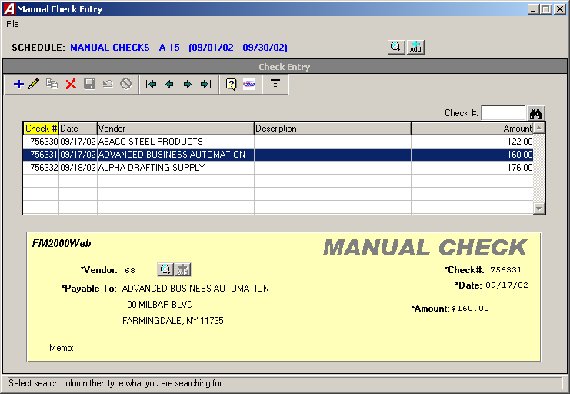
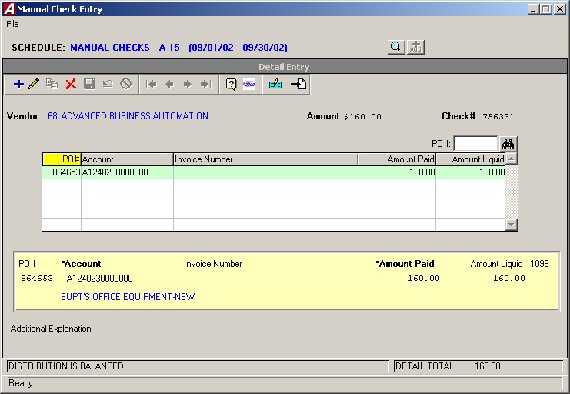
Manual Checks – Accessed through the button or from the Data Entry menu tree under Cash Disbursements.
   
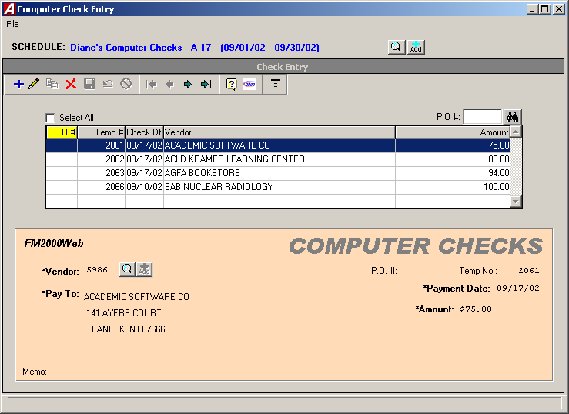
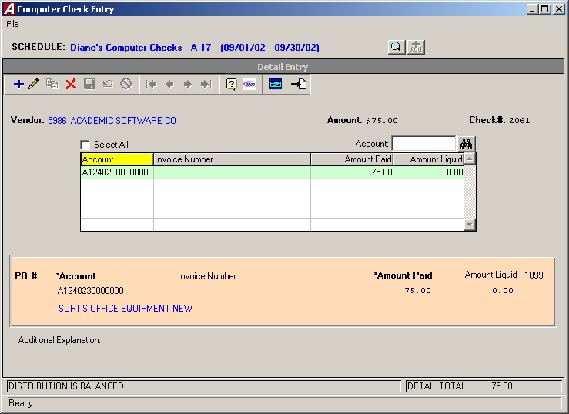
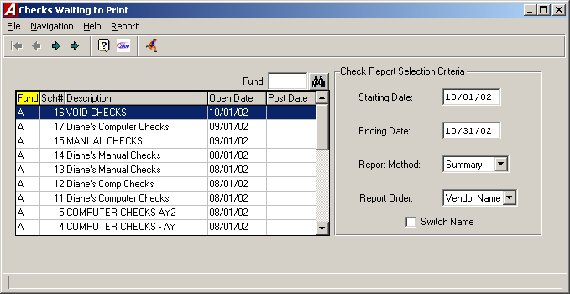
Computer Checks - Accessed through the button or from the Data Entry menu tree under Cash Disbursements.
   
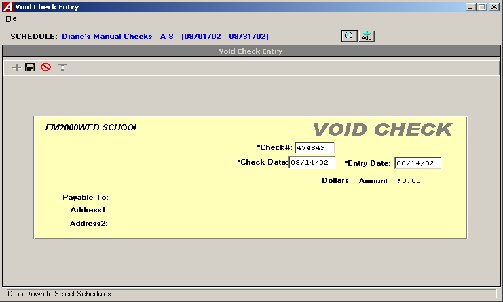
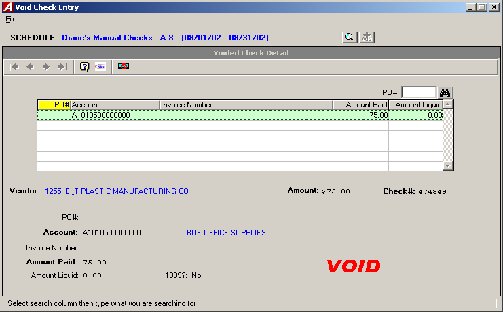
Void Checks - Accessed through the button or from the Data Entry menu tree under Cash Disbursements.
   
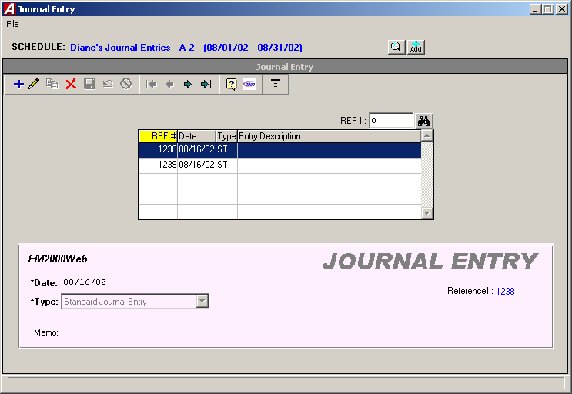
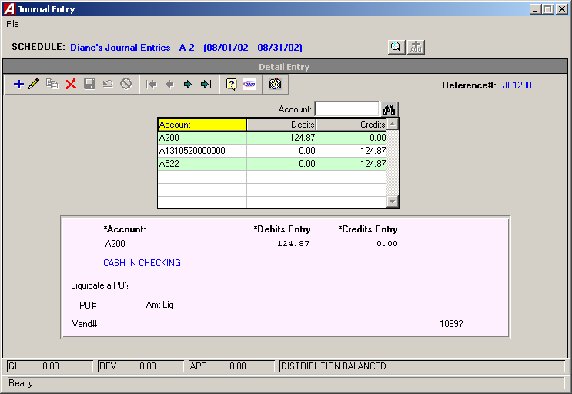
Journal Entry - Accessed through the button or from the Data Entry menu tree.
   
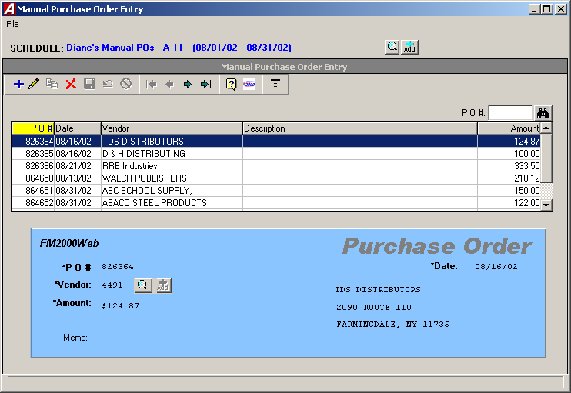
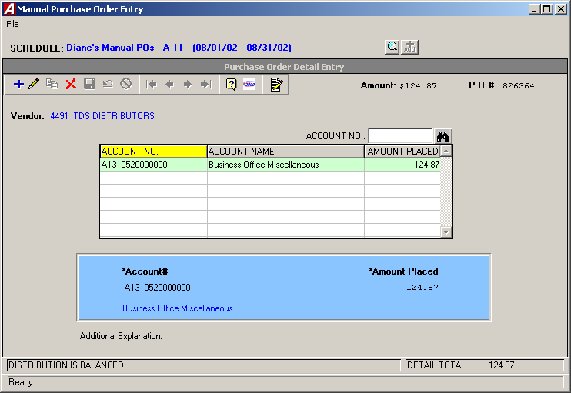
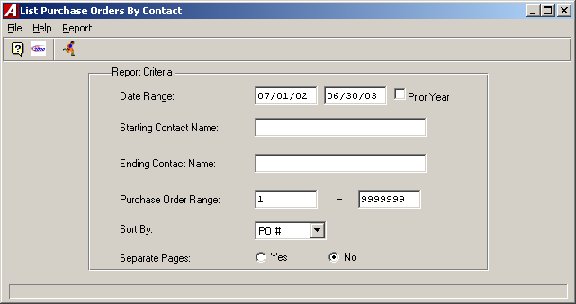
Manual PO - Accessed through the button or from the Data Entry menu tree under Purchase Orders.
   
Computer PO - Accessed through the button or from the Data Entry menu tree under Purchase Orders.
   
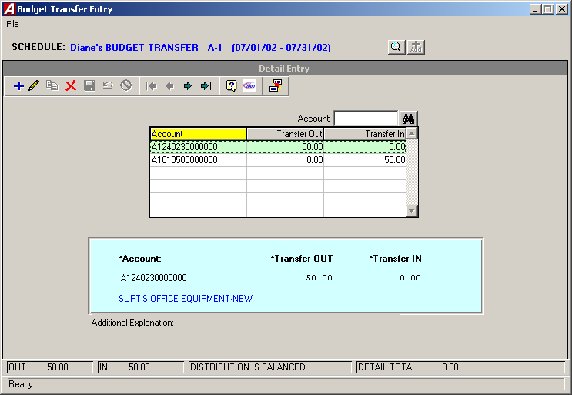
Budget Transfer - Accessed through the button or from the Data Entry menu tree.
   
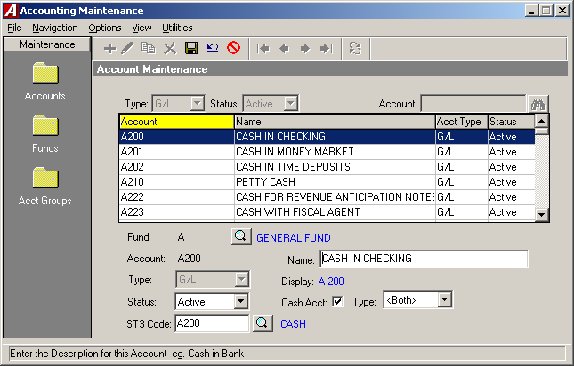
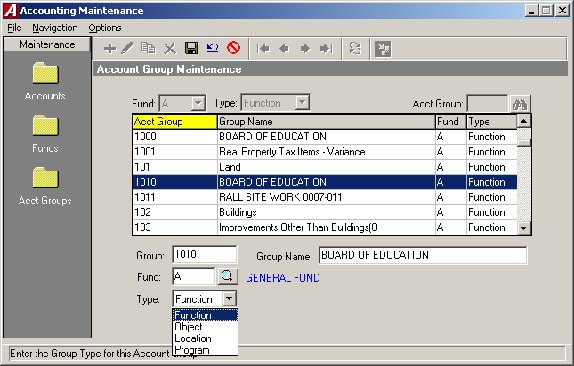
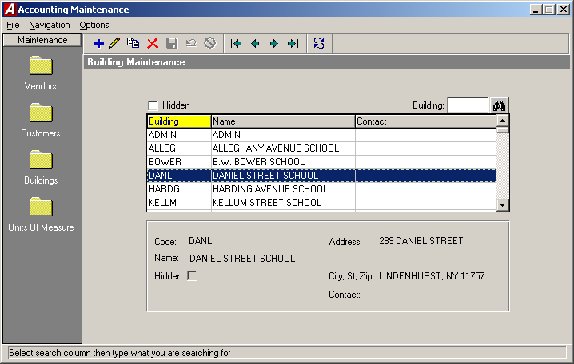
Chart of Accounts Maintenance - Accessed through the button or from the Maintenance menu tree.
   
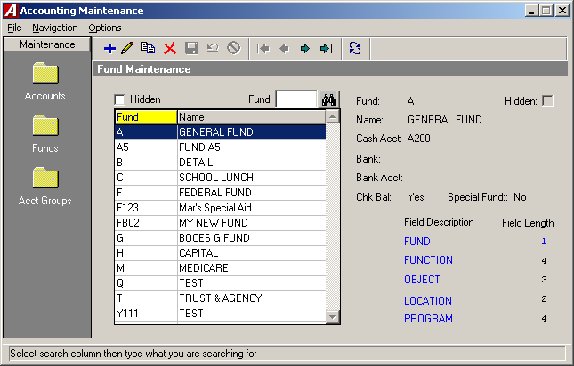
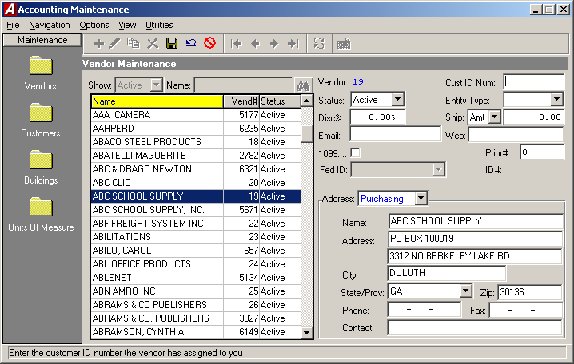
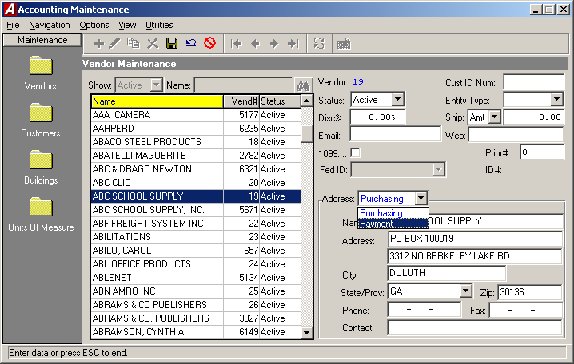
Vendor Maintenance - Accessed through the button or from the Maintenance menu tree.
   
Reports – Accessed through the button or from the Reports menu tree.
   
Query – Accessed through the button or from the Query menu tree.
   
Utilities – Accessed through the button or from the Utilities menu tree.
   
Custom Reports - Accessed through the button or from the Reports menu tree.
   
Presentation Quality Board Reports – Accessed through the button.

Back to top


Screen Style Standards


Browser Sorting Options


Browser Sorting Options


Data in a browser is normally sorted in either numerical ascending order or in alphabetical order. The column title is highlighted in yellow to indicate the selected sort option. To change the manner in which information is displayed in the browser, simply click once on the column title (Check #, Date, Vendor, etc.). To reverse the order, that is to sort in numerical descending order or in reverse alphabetical order, click on the column title a second time.


Search Feature


Search Feature
Each window containing a browser allows you to search for a specific record in that browser based on the sorting method chosen. Immediately above and to the extreme right of the browser is a search feature. The name of the Search field changes based on the column title that is highlighted. For example, if you are sorting by Check Number and you want to find a specific check number, enter that number in the field and press the Search button to begin the search process. The system highlights the appropriate record.


Standard Navigation and Maintenance Panels


Standard Navigation and Maintenance Panels
The Navigation buttons can be used to scroll through the records in each browser.
 
Navigation Panel Buttons Function
   
First            This option is used to highlight the first record in the browser.
   
Previous      This option is used to highlight the previous record in the browser. For example, if there are five records in the browser and your cursor is highlighting the third record, select the Previous button to highlight the previous (second) record.
   
Next This option is used to highlight the next record in the browser. For example, if there are five records in the browser and your cursor is highlighting the third record, select the Next button to highlight the next (fourth) record.
   
Last This option is used to highlight the last record in the browser.

 
The Maintenance buttons can be used to maintain the records in each browser.
 
Maintenance Panel Buttons Function
   
Add This option is used to add a new record.
   
Update This option is used to update an existing record.
   
Delete This option is used to delete an existing record.
   
Save This option is used to save information entered while adding or updating records.
   
Reset This option is used to reset the window back to the last saved version.
   
Cancel This option is used to cancel the Add or Update functions.

Back to top


Cash Receipt Entry
 
The Cash Receipt Entry window allows you to record miscellaneous monies received by your district. The screen is designed to look like you are filling out an actual cash receipt.


Required fields are labeled in bold font and flagged with an asterisk.
 
You can select a different schedule and add or maintain schedules directly from the Cash Receipt Entry window by pressing the Lookup or Add buttons next to the schedule description at the top of the window.

Back to top


Cash Receipt Detail
 
The Cash Receipt Detail window allows you to record the account distribution for the cash receipt. The screen is designed to look like you are filling out an actual ledger.


The remaining balance in each account displays after you tab off the account code field.
 
The routine was redesigned so that you no longer are required to enter control account distribution (i.e., 980 and 522). However, you may continue to do so if you wish.
 
The status of the account distribution displays in the status bar at the bottom of the window.

Back to top


Manual Check Entry
 
The Manual Check Entry window provides a mechanism of recording hand-written check documents into the system. The screen is designed to look like you are filling out an actual manual check.


Required fields are labeled in bold font and flagged with an asterisk.
 
You can select a different schedule and add or maintain schedules directly from the Manual Check Entry window by pressing the Lookup or Add buttons next to the schedule description at the top of the window.

Back to top


Manual Check Detail
 
The Manual Check Detail window allows you to record the account distribution for the manual check. The screen is designed to look like you are filling out an actual ledger.


The remaining balance in each account displays after you tab off the account code field.
 
This window includes a new field labeled “1099?”. This field is only accessible if the 1099 Flag for the vendor is set to YES in the Vendor Master File and will display for each distribution line. Enter Yes in this field if the detail distribution is reportable on the vendor’s 1099.
 

Back to top


The status of the account distribution displays in the status bar at the bottom of the window.

Back to top


Computer Check Entry
 
The Computer Check Entry window provides a mechanism of recording system-generated check documents into the system. The screen is designed to look like you are generating an actual computer check.


Required fields are labeled in bold font and flagged with an asterisk.
 
You can select a different schedule and add or maintain schedules directly from the Computer Check Entry window by pressing the Lookup or Add buttons next to the schedule description at the top of the window.

Back to top


Computer Check Detail
 
The Computer Check Detail window allows you to record the account distribution for the computer check. The screen is designed to look like you are filling out an actual ledger.


The remaining balance in each account displays after you tab off the account code field.
 
This window includes a new field labeled “1099?”. This field is only accessible if the 1099 Flag for the vendor is set to YES in the Vendor Master File and will display for each distribution line. Enter Yes in this field if the detail distribution is reportable on the vendor’s 1099.
 

Back to top


The status of the account distribution displays in the status bar at the bottom of the window.

Back to top


Budget Transfer Entry
 
The Budget Transfer Entry window provides a mechanism for recording budget transfers between budgetary appropriation accounts. The screen is designed to look like you are filling out an actual budget transfer document.


Required fields are labeled in bold font and flagged with an asterisk.
 
You can select a different schedule and add or maintain schedules directly from the Budget Transfer Entry window by pressing the Lookup or Add buttons next to the schedule description at the top of the window.

Back to top


Budget Transfer Detail
 
The Budget Transfer Detail window is used to create and maintain the transfer records between budgetary appropriation accounts. The screen is designed to look like you are filling out an actual ledger.


The remaining balance in each account displays after you tab off the account code field.
 
The status of the account distribution displays in the status bar at the bottom of the window.
 

Back to top


Journal Entry
 
The Journal Entry routine provides a mechanism for recording standard journal entries, budgetary adjustments, opening General Ledger entries, and opening subsidiary budget entries. The screen is designed to look like you are completing an actual journal entry.


Required fields are labeled in bold font and flagged with an asterisk.
 
You can select a different schedule and add or maintain schedules directly from the Journal Entry window by pressing the Lookup or Add buttons next to the schedule description at the top of the window.

Back to top


Journal Entry Detail
 
The Journal Entry Detail window is used to create and maintain the transfer records between budgetary appropriation accounts. The screen is designed to look like you are filling out an actual ledger.


The remaining balance in each account displays after you tab off the account code field.
 
The status of the account distribution displays in the status bar at the bottom of the window.
 

Back to top


Manual Purchase Order Entry
 
The Manual Purchase Order routine provides a mechanism for recording hand-written purchase orders into the system. The screen is designed to look like you are completing an actual purchase order.


Required fields are labeled in bold font and flagged with an asterisk.
 
You can select a different schedule and add or maintain schedules directly from the Manual Purchase Order Entry window by pressing the Lookup or Add buttons next to the schedule description at the top of the window.

Back to top


Manual Purchase Order Entry Detail
 
The Manual Purchase Order Entry Detail window is used to create and maintain the account code distribution associated with the manual purchase order. The screen is designed to look like you are filling out an actual ledger.


The remaining balance in each account displays after you tab off the account code field.
 
The status of the account distribution displays in the status bar at the bottom of the window.

Back to top


Void Checks
 
The Void Checks routine is used to void any checks, either computer generated or manually prepared, that have already been entered into Accounting Manager using the Computer Check or Manual Check Entry routines and have been physically disbursed.
 
The routine was changed so that you can select the schedule before entering the check number that you wish to void.


The routine allows you to select a Detail button that displays the detail distribution entries made against the check prior to performing the void.


Back to top


Schedule Maintenance
 
The Schedule Maintenance routine is used to open and edit schedules for the recording and organizing of accounting information including Cash Receipts, Cash Disbursements, Purchase Orders, Journal Entries, and Budget Transfers.


This routine allows you to add and edit schedule information for all the different schedule types, rather than have to go into each individual Data Entry area to create or update a schedule. It is also used to close and post schedules to the appropriate ledger accounts.

Back to top


Chart of Account Maintenance
 
The Chart of Account Maintenance window is used to create and maintain the account codes in your General Ledger Chart of Accounts.


There are two new features that have been added to this screen.
 
The first is the Status field, where you now have the ability to designate an account as Active, Inactive, or Hidden.
 
Active – Active codes are able to be used in all data entry areas, as well as the reporting areas.
Inactive – Inactive codes are not available for use in the data entry areas, but they will show in the reporting areas.
Hidden – Hidden codes are codes that at one time may have been used, but are no longer being used and have no detail from the current fiscal year. These codes are not available in the data entry areas or in the Appropriation Status Report.
 
The second is the ability to designate any account that you wish as a Cash Account by checking the Cash Acct check box. Once an account is flagged as a Cash Account, you can indicate the Type of cash account – Receipts, Disburse, or Both.
 
Receipts – This indicates that you are only receiving money to this cash account. An example of this would be a Money Market Account.
Disburse – This indicates that you are only expending money from this cash account.
Both – This indicates that you are receiving and expending money from this cash account. An example of this would be the general cash account (A200).

Back to top


Fund Maintenance
 
The Fund Maintenance window is used to create and maintain the various funds used in ACCOUNTING MANAGER .


The system provides the ability to designate a fund as “hidden”. If you hide a fund, the system will hide all accounts associated with that fund. If you unhide the fund, the accounts will not automatically be unhidden. You must manually unhide the accounts.
 
Hidden funds are those that at one time may have been used, but are no longer being used and have no detail for the current fiscal year. These fund codes are not available in the data entry areas or in the Appropriation Status Report.

Back to top


Account Group Maintenance
 
The Account Group Maintenance window is used to create and maintain the various account groups used in ACCOUNTING MANAGER .


You have the ability to designate group codes by types – function, object, location, and program. For example, you may have account group 1010 as a function type and account group 1010 as a location type.

Back to top


Vendor Maintenance
 
The Vendor Maintenance window is used to create and maintain the various vendor numbers used in ACCOUNTING MANAGER .


There are two new features that have been added to this screen.
 
You now have the ability to designate the vendor status as hidden. Hidden vendors may have been used at one time, but are no longer being used and do not have detail for the current fiscal year. These vendor codes are not available for use in the data entry areas or on some reports.
 
This window provides the ability to enter the vendor’s email address, as well as the URL to the vendor’s website.
 
The routine allows you to add and maintain miscellaneous, free-form notes for each vendor.

Back to top


Vendor Maintenance (cont’d)
 
You can switch from the vendor’s purchasing and payment address information by clicking on the Address drop-down.


Back to top


Customer Maintenance
 
The Customer Maintenance window is used to create and maintain the various customer codes used in ACCOUNTING MANAGER .


You now have the ability to designate the customer status as hidden. Hidden customers may have been used at one time, but are no longer being used and have no detail for the current fiscal year. These customer codes are not available for use in the data entry areas or on some reports.
 
The routine provides the ability to enter the customer’s email address and allows you to add and maintain miscellaneous, free-form notes for each customer.

Back to top


Building Maintenance
 
The Building Maintenance window is used to create and maintain the various building codes used in ACCOUNTING MANAGER .


You now have the ability to designate the building status as hidden. Hidden buildings may have been used at one time, but are no longer being used and have no detail for the current fiscal year. These building codes are not available for use in the data entry areas or on some reports.

Back to top


User Account Chart Range
 
The User Account Chart Range routine is used to associate users with specific account codes that they are authorized to use. For example, certain users may have access to all account codes, while others only have access to specific account codes within specific funds.


The User List and Account Edit/View windows were consolidated so that as you highlight a selected user name, a listing of the accounts to which they have access is displayed.
 
The routine allows you to restrict accounts by user in Accounting Manager.

Back to top


Checks Waiting to Print Report


The Report Criteria Selection window allows you to switch the display of the vendor payment name.

Back to top


Purchase Order Contact Listing


The Report Criteria selection window allows you to automatically switch to the prior year.
 

Back to top


Purchase Order Outstanding by PO Number


The Report Criteria selection window allows you to automatically switch to the prior year.
 
The window no longer provides a purchase order number lookup.

Back to top


Purchase Order Outstanding by Vendor


The Report Criteria selection window allows you to automatically switch to the prior year.
 
The window no longer provides a vendor number lookup.
 

Back to top


Vendor History


The Report Criteria selection window allows you to specify a fund range.
 
The Report Criteria selection window allows you to automatically switch to the prior year.
 
The window no longer provides a purchase order number lookup.
 
The window allows you to include vendors with no detail.
 

Back to top


Vendor Listing


The Report Criteria Selection window allows you to specify a “Long Version” or “Short Version” report.The Report Criteria Selection window allows you to specify a “Long Version” or “Short Version” report.

The Long Version of the Vendor Listing provides the vendor number, vendor purchasing name and address, vendor payment name and address, purchasing telephone and fax numbers, 1099 indicator, federal ID #, and status.

The Short Version of the Vendor Listing provides the vendor number, vendor purchasing name, vendor purchasing address, purchasing telephone number, and status.
 

Back to top


Appropriation Status Report
 
The Appropriation Status Report includes a detail of the individual appropriation accounts with respect to the current adjusted budget, fiscal year-to-date expenses, current encumbrances, and current unencumbered balance.


The Report Criteria selection window allows you to automatically switch to the prior year.
 
The Report By field now includes an option to print the report by ST-3 format.
 
The Break by Totals option allows you to specifically define the formatting of any report breaks that you wish to include. When the Break by Totals option is checked, the following section displays in the bottom of the window.


You can specify whether you wish to include all, some, or none of the report breaks and whether the subtotals for each break should include an underline by checking the appropriate boxes.


Back to top


Appropriation Status Report (cont’d)
 
The Screen Version selection generates a report that displays the Account Code, Account Description, Adjusted Budget, Expensed Amount, Encumbered Amount, and Available Amount. If Screen Version is not selected, the report includes the Account Code, Account Description, Original Budget, Adjustments, Adjusted Budget, Expensed Amount, Encumbered Amount, and Available Amount.

Back to top


Cash Balance Report
 
The Cash Balance Report routine is used to generate a report containing receipts, disbursements, daily activity, and balance for a specified cash account and date range.


Back to top


Bank Reconciliation
 
The Bank Reconciliation routine is used to reconcile the checks that were cleared by the bank and to post the reconciliation to the glbank file.


Back to top


Year End Routines
 
The Carry Forward Purchase Orders, Carry Forward Special Fund Budget, and Carry Forward General Ledger Balances routines can all be accessed from the same window.
 
Year End Routines include an automated closing of General Ledger control accounts.

Back to top


Finance Manager  1  October 2002