PAYROLL MANAGER uses a five-step procedure to process each payroll. Users can follow the payroll process from generating the initial payroll and processing unique payroll situations, to calculating the entire payroll and printing the payroll checks. In addition, PAYROLL MANGER allows the user to view a single payroll check on screen, either before or after it has been printed.
PAYROLL MANAGER features a computerized employee database, which catalogs all relevant employee data. The database allows users to maintain the data on-hand electronically, eliminating the need to manually research employee data.
In addition to its processing function, PAYROLL MANAGER can generate a full set of payroll reports, including contract and earnings listings, edit listings, check registers, account code distributions, as well as all state retirement system reports.
Before becoming involved in the details of PAYROLL MANAGER, the user must grasp the most important concept of the program:
· Understanding how the payroll process works
PAYROLL MANAGER utilizes a five-step procedure to process each payroll. The processing steps include:
Setting the Payroll Parameters The first part of the payroll process is to set the parameters for the current payroll. The parameters include the dates covered by the payroll period, the payroll check date, and the pay frequencies to be used on the current payroll. Each item must be defined for the current payroll period.
Generating the Payroll
The next part of the payroll process is to generate the payroll for all full-time contractual employees. The generation of payroll is based upon the employees contracted salary and the time period for which the payroll is intended. All adjustments made to the employeeās base contractual salary will be reflected in the current payroll generation.
The generated payroll is essentially the base payroll of the individual contractual employees and remains constant until the employeeās contract salary changes.
PAYROLL MANAGER generates the payroll by accessing each employee data file and computing the standard, full-time salary to be paid during the current payroll period.
Entering Additional Earnings
The third part of the payroll process is to enter the additional earnings for the payroll period. The additional earnings are entered from timesheets or payroll vouchers for both full-time and part-time employees. Entered data is unique for the payroll period and will include hours worked for hourly employees, overtime hours for salaried employees, and additional payments for other employee earnings (e.g. ā night differential pay, longevity stipends). Entered data will automatically reset for each payroll period. Utilities are available to speed the data input process of additional earnings.
Calculating the Payroll
The fourth part of the payroll process is to calculate the payroll for all employees by merging together the generated contractual earnings and the entered additional earnings. The combination is the employeeās gross wages for the payroll period.
Once the gross wages have been totaled, Once the gross wages have been totaled, PAYROLL MANAGER completes the calculation as based upon the employeeās specific voluntary deductions and the current yearās tax tables. The calculation will result in the employeeās net wages for the period.
After the calculation of the payroll, the user can then work with and review the payroll periodās data in a variety of formats. The user can generate reports to compare to batch totals of timesheets, correct any discovered errors or discrepancies re-generate and re-calculate select employees to account for changes, and view individual payroll checks on screen.
Printing the Checks
After any errors have been corrected and all of the checks are determined to be correct, the user can print the periodās payroll checks. After the checks have been printed and reviewed, the payroll data can be posted to the individual employeeās file.
For additional information, please refer to the Sample Payroll Procedure.
Payroll Modules
The PAYROLL MANAGER program can be broken up into three different sections or modules. Each module has its own specific purpose in the program. Similar operations have been grouped together to simplify PAYROLL MANAGER'S operation
The three modules consist of routines for:
Processing
Requests
Setting the Payroll Parameters
The payroll process for each payroll period begins in the Payroll Processing section by setting the payroll parameters for the current payroll period. To enter the set payroll parameters module, select Processing
ą
Set Payroll Parameters from the PAYROLL MANAGER Main Menu.
Before data for a new payroll period can be entered, the payroll period must be defined. To define a new payroll period:
·
Click UPDATE from the update panel.
·
Enter the Start Date of the current payroll period to be defined and press TAB.
·
Enter the End Date of the current payroll period and press TAB.
·
Enter the Check Date of the current payroll period and press TAB. This date should be the date of the payroll, not necessarily the date they will be printed.
Payroll Tips:
0
The date of the checks should be the date of the payroll. Normally, payroll checks are prepared prior to the payroll date. Checks dated for the date of the payroll and not for the date they are prepared will reduce any potential irregularities in the payroll process.
·
Enter the Starting Check number of the next payroll check and press TAB.
·
Enter the Payroll Number and press TAB. This is a number unique to a district.
Payroll Tips:
0
The YES or NO options for the payroll generated, taxes calculated, P/R Checks printed and Payroll posted will change automatically as the procedures are completed by the user. You do not need to enter these values.
Repeat the same process for the next payroll.
·
Enter the Payroll Cash account code as used in ACCOUNTING MANAGER to record transactions in the payroll checking account and press TAB. FINANCE MANAGER will automatically default to the A200 account number. To select another account the user can click the magnifying glass to display a list of available General Ledger accounts.
·
If the payroll includes Direct Deposit of employeeās wages, enter āEā for āEnabledā and press TAB. If Direct Deposit is not used, enter āDā for āDisabledā and press TAB
·
If the payroll has been encumbered and is to be liquidated by a purchase order, enter the purchase order number and press TAB.
Select the type of Payroll Routine. The different Payroll Routines are:
Regular This routine is for a normal regular biweekly payroll.
Year-End This routine will prepare the year end āmulti-payā payroll to satisfy fiscal contracts.
Split Period This routine is intended for any payroll period that is less than the full payroll cycle. It will allow the earnings to be split into a smaller period, i.e. to pay for only 6 out of 10 days in the payroll period. This routine is commonly used for the first biweekly payroll in the fiscal year where only a partial period is being paid.
·
Enter the default hourly multipliers to be used for the payroll, if applicable.
·
Click SAVE to lock in the information.
Shifting the Periods
As each payroll period passes, the user must shift the payroll into the proper time frame. PAYROLL MANAGER uses three different definitions to refer to payroll periods. The three definitions are:
Previous - the most recent payroll period
Current - the current payroll period
Next - the next payroll period
To shift the payroll to the next payroll period:
·
Click the SHIFT Button.
·
PAYROLL MANAGER will automatically shift the current payroll to the previous period.
·
The user may then fill in the current dates to begin the new periodās payroll.
Payroll Tips:
0
The user cannot shift to the next payroll period unless the most recent payroll period has been completed, printed, and posted and the YES or NO fields on the P/R Parameters screen must all read YES.
0
āPostā on the P/R Parameters screen may not change to YES if checks with errors remain in the Display/Modify Checks screen.
Setting the Payroll Frequencies
Because not all employees are paid in the same way, PAYROLL MANAGER allows the user to create and use payroll frequency codes to pay and deduct selected items at different times.
To set the payroll frequency codes:
·
Select the FREQUENCY tab.
·
Select the desired frequency.
·
To turn the frequency code on or off for this payroll, you can either double click the deduction or earning column, or type āYā for āYESā or āNā for āNOā and click SAVE to include the earning and/or deduction codes in the current payroll period. The ability to change the āYESā or āNOā in the columns is based on the type column. If the type column displays deductions you can only change the deduction column, like wise if the type column displays earnings you can only change the earnings column, and if the type column displays both you can change both the earnings and deductions columns. Another indication of the ability to change the āYESā or āNOā in the columns is that the appropriate āYESā or āNOā will be highlighted in green.
Payroll Tips:
0
The ability to update or change the YES or NO option for the earning or deduction fields will be based on the frequency chosen.
For more information about the use of pay frequencies, please refer to Maintenance Menu - Pay Frequencies.
Employee Type
The Employee Type Tab is used to update the type of payments that will be made to each employee type.
·
Select the employee type from the listing by using the scroll bar.
·
To change the type of payment that will be made to the employee type you must double click the correct column either contractual or supplemental to turn the payment on or off for that employee type. YES will have the payment be made, NO will stop the payment. These changes need to be made for each payroll they will not be saved in the database.
Generating Payroll
Once the payroll parameters for the current payroll period have been set, the payroll should be generated. To generate the payroll, select Processing
ą
Generate Payroll from the PAYROLL MANAGER Main Menu.
PAYROLL MANAGER will ask the user to define the range of employees for the payroll being generated. To enter the range:
·
To generate all employees, leave the selection criteria blank.
·
To generate a range of employees enter the first employee number of the range and press TAB twice.
·
Enter the last employee number of the range and press TAB. To select an employee click the magnifying glass to display a list of available employees from which to select.
·
Click "OK" to generate the payroll information. The generation will display across the bottom of the screen as it occurs.
PAYROLL MANAGER will automatically generate the payroll for all active, contractual employees within the selected range.
Payroll Tips:
0
To re-generate a single employee, simply enter the desired employee number as both the beginning and ending number of the range. An employee or group of employees may be regenerated an infinite number of times prior to printing payroll checks. Once regenerated, the employeeās deduction information will be reset to zero and the applicable taxes and deductions MUST be calculated again.
0
Once a check has been generated, inactivating an employee will NOT remove it from the generated list. The user must manually delete the check form the Display/Modify Check screen.
Timesheets
Timesheet Input Utility
To access the Timesheet Input Utility function, select the Timesheet Input Utility option from the Processing drop-down menu or simply select the Timesheet button.
The Timesheet Input Utility function allows you to group and enter payroll period data by account, earnings, building, department, employee type, or employee name. These various methods of data input help to expedite the payroll process. Blank timesheet input worksheets can be printed and distributed to various departments. Once the worksheets are completed and returned to the Payroll Department, the data can be easily entered. Once entered into the system, the data is transferred to the current payroll checks.
Data Entry
The Data Entry folder contains a listing of those timesheet records that were created either through the Maintenance folder or set up through the Utilities folder. This folder facilitates the Payroll Timesheet process in that the user can simply go down the list of timesheet entries and enter the proper number of units to be paid.
Printing
The Printing folder is used to print completed timesheet data so that you may verify your entries before transferring the data to the current payroll.
Maintenance
The Maintenance folder is used to add, update, or delete a timesheet record for an employee.
Transfer
The Transfer folder is used to transfer timesheet data to the current payroll checks.
Utilities
The Utilities folder is used to create, initialize, or purge timesheet entries for all employees associated with a specific group (Account, Earnings, Building, Department, Employee Type, Employee). You may also generate blank timesheet input worksheets.
Timesheet Data
The Data Entry folder contains a listing of those timesheet records that were manually created either through the Maintenance folder or automatically set up through the Utilities folder. This folder facilitates the Payroll Timesheet process in that the user can simply go down the list of timesheet entries and enter the proper number of units to be paid.
The Timesheet Entry browser displays the following information: Employee Number, Employee Name, Social Security Number, Employee Type, Account Code, Earnings Code, Building Code, Department Code, Units, Pay Rate, and Extended Amount. The Timesheet Pay Entry function allows you to group and enter payroll period data by account, earnings, building, department, employee type, or employee name. These various methods of data input help to facilitate and expedite the payroll process.
To Use the Timesheet Pay Entry Window:
1. Use the radio buttons in the Entry By field located above the browser to indicate how the timesheet data is being grouped and inputted. Employee timesheet records can be sorted in any one of the following methods: by Account Code, Earnings Code, Building, Department, Employee Type, or Employee Number. Once the timesheet entry method has been specified, the column heading in the browser is highlighted to reflect the selected entry method.
2. Optionally select a secondary sort for timesheet entry by flagging the appropriate radio button in the List By field located below the browser. Within each primary sort method, a secondary sort by employee number, employee name, or social security number may be specified. For example, if timesheets are entered alphabetically by employee name within each building, set the Entry By radio button to Building and the List By radio button to Employee Name.
3. The Show radio buttons can be used to restrict the browser to specific timesheet entries. All Timesheet Reports contain the following information: employee number, employee name, account number, earnings code, building, department, employee type, pay rate, units, extended pay amount, transfer flag (indicating whether the timesheet information has been transferred to the current payroll), timesheet entry date, and initials of the individual who entered the timesheet information. Subtotals are provided for each group and for the entire timesheet.
Timesheet Data Maintenance
The Maintenance folder is used to add, update, or delete a timesheet record for an employee. If you already have used the Setup Entries by Account option under Timesheet Utilities, those timesheet records are displayed on the Maintenance folder.
Each timesheet record in the browser includes the following information: employee number, employee name, social security number, account number, earnings code, pay rate, and number of units. Use the Sort radio buttons to change the sort order of the information contained in the browser. Records may be displayed in employee name, number, or social security number order. Use the Starting field to change the starting point of timesheet records contained in the browser.
R ā Regular Pay
O ā Overtime Pay
U ā Doubletime Pay
I ā Differential Pay
X ā Extra Pay
D ā Per Diem Pay
To display more earnings codes, use the Earnings Code Lookup browser to select the appropriate code.
·
If the Earnings Code selected is Regular Pay, this field defaults to the Regular Account code defined on the Earnings window in Employee Maintenance.
·
If the Earnings Code selected is Overtime Pay and the employee is an Hourly employee, this field defaults to the Overtime Account code defined on the Earnings window in Employee Maintenance.
·
This field defaults to the pay rate associated with the earnings code as defined on the Earnings window in Employee Maintenance. If the Earnings code is for Overtime or Doubletime Pay, the system calculates the appropriate pay rate based on the hourly pay factors defined in the Set Payroll Parameters function.
Adding a Timesheet Record
·
Select the Add button.
·
Enter all appropriate timesheet information.
·
Select the Save button to lock in the new information.
Finding a Timesheet Record
In order to edit/change or remove a timesheet record, you must first identify the appropriate record. PAYROLL MANAGER allows you to locate records using the SORT method with three search options.
Name Select the Name radio button in the Sort box to sort timesheet records by employee last name. In the Starting field, type in all or part of the employeeās last name. The starting point of the records in the listing is based on the sort criteria you enter.
Number Select the Number radio button in the Sort box to sort timesheet records by employee number. In the Starting field, type in all or part of the employee number. The starting point of the records in the listing is based on the sort criteria you enter.
SSN Select the SSN radio button in the Sort box to sort timesheet records by social security number. In the Starting field, type in all or part of the social security number. The starting point of the records in the listing is based on the sort criteria you enter.
Editing a Timesheet Record
·
Highlight the appropriate timesheet record from the list.
·
Select the Update button.
·
Make changes by typing over the existing data.
·
Select the Save button to lock in the new information.
Deleting a Timesheet Record
·
Highlight the appropriate timesheet record from the list.
·
Select the Delete button.
·
Confirm that this is the correct record that you wish to delete. Click Yes to delete the record. Click No if you do not wish to delete the record.
Exiting from Timesheet Maintenance
·
Select the Exit button to return to the PAYROLL MANAGER Main Menu.
Transfer Timesheet Data
The Transfer folder is used to transfer timesheet data to the current payroll checks.
NOTE: This function should only be used after the timesheet data has been entered and verified. Use the Printing folder tab to print a timesheet report to ensure that all data is correct before generating the timesheet transfer process.
To Transfer Timesheet Data:
1. Select the OK button.
2. A message box displays asking you to confirm that you wish to proceed with the timesheet transfer process at this time. Select YES if you wish to transfer timesheet data. Otherwise, select NO.
3. Once data has been transferred, the system displays an Information box stating that the transfer is complete.
The timesheet entries on the Data Entry window are displayed in red, indicating that the data has been transferred to the current payroll. The transferred payroll records can be viewed using the Display/Modify Current Payroll Checks function or Enter Additional Earnings. At this point, updates to the units and amount values are not permitted. Use the Enter Additional Earnings function to make any necessary changes.
Timesheet Utilities
The Utilities folder is used to create, initialize, or purge timesheet entries for selected or all employees associated with a specific group (Account, Earnings, Building, Department, Employee Type, Employee). You may also generate blank timesheet input worksheets.
Setup Entries Utility
This utility creates a new timesheet entry for all employees with Hourly or Per Diem appointments based on a specified date range. If any new employees were hired since the last payroll was run, this utility will create a timesheet entry for those employees. This utility can also be used to create a new timesheet entry for hourly or per diem employees at the start of the fiscal year.
1. Use the buttons on the left-hand side of the window to indicate how the timesheet entries are to be set up. Employee timesheet records can be set up in any one of the following methods: by Account Code, Earnings Code, Building, Department, Employee Type, or Employee.
2. Once the setup method or group has been specified, use the browser to select specific criteria for the setup process. If the employee is contractual and has been generated, a check already exists and the employee simply needs to be selected to add additional earnings information. To select an existing employee:
·
Select the employee from the list, either through the SORT method or by using the scroll bars.
·
Select the Additional $ tab.
Once created or selected to be processed, additional earnings can be entered. Select the type of earning to enter. When a selection is chosen, the Additional Earning Screen will appear.
Finding an Employeeās Current Payroll Data
In order to edit/change or delete an employeeās payroll data for the current period, it is necessary to locate it. The SORT method assists the user in locating the data by four search options.
NAME Allows the user to type in the employee name being searched EMP NUM Allows the user to type in the employee number being searched
Removing an Employeeās Current Payroll Data
Users can remove an employeeās current payroll period data from any open listing, essentially removing the employeeās check.
·
Select the individual employee from the Current Payroll Checks listing
·
Click DELETE from the Update Panel
·
PAYROLL MANAGER will ask, "Delete this payroll check?"
·
Click āYESā to delete the employeeās check or click "No" to keep the information.
Exiting the Payroll Processing
Selecting EXIT from the Update Panel will return the user to the PAYROLL MANAGER Main Menu.
Entering Additional Wages
·
Select ADD from the Update Panel
·
Enter the Earning type "H" for hourly, "P" for per diem wages, or "S" for supplemental and press TAB.
For Hourly Wagesā¦
·
Enter the type of pay, āRā for regular, āXā for extra, āOā for overtime, āUā for double-time, āHā for holiday, āVā for vacation, āIā for differential pay or āSā for stand-by time and press TAB.
·
Continue to follow the directions for All Entries
For Per Diem Wagesā¦
·
PAYROLL MANAGER automatically provides the user with the correct type and code
·
Continue to follow the directions for All Entries.
For Supplemental Wagesā¦
·
Enter the supplemental earning code and press TAB (Click the magnifying glass to view all available earning codes, select the code from the list and click exit to return to the Additional $ screen).
·
Continue to follow the directions for All Entries.
All Entries...
·
Enter the number of hours, if necessary, and press TAB.
·
Enter the hourly rate. The default rate displayed by PAYROLL MANAGER is the employeeās hourly rate from their earnings information screen (Screen 4) multiplied by the respective hourly multiplier as indicated in the Set Payroll Parameters (Please refer to Employee Information - Earnings Information - Screen 4)
·
The default amount displayed by PAYROLL MANAGER is the number of hours multiplied by the hourly rate
·
Enter the desired tax method, ā0ā for taxation at the employeeās normal tax rate or ā9ā for the taxation at the reduced supplemental flat tax rate, and press TAB. These are the only two allowable taxation methods for earnings as detailed by the Internal Revenue Service in its Publication 15, Circular E, Employerās Tax Guide
·
Enter the retirement System Code, or click the magnifying glass for an available listing and press TAB. If the specific earning is to be excluded from the retirement system calculations for the employee, select āXā to exclude.
·
Enter the budgetary account to be expensed and click SAVE to lock in the new information (click the magnifying glass to view all available payroll accounts).
Payroll Tips:
0
Payroll Manager displays the default account. The default code is the budgetary account code with the highest Fiscal Year-to-Date earnings for the employee for the Earning Code entered.
·
Enter additional items in the same manner
Modifying Additional Wages
·
Select the earning line to change.
·
Select UPDATE from the Update Panel.
·
Press TAB until the desired information to be changed is selected.
·
Enter in the correct data and click SAVE. PAYROLL MANAGER will automatically replace the old data and return to the item listing.
Payroll Tips:
0
Payroll Manager allows the user to change all information except the employee type. If the employee type needs to be changed then the user must enter a new additional wages earning line.
Removing Additional Wages
·
Select the earning line to remove.
·
Click DELETE from Update Panel.
·
PAYROLL MANAGER will ask āDelete this earning?ā click "YESā to remove the earning line or click "No" to keep it.
Exiting the Payroll Processing
Selecting EXIT from the Update Panel will return the user to the PAYROLL MANAGER Main Menu.
Calculating Payroll
After the base salary has been generated, and the additional earnings data has been processed, the gross and net wages are ready to be calculated. PAYROLL MANAGER completes the payroll calculation based upon the employeeās specific deductions and the current yearās tax tables. The calculation will result in the employeeās net earnings for the period.
To calculate the payroll, select Processing
ą
Calculate Payroll from the PAYROLL MANAGER Main Menu.
PAYROLL MANAGER will ask the user to define the range of employees that should be calculated for the payroll. To enter in the range:
·
Enter the first employee number of the range and press TAB or click the magnifying glass to select from the employee list.
·
Enter the last employee number of the range and press TAB or click the magnifying glass to select from the employee list.
·
To select all employees, leave the selection criteria blank.
·
Click "OK" to generate the payroll. PAYROLL MANAGER will automatically calculate the payroll for the selected employees.
Payroll Tips:
0
To re-calculate a single employee, simply enter the desired employee number as both the beginning and ending number of the range. An employee or group of employees may be recalculated an infinite number of times prior to printing payroll checks. Once recalculated, the employeeās tax and deduction information will be reset to the recalculated amounts, overwriting any amounts modified through Display/Modify checks.
Display/Modify Payroll Checks
After the payroll has been generated, processed, and calculated, the checks may be displayed on screen to verify the calculation process and modified, if necessary. To display or modify checks in the current payroll, select Processing
ą
Display/Modify Checks from the PAYROLL MANAGER Main Menu.
PAYROLL MANAGER will display a listing of all non-posted checks. You may not modify information for manual checks or checks that have already been printed.
Finding an Employeeās Current Payroll Check
In order to edit/change or delete an employeeās payroll check for the current period, it is necessary to locate it. The SORT method assists the user in locating the data.
NAME Allows the user to type in the employee name being searched
NUMBER Allows the user to type in the employeeās employee number being searched
Modifying an Employeeās Check
At times, modifications that apply for only one payroll period must be entered. To make these modifications:
·
Select the employeeās check (as detailed above).
·
Select the View Tab.
·
Select UPDATE from the Update Panel.
·
Press TAB until the desired field is reached. Enter the new data and click SAVE. The new data will replace the old data.
·
After the last item is entered the gross wage amounts and net amount of the check will be recalculated.
Payroll Tips:
0
When a check is modified in PAYROLL MANAGER, all applicable wages and FICA and Medicare withholding will be recalculated for the check. The related federal, state, and city tax withholdings will not be recalculated. To enable the system to recalculate the withholdings, modifications should be made to the employeeās master records and the payroll check should be regenerated and recalculated.
Override an Employeeās Wages
PAYROLL MANAGER provides user the ability to override the calculated wages. Any modifications to an employeeās wages should be documented and reported on the necessary federal, state, and local wages reports.
·
Click the OVERRIDE WAGES button.
·
PAYROLL MANAGER will prompt the user for a password. Enter in the System Supervisor Password to continue.
·
Enter the desired gross, FICA, Medicare, Federal or State wages.
·
When a user has selected to override a payroll checks wages, PAYROLL MANAGER will internally mark the check with the time, date, and user identification for audit control purposes.
For Earnings and Deductions, a separate tab will display their respective windows.
Contractual Earnings
If the employee is a Contractual Employee the user will be able to enter the account for the earnings and either the percentage or amount.
Adding a Contractual Earning
·
Click ADD from the Update Panel.
·
Enter the account number or Double Click the text box to display the Employee Account Code look-up screen.
·
After selecting the Code enter the percentage for that code or press tab and enter the amount for that code (If you use the percentage method it must total 100% before you can leave the screen).
·
Enter addition information in the same manner. When all information has been entered click SAVE to lock in the new information.
Modify Contractual Earnings
·
Click UPDATE on the Update Panel.
·
Click the earnings line that needs to be changed.
·
Enter in the new information and click SAVE. PAYROLL MANAGER will automatically replace the old data with the new data.
Remove a Contractual Earning
·
Click the earnings line that you would like to delete.
·
Click DELETE from the Update Panel.
·
PAYROLL MANAGER will ask, "Ok to delete the selected earning record?" click "Yes" to delete the record, or click "No" to keep the record.
Processed Earnings
If the employee is not contractual the user will enter the information in the processed earnings screen.
Adding Processed Earnings
·
Click ADD from the Update Panel.
·
Enter the employee type, double click the text box or press F6 to display the employee type look-up screen.
·
Enter the earning code, double click the text box or press F6 to display the earnings code look-up screen.
·
Enter the number of hours for the employee and press TAB.
·
Enter the rate of pay for the employee and press TAB twice. The amount will automatically be calculated for you.
·
Enter the tax method "0" for normal or "9" for 28% Federal, 7.35% NY State and 4.080 NY City.
·
Enter the Retirement System Code āXā to exclude, "E" for NYS ERS, "P" for NYS Police, "T" for NYS.
·
Enter the account number, double click the text box or press F6 to display the employee type look-up screen.
·
Enter additional processed earnings in the same manner.
·
After all entries have been made click SAVE to lock in the new information.
Deductions
·
Click ADD from the Update Panel.
·
Enter the deduction code, double click the text box or press F6 to display the deduction code look-up screen.
·
Enter the amount to be deducted.
·
Click SAVE to lock in the new information.
·
Enter additional entries in the same manner.
Remove Deductions
·
Select the deduction line to be removed.
·
Click DELETE from the Update Panel.
·
PAYROLL MANAGER will ask, "Ok to delete the selected deduction record?" click "Yes" to remove the record or click "No" to keep the record.
Direct Deposit
·
Click ADD from the Update Panel
·
Enter the bank code, double click the text box or press F6 to display the Employee Direct Deposit Bank look-up screen.
·
Enter the amount of the deposit.
·
Enter additional entries in the same manner.
·
After all entries have been made click SAVE to lock in the new information.
Modify a Direct Deposit
·
Select the Direct Deposit line to be changed.
·
Click the amount text box to change the amount of deposit. (If the Bank Code needs to be changed the user can both delete the old code and add a new one or keep the old code and add a new code.)
Removing a Direct Deposit
·
Select the direct deposit to be deleted.
·
Click DELETE from the Update Panel. ·
PAYROLL MANAGER will ask, "Ok to delete the selected direct deposit record?" click "Yes" to remove the record or click "No" to keep the record.
Removing an Employeeās Check
Users can remove an employeeās current payroll period data from any open listing, essentially removing the employeeās check.
·
Select the Check tab.
·
Select the individual employee from the Current Payroll Checks listing
·
Select the Maintenance tab.
·
Click DELETE from the Update Panel
·
PAYROLL MANAGER will ask, "Delete this manual check?" click āYESā to delete the employeeās check or "No" to keep the check.
Exiting Display/Modify
·
Selecting EXIT from the Update Panel will return the user to the PAYROLL MANAGER Main Menu.
Printing the Payroll Checks
After the payroll modifications are completed, the checks may be physically printed. To print the current payroll, select Processing
ą
Print Payroll Checks from the PAYROLL MANAGER Main Menu.
Updating the Check Printing Option
PAYROLL MANAGER will ask the user to define the print options for how employee payroll checks should be printed. To update the options:
·
Enter the starting and ending building of the range and press TAB. Leave blank to select all buildings.
·
Enter the first and last employee number of the range and press TAB. Leave blank to select all employees.
·
Enter the account number of the payroll bank account.
·
Enter the starting check number and press TAB. The starting check number should be the first check ready to print after loading the checks into the printer.
·
Enter the check date and press TAB.
·
If Direct Deposit is enabled and the Direct Deposit Stubs are to be printed in a separate print run, enter the starting Direct Deposit Stub number and press TAB. The starting stub number should be the first check ready to print after loading the forms into the printer (please refer to SYSTEM MANAGER, System Parameters, for more information on configuring PAYROLL MANAGER for a separate Direct Deposit Stub Run).
·
Enter the method of sorting the payroll checks, āBā for Building by Name, āDā for Department by Name, or āNā for Name only.
·
Enter āYesā to print the Building location next to the employeeās name. This will enable the building location to be seen when the check is in an envelope.
·
Enter āYesā to add messages by employee type. If "Yes" is entered click the icon ·
Enter āNoā to add a generic check message.
Update Employee Type Messages
PAYROLL MANAGER will ask the user to update the employee type message to print on the current payroll checks. After the checks are printed, PAYROLL MANAGER will automatically delete old messages to allow new messages to be inserted in the new payroll.
Changing an Message
·
Select UPDATE from the Update Panel.
·
Type in the message to be printed and click SAVE to lock in the new message.
Finding an Employee Type Message
In order to edit/change or delete an employee type message, it is necessary to locate it. The SORT method assists the user in locating the data.
TYPE Allows the user to type in the employee type code being searched
DESCRIPTION Allows the user to search by description.
Viewing an Employee type Message
Users can view an Employee Type Message from the open listing.
·
Select the individual employee type from the current listing
·
The message will appear in the message text box.
Exiting an Employee Type Message
Select EXIT from the Update Panel it will return the user to the Payroll Check Printing screen.
Printing the Checks
Payroll Tips:
0
The user should load the blank computer checks into the desired printer prior to selecting the Print Payroll Checks module.
After updating the Payroll Check Printing Options, the user can proceed to print the checks.
·
Click Print Checks from the Payroll Check Printing Options to print the checks
·
PAYROLL MANAGER will validate the current payroll checks to ensure they have been properly prepared. If any errors exist, the user will be prompted to correct the error before printing.
·
If printing checks, the system will prompt the user to align the checks in the printer.
·
After the checks are aligned, click āYESā to confirm and begin printing checks.
·
The check number on the screen will increase as each check is printed. A total of the number of checks will be displayed at the end of the print routine.
Re-running the Payroll Checks
After printing the checks, the user has the option of voiding and re-running the checks in case of errors during printing. To re-run the checks, click Re-Run Checks from the Payroll Check Printing Options.
PAYROLL MANAGER will review the checks that have been sent to the printer to determine if all checks or if only a portion were printed. The range of check numbers assigned to checks will be displayed on screen. The user may select to re-run all checks or only a selected range of check numbers.
·
Select to re-run All or a Range and press TAB.
·
If a range, enter the number range to re-run and press TAB.
·
Click āYESā to re-run the selected range.
·
The user will be returned to the Print Checks screen. Click the Print Checks button to reprint the checks.
Printing Direct Deposit Stubs
If PAYROLL MANAGER has been configured to print Direct Deposit Stubs on separate forms, options Print Stubs and Re-Run Stubs will be available (please refer to SYSTEM MANAGER, System Parameters, for more information on configuring PAYROLL MANAGER for a separate Direct Deposit Stub Run).
Payroll Tips:
0
The user should load the direct deposit forms into the desired printer prior to selecting the Print Stubs option.
After updating the Payroll Check Printing Options, the user can proceed to print the checks.
·
Select option Print Stubs from the Payroll Check Printing Options to print the stubs.
·
PAYROLL MANAGER will validate the current direct deposit stubs to ensure they have been properly prepared. If any errors exist, the user will be prompted to correct the error before printing.
·
If printing forms, the system will prompt the user to align the checks in the printer.
·
After the forms are aligned, Click OK to confirm and begin printing.
·
The Direct Deposit Stub number on the screen will increase as each check is printed. A total of the number of stubs will be displayed at the end of the print routine.
Re-running Direct Deposit Stubs
After printing the stubs, the user has the option of voiding and re-running the stubs in case of errors during printing. To re-run the checks, select Re-Set Stubs from the Payroll Check Printing Options.
PAYROLL MANAGER will review the stubs that have been sent to the printer to determine if all stubs or if only a portion were printed. The range of stub numbers used will be displayed on screen. The user may select to re-run all direct deposit stubs or only a selected range.
·
Select to re-run All or a Range and press ENTER.
·
If a range, enter the number range to re-run and press ENTER.
·
Click OK to re-run the selected range.
Post the Checks
Once the payroll checks and, if applicable, the direct deposit stubs are printed and are determined to be accurate, the checks must be posted. Posting the checks records the information permanently in the employeeās payroll file.
To Post the Payroll Checks
·
Click Post Checks from the Payroll Check Printing Options screen.
·
Read the check-posting message that appears on screen. Click "OK" or click "Cancel".
·
Click āYesā to post the payroll checks.
·
Click āNoā to leave the routine and not post the payroll checks.
·
If errors are found while trying to post a list of the checks with errors will be displayed on screen.
Payroll Tips:
0
Why should I post my payroll checks immediately?
0
Payroll checks should be posted immediately so that no unwanted changes are made to the checks that have already been printed. Any changes that are made might lead to discrepancies between the printed checks and the posted checks. Also, final payroll journals may not be printed until the checks are posted.
Void and Reissue Payroll Checks
The Void and Reissue Payroll Checks function is accessed by selecting the Supervisor Utilities option from the Utilities drop-down menu, and then selecting Void and Reissue Payroll Checks. For a screen image, please click Void and Reissue Payroll Checks.
The Void and Reissue Checks function allows you to record a printed and posted check as void and, if needed, reissue another replacement check. This function can be utilized to reissue a lost check. This function can also be used in a situation where a deduction pay flag was inadvertently turned off before checks were printed and posted, and it becomes necessary to void an entire check run. You may choose to void one, multiple, or all checks having a specified check date.
The Void Only option may be performed for regular-type checks, including those that are direct deposit. The Void and Reissue option may only be used for regular-type checks that are not direct deposit. During the void check process, the system reverses the earnings, deductions, and taxes.
To Perform the Void/Reissue Payroll Check Process:
1. Enter the date of the check(s) to be voided or voided and reissued.
2. The Effective Date of Void field defaults to the same date as that entered for the Date of Check. Accept the default value or enter the effective date of the void.
3. Select the appropriate action that you wish to perform. To enter a manual check, select Processing
ą
Enter Manual Check Info from the PAYROLL MANAGER Main Menu.
The top portion of the Manual Check Maintenance window contains a listing of those manual check records that have not yet been posted through the check posting process.
The middle portion of the window contains the three essential elements that must be balanced in order to complete the manual check function.
Total Earnings This system-calculated field represents the total earnings entered on the Earnings folder, with the exception of Non-Cash earnings.
Total Deductions This system-calculated field represents the total deductions entered on the Deductions and Taxes folder.
Net Pay This user-defined field represents the Net Pay amount entered on the Check Entry folder. The Total Earnings minus the Total Deductions must equal the Net Pay.
The bottom portion of the window contains the folders used to record the check entry, earnings, deductions, and taxes.
Check Entry
NOTE: If you are using the Manual Checks function to make an adjustment to an employeeās pay that has already been posted to Payroll, the Post Date should be the next posting date. If you are making an adjustment to an employeeās pay that has not yet been posted to Payroll, the Post Date should be the current posting date.
Adding a Manual Check
·
Click the Check Entry Tab.
·
Click ADD from the Update Panel.
·
Enter the employee number and press TAB. Click the magnifying glass to view a list of available employees.
·
Enter the manual check number and press TAB.
·
Enter the date of the manual check and press TAB. This should be the actual date that the manual payroll check was issued.
·
Enter the effective posting date of this manual check.
Payroll Tips:
0
The manual payroll checks will be summarized on the payroll journal for the effective posting date.
·
Enter the Net Amount of the manual check and press TAB.
·
Select the Save button to lock in the new information. The manual check record displays in the browser at the top of the window.
Payroll Tips:
If more than one manual check record displays in the browser, the system does not allow you to switch to a different manual check record until the check record being processed is in balance (Net Pay equals Total Earnings minus Total Deductions). Likewise, the system only permits you to exit the Manual Checks function when your entries are balanced.
Payroll Tips:
Use the Display/Modify Current Payroll Checks to view the manual check record. The Check Type displays as Manual with the Sequence Number of 80 or greater. The Employee Type defaults from the Information folder in Employee Maintenance. The Building defaults to the Check Delivery To building from the Tax Withholding folder in Employee Maintenance.
Editing/Changing an Employeeās Check
PAYROLL MANAGER provides the user with the ability to edit and change manual checks prior to posting
·
Click the Manual Checks tab.
·
Select the individual check from the listing
·
Click the Maintenance tab.
·
Click UPDATE from the Update Panel.
·
Press TAB until the desired information to be changed is selected.
·
Enter in the correct data and click SAVE. PAYROLL MANAGER will automatically replace the old data.
Removing a Manual Check
·
Select the individual check from the Manual Check Tab listing.
·
Click the Maintenance tab.
·
Select DELETE from the Update Panel.
·
PAYROLL MANAGER will ask you āDelete this manual check?ā
·
Click āYesā to remove the check.
·
Click āNo" to keep the check.
Earnings
The Earnings folder is used to enter the earnings information associated with the manual check. Earnings records are created by Type (Contract, Supplemental, Hourly, or Per Diem).
If the earnings type is Contract, the earnings code must be either Contract, Contract Adjustment, Docked or Retro.
If the earnings type is Supplemental, you may select any of the earnings codes from the Earnings Code File.
If the earnings type is Hourly, the earnings code must be any one of the following: Regular, Extra, Overtime, Doubletime, Holiday, Vacation, Differential, or Standby.
If the earnings type is Per Diem, the system defaults the earnings code to PER DIEM.
Adding Earnings Information
·
Click the Add button from the update panel.
·
Select the Earning Type from the drop down menu.
·
Select the Earning Code from the drop down menu.
·
Enter the account code or click the magnifying glass to select from a list of available account codes.
·
Enter the number of units and press TAB.
·
Enter the rate of pay and press TAB.
·
Enter the Retirement System or click the magnifying glass to select from a list of available Retirement System Codes.
·
Click the Save button to lock in the new information. The sum of all earnings records, except for Non-Cash, are displayed in the Total Earnings field.
Editing/Updating the Earnings Information
·
Click UPDATE from the update panel.
·
Select the information to be changed.
·
Enter the new information and click SAVE. FINANCE MANAGER will automatically replace the old information with the new.
Deleting an Earnings Record
·
Highlight the earnings record that you wish to delete.
·
Click the Delete button from the update panel.
·
PAYROLL MANAGER will ask āAre you sure you want to delete?ā
·
Click YES to delete the earnings record. Click NO to keep the earnings record.
Deductions
The Deductions folder is used to enter the voluntary deduction information associated with the manual check. The system only allows entry of deductions already defined for the employee on the Deductions folder in Employee Maintenance.
Adding Deductions Information
·
Click the Add button from the update panel.
·
Enter the Deduction code or click the magnifying glass to select form a list of available deduction codes.
·
Click the Save button to lock in the new information. The sum of all entered deductions are included in the Total Deductions field.
Editing/Updating the Deduction Information
·
Click UPDATE from the update panel.
·
Select the information to be changed.
·
Click SAVE to lock in the new information. PAYROLL MANAGER will automatically replace the old information with the new.
Taxes
The Taxes folder is used to enter the mandatory tax deduction information associated with the manual check.
The left-hand side of the folder contains the Wages which are used for W2 reporting and are system-calculated as follows:
FICA Wage Gross minus Flex deductions (not to exceed the yearly maximum).
Federal Wage Gross minus (Flex, Annuity, and Retirement deductions)
Medicare Wage Gross minus Flex deductions
State Wage Gross minus (Flex and Annuity deductions)
City Wage Gross minus (Flex and Annuity deductions) (Calculated only if the City W/H flag is checked on the Tax Withholding folder in Employee Maintenance.)
Payroll Tips:
During the Update mode, you may use the Override button to change and save any of the system-calculated Wages.
Adding Tax Deductions
·
Click the Update button.
·
Enter all appropriate tax deduction information.
·
Use the Override button if necessary to change any of the system-calculated Wages.
·
Click the Save button to lock in the new information. The sum of all entered tax deductions are included in the Total Deductions field.
Payroll Tips:
0
Once entered, the manual check(s) must still be posted to the employeeās records. (Please refer to Posting Payroll Checks).
Override an Employeeās Wages
PAYROLL MANAGER provides user the ability to override the calculated wages. Any modifications to an employeeās wages should be documented and reported on the necessary federal, state, and local wages reports.
·
Click the OVERRIDE button.
·
PAYROLL MANAGER will prompt the user for a password. Enter in the System Supervisor Password to continue.
·
Enter the desired gross, FICA, Medicare, Federal or State wages
·
When a user has selected to override a payroll checks wages, PAYROLL MANAGER will internally mark the check with the time, date, and user identification for audit control purposes
Exiting the Manual Checks Module
Selecting EXIT from the Update Panel will return the user to the PAYROLL MANAGER Main Menu.
Employee Types
Employee types provide the user with the ability to create, edit, and define categories to classify all of the employees. Employees may be classified for reporting purposes and allow for uniform changes in basic payroll assumptions.
Select Maintenance
ą
Employee Types from the Payroll Maintenance Menu to enter the listing of employee types. A listing of employee types will be displayed in alphabetic order.
Adding an Employee Type
·
Click ADD from the Update Panel.
·
Type the employee type code (up to a maximum of five characters) and press TAB.
·
Enter the description and press TAB.
·
Enter a name of the bargaining unit for this employee type and press TAB.
·
If the employee type is instructional type āYā and press TAB.
·
If the employee type is substitute type āYā and press TAB. This will enable employees to be seen as available substitutes in attendance record data entry (please refer to HUMAN RESOURCES MANAGER, attendance data entry).
·
If the employee type is to be included in the current payroll Generation and Supplemental Earnings, type āIā for āIncludeā and press TAB.
·
Enter the length of the contract year in days and press TAB. This amount should represent the total, regular working days for the entire fiscal year for this employee type.
·
Enter the normal hours per day and months per year for the employee type and press TAB.
·
Enter the Default number of months in the contract and press TAB.
·
Enter in the default number of checks per fiscal year the employee type will be paid in and press TAB.
·
Enter the method of biweekly pay calculation, āDā if based upon the Daily Rate or āCā if based upon the number of Checks.
·
Click the Attendance Days button.
·
Enter in the number of sick, personal, vacation, and comp units earned per year, the maximum limit this employee type may accumulate, and the rate the time accrues at and press TAB. The accrue rate is used by the accrual utility as the default rate for each type.
·
Enter in the number of units, if any per fiscal year granted the employee type for personal reasons and comp time and press TAB. If the days convert to sick days at the end of the fiscal year, type āYā for yes and click the SAVE button to lock in the information.
Finding an Employee Type
In order to edit/change or remove an employee type, it is necessary to locate it. The SORT method assists the user in locating employee type by three search options.
TYPE Allows the user to type in the employee type code being searched
DESCRIPTION Allows the user to search by description.
Editing/Changing an Employee Type
PAYROLL MANAGER provides the user with the ability to edit and change employee types.
·
Select the employee type from the listing.
·
Click UPDATE from the Update Panel.
·
Press TAB until the information to be changed is selected.
·
Enter in the correct data and click SAVE. PAYROLL MANAGER will automatically replace the old data.
Removing an Employee Type
·
Select the individual employee type from the listing.
·
Select DELETE from the Update Panel.
·
PAYROLL MANAGER will ask you āARE YOU SURE?ā
·
Click āYESā to remove the type.
·
Click āNOā to keep the type.
HUMAN RESOURCES Tips
0
If employees are associated with the selected type, deletion is not allowed.
Employee Type Health
The Health screens are used to keep track of various medically related events (e.g. physicals). From the Employee Types listing, select the employee type that you wish to update. Select the HEALTH tab.
ADD...
·
Click ADD on the Update Panel.
·
Enter a new Health Event, or click the magnifying glass to view a list of available events.
·
Answer āYā if it is required, āNā if not required.
·
Enter a Next Due Date for employees of this type, if one standard date is to be used.
·
Enter any special instructions for this employee type.
VIEW...
·
Select a Health Event from the listing.
·
The Health Event information will be displayed on the right side of the screen.
CHANGE...
·
Select a Health Event from the listing.
·
Click UPDATE on the Update Panel.
·
Press TAB until the information to be changed is highlighted.
·
Click SAVE to lock in the changes.
REMOVE...
·
Select a Health Event from the listing.
·
Click DELETE on the Update Panel.
·
Enter āYā and press Enter to remove the record.
·
Enter āNā and press Enter to keep the record.
HUMAN RESOURCES Tips:
0
If you delete the Health Event, you will also delete this event from the employee's records.
PRINTā¦
·
If you enter a next due date, you may print a report of the health events due by clicking on the print icon.
Employee Type Salary Schedule
The path to the Employee Type Salary Schedule is Maintenance
ą
Employee Type
ą
Schedule. Salary schedule information can be set for each employee.
·
Select the desired employee type from the Employee Types tab.
·
Click the Schedule tab.
Adding a Salary Schedule
·
Click ADD from the Update Panel to add a new schedule
·
Enter the control ID or click the magnifying for a list of available Salary Schedules.
·
Enter the effective date for this schedule.
·
Enter the Start date.
·
Enter the End date.
·
Enter the Schedule type.
·
Click SAVE to lock in the new schedule.
Editing/Changing a Salary Schedule
·
Click the desired schedule from the list.
·
Click the UPDATE button from the update panel.
·
Press TAB until the information to be changed is highlighted.
·
Enter the new information and click SAVE. PAYROLL MANAGER will automatically replace the old data with the new data.
Removing a Salary Schedule
·
Select the individual salary schedule from the listing.
·
Click DELETE on the Update Panel.
·
PAYROLL MANAGER will ask you āDelete this record?ā
·
Click āYesā to remove the schedule.
·
Click āNo" to keep the schedule.
PRINTā¦
·
If you enter a salary schedule, you may print a report of the salary schedules by clicking on the print icon.
Exiting the Salary Schedule Module
Selecting EXIT will return the user to the PAYROLL MANAGER Main Menu.
Attendance Codes
To categorize employee attendance records uses PAYROLL MANAGER attendance codes. These codes are used to maintain employee sick, vacation, compensation and leave time records.
Select Maintenance
ą
Attendance Code from the main screen to enter the attendance codes module. The Attendance Codes Screen will be displayed, listing all codes in alphabetic order.
Adding a Code
·
Click ADD on the Update Panel.
·
Type the attendance code (up to a maximum of two characters) and press TAB.
·
Enter the description and press TAB.
·
If the absence is chargeable type āYā for āYESā and press TAB.
·
Enter the type the absence is chargeable against, āSā for sick, āVā for vacation, āPā for personal or āCā for comp time and press TAB
·
Select unit type, Hourly or Daily.
·
Enter āYā or āNā if it applies to Seniority Calculation.
·
Click SAVE to lock in the new attendance code.
HUMAN RESOURCES Tips:
0
There are five fixed attendance codes, *S, *P, *V, *C, and LV. The * codes are accrual codes used to grant employees units earned. The LV code is used to record extended period of unpaid leave. Any recorded leave is used in the calculation of seniority dates.
Finding an Attendance Code
In order to edit/change or remove an attendance code, it is necessary to locate it. The SORT method assists the user in locating the attendance code.
CODE Allows the user to sort by the attendance code being searched.
DESCRIPTION Allows the user to sort by code description.
Editing/Changing an Attendance Code
PAYROLL MANAGER provides the user with the ability to edit and change attendance codes.
·
Select the attendance code from the listing.
·
Select UPDATE from the Update Panel.
·
Press TAB until the information to be changed is highlighted.
·
Enter in the correct data and click SAVE. PAYROLL MANAGER will automatically replace the old data.
Removing an Attendance Code
·
Select the individual attendance code from the listing.
·
Select DELETE from the Update Panel.
·
PAYROLL MANAGER will ask you āDelete this attendance code?ā
·
Click āYes" to remove the code.
·
Click āNo" to keep the code.
Exiting the Attendance Code Module
·
Click the EXIT button to return to the PAYROLL MANAGER main menu.
Departments
A department is an individual segment, such as a specific division or department, of the municipal entity that is segregated for reporting purposes. A department code is assigned to each employee record in Employee Information Maintenance. Users may want to create and maintain departments to enhance the relevance of data in PAYROLL MANAGER.
The departments module provides the user with the ability to create, edit, and define department codes used within its system. Select Maintenance
ą
Departments from the PAYROLL MANAGER main screen. The Department Maintenance Screen will be displayed, listing all department codes in alphanumerical order.
Adding a Department
·
Click ADD from the Update Panel.
·
Type in the department number or code and press TAB.
·
Enter the department name and click SAVE to lock in the new code.
Finding an Existing Department
In order to edit/change or remove a department code, it is necessary to locate it. The SORT method assists the user in locating department codes by two search options.
CODE Allows the user to type in the department code number being searched.
NAME Allows the user to search by department name.
Editing/Changing Department Codes
PAYROLL MANAGER provides the user with the ability to edit and change department names. Department codes cannot be edited.
·
Select the individual department from the schedule listing.
·
Click UPDATE from the Update Panel.
·
Press TAB until the information to be changed is highlighted.
·
Enter in the correct name and click SAVE. PAYROLL MANAGER will automatically replace the old name.
Removing a Department
·
Select the individual department from the schedule listing.
·
Click DELETE from the Update Panel.
·
PAYROLL MANAGER will ask you āDelete this department?"
·
Click āYes" to remove the department.
·
Click āNo" to keep the department.
Payroll Tips:
0
If the department code has employees attached deletion will not be allowed.
Exiting the Departments Module
Selecting EXIT from the Update Panel will return the user to the PAYROLL MANAGER main screen.
Buildings
The buildings listing provides the user with the ability to create, edit, and define the individual building codes used within the system. Building Codes are used to help categorize or group employee by building for payroll and personel reporting and sorting purposes. You may also choose to print payroll checks by building. A Building Code is assigned to each employee record in Employee Information Maintenance. Select Maintenance
ą
Buildings from the PAYROLL MANAGER main screen to enter the Building Maintenance Screen, which lists all building codes in alphanumerical order.
Adding a Building
·
Click ADD from the Update Panel.
·
Type in the building code number and press TAB.
·
Enter the building name and press TAB.
·
Enter the building address and primary contact person. This address should be the shipping and/or mailing address of the building.
·
Click SAVE to lock in the new information.
Finding an Existing Building
In order to edit/change or remove a building code, it is necessary to locate it. The SORT method assists the user in locating building codes by two search options.
CODE Allows the user to type in the building code being searched
NAME Allows the user to type in the name of the building being searched.
Editing/Changing a Building
PAYROLL MANAGER provides the user with the ability to edit and change building names and addresses. Building codes cannot be edited.
·
Select the individual building code from the schedule.
·
Click UPDATE from the Update Panel.
·
Press TAB until the desired information to be changed is selected.
·
Enter in the correct data and click SAVE. PAYROLL MANAGER will automatically replace the old data.
Removing a Building
·
Select the individual building code from the schedule.
·
Click DELETE from the Update Panel.
·
PAYROLL MANAGER will ask you āDelete this building?ā
·
Click āYesā to remove the building.
·
Click āNo" to keep the building.
Payroll Tips:
0
If the building code has employees attached, deletion will not be allowed.
Exiting the Buildings Module
Selecting EXIT from the Update Panel will return the user to the PAYROLL MANAGER main screen.
Chart of Accounts
The chart of accounts provides the user with the ability to create, edit, and define the individual budgetary account codes used within its system. Select Maintenance
ą
Chart of Accounts from the PAYROLL MANAGER main screen to enter the chart of accounts. The Chart of Account Maintenance Screen will be displayed, listing all account codes in alphanumeric order.
Adding an Account
·
Select ADD from the Update Panel.
·
Type the account number and press TAB.
Accounting Tips:
0
Account numbers should begin with the individual fund letter followed by the account number as indicated by the New York State Uniform Chart of Accounts. Your fundās specific account number format is designated under the specifications of each fund. (Please refer to ACCOUNTING MANAGER: Maintenance - Funds). Be sure to follow your specified account code format.
·
Enter the account name and press TAB.
·
Enter the fund or click the magnifying glass to select from the Fund look-up listing.
·
Enter the account type and press TAB. Enter G for a general ledger account, S once for a subsidiary revenue account, or S twice for a subsidiary appropriation account.
·
Enter the Account Status, A for Active or I for Inactive, and press TAB.
·
Enter a State Consolidation Code to consolidate the account to for New York State reporting purposes. Be sure to enter in a valid State reporting code or click the magnifying glass to select from the State Consolidation look-up listing. After all new accounts have been entered click SAVE to lock in the new information.
Finding an Existing Account
In order to edit/change or remove an account code, it is necessary to locate it. The SORT method assists the user in locating account codes by four search options.
ACCOUNT Allows the user to type in the account number being searched
NAME Allows the user to type in the name of the account being searched.
TYPE Allows the user to sort by account type.
STATUS Allows the user to sort by account status.
Editing/Changing an Account
PAYROLL MANAGER provides the user with the ability to edit and change account codes. The account code and type cannot be changed once entries exist for the account code.
·
Select the individual account code from the schedule listing.
·
Click UPDATE from the Update Panel
·
Press TAB until the information to be changed is selected.
·
Enter in the correct data and click SAVE. PAYROLL MANAGER will automatically replace the old data.
Removing an Account
Unused account codes may be removed from the system provided no activity exists in the account history.
·
Select the individual account code from the schedule listing.
·
Click DELETE from the Update Panel.
·
PAYROLL MANAGER will ask you āDelete this account?ā
·
Click āYesā to remove the code.
·
Click āNoā to keep the account.
Exiting the Chart of Accounts Module
Selecting EXIT will return the user to the Maintenance Menu
Deduction Codes
To categorize and standardize employee payroll deductions PAYROLL MANAGER uses deduction Codes. Deduction Codes are assigned to employee records in Employee Deduction Information Maintenance.
Select Maintenance
ą
Deduction Codes from the PAYROLL MANAGER main screen to enter the Deduction Codes module. The Deduction Codes Screen will be displayed, listing all codes in alphabetic order.
Adding a Deduction Code
·
Select ADD from the Update Panel.
·
Type the Deduction Code (up to a maximum of eight characters) and press TAB.
·
Enter the description and press TAB.
·
If the deduction is an annuity, type āYā and press ENTER
·
If the deduction is a cafeteria or flex plan, type āYā and press TAB.
·
If a flex deduction, enter the necessary flex plan code, āDā for dependent care, āMā for medical, or āRā for reimbursement, and press TAB.
·
Enter the deduction type, āBā for deduction before taxes or āDā for after taxes, and press TAB.
·
Indicate whether the deduction requires a bank account number by entering āYESā or āNOā and press TAB.
·
If the deduction is to be excluded from the current payroll calculation, type āYā for āYESā and press TAB.
·
Enter the proper print position for this deduction. This field is active only if the Use P/R box number for P/R Deductions flag is checked in the System Parameters Preference Maintenance Function.
·
Enter the default settings for this deduction code. These defaults will be used every time the deduction is added to an employeeās master information. Defaults exist for the pay frequency, times taken per year, deduction year, deduction type, fixed amount, and year-to-date dollar limit.
·
Enter the general ledger account code the deduction is to be recorded in, if any, and press TAB. Click the magnifying glass to view available account codes from the Account look-up screen.
·
If this deduction is payable to a single accounts payable vendor, enter the desired vendor number. Click the magnifying glass to view available vendors from the Vendor Maintenance screen.
·
If the deduction is before taxes, indicate the tax withholdings the deduction is exempt from by clicking the Exemptions buttons.
Finding an Deduction Code
In order to edit/change or remove a deduction code, it is necessary to locate it. The SORT feature assists the user in locating deduction codes by three search options.
CODE Allows the user to type in the deduction code being searched.
DESCRIPTION Allows the user to type in the description of the deduction code being searched.
TYPE Allows the user to sort the listing by type.
Editing/Changing a Deduction Code
PAYROLL MANAGER provides the user with the ability to edit and change deduction codes.
·
Select the deduction code from the listing.
·
Click UPDATE from the Update Panel.
·
Press TAB until the information to be changed is selected.
·
Enter in the correct data and click SAVE. PAYROLL MANAGER will automatically replace the old data.
·
If a T&A code exists which matches this deduction, the user must decide whether or not to also update the related T&A code (see T&A codes in ACCOUNTING MANAGER).
Removing a Deduction Code
Unused deduction codes may be removed from the system provided no activity exists in the account history.
·
Select the individual deduction code from the listing.
·
Click DELETE from the Update Panel.
·
PAYROLL MANAGER will ask you āDelete this deduction?ā
·
Click āYesā to remove the code.
·
Click āNo" to keep the code.
Exiting the Deduction Module
Selecting EXIT will return the user to the Maintenance Menu.
Pay Frequencies
PAYROLL MANAGER uses pay frequency codes to categorize when employee supplemental earnings and voluntary deductions are earned or taken. The frequencies serve as switches that can be turned on when the earning or deduction is desired. Frequencies are assigned to each employee deduction record in Employee Pay Freqeuncies Information Maintenance.
Select Maintenance
ą
Pay Frequencies from the PAYROLL MANAGER main screen to enter the Pay Frequencies module. The Pay Frequencies Screen will be displayed, listing all codes in alphabetic order.
Adding an Pay Frequency
·
Select ADD from the Update Panel.
·
Type the frequency code (up to a maximum of four characters) and press TAB.
·
Enter the description and press TAB.
·
Enter the number of checks, per fiscal year, to be paid to the employees in this pay frequency.
·
Select the type of frequency. Enter āDā for deductions only, āEā for earnings only, or āBā for both deductions and earnings.
·
Click SAVE to lock in the new information.
Finding an Pay Frequency
The Sort method assists the user in locating frequency codes by two search options.
CODE Allows the user to type in the frequency code being searched.
DESCRIPTION Allows the user to type in the description of the pay frequency being searched.
Editing/Changing a Pay Frequency
PAYROLL MANAGER provides the user with the ability to edit and change pay frequency codes.
·
Select the pay frequency from the listing.
·
Click UPDATE from the Update Panel.
·
Press TAB until the information to be changed is highlighted.
·
Enter in the correct data and click SAVE. PAYROLL MANAGER will automatically replace the old data.
Removing a Pay Frequency
·
Select the individual frequency code from the listing.
·
Click DELETE from the Update Panel.
·
PAYROLL MANAGER will ask you āDelete this pay frequency?ā
·
Click āYesā to remove the code.
·
Click āNo" to keep the code.
·
If the pay frequency is in use, it can not be removed.
Exiting the Pay Frequency Module
Selecting EXIT will return the user to the Maintenance Menu.
Earning Codes
To categorize employee earnings and assist in budgetary reporting PAYROLL MANAGER uses earning codes. Payroll information defined in earning codes is used in calculating payroll for those earning situations. Earnings Codes are assigned to employee records in Employee Earnings Information Maintenance.
Select Maintenance
ą
Earning Codes from the PAYROLL MANAGER main screen to enter the earning codes module. The Earning Codes Screen will be displayed, listing all codes in alphabetic order.
Adding an Earning Code
·
Select ADD from the Update Panel.
·
Type the earning code (up to a maximum of eight characters) and press TAB.
·
Enter the description and press TAB.
·
Select the amount type, fixed or individual, and press TAB.
·
Select the wage type, wages or reimbursement, and press TAB.
·
Enter "Yes" or "No" to have the earning code included in contractual calculations.
Payroll Tips:
0
Reimbursement earning codes may be used to reimburse employees for valid business expenses through the payroll system. They are used in lieu of direct payments from the General Fund through the accounts payable system the reimbursements are reported on the employeeās Form W-2 at year-end.
·
Enter the proper print position for this Earning. This field is active only if the Use P/R box number for P/R Deductions flag is checked in the System Parameters Preference Maintenance Function.
·
Enter the default settings for this earning code. Defaults exist for the pay frequency, times paid per year, earning year, fixed amount, and year-to-date dollar limit.
·
Enter the general ledger account code for the earning code or click the magnifying glass to view available account codes.
Finding an Earning Code
In order to edit/change or remove an earning code, it is necessary to locate it. The SORT method assists the user in locating earning codes by three search options.
CODE Allows the user to type in the earning code being searched.
DESCRIPTION Allows the user to type in the description of the earning code being searched.
AMOUNT TYPE Allows the user to sort the codes by account type.
Editing/Changing an Earning Code
PAYROLL MANAGER provides the user with the ability to edit and change earning codes.
·
Select the earning code from the listing.
·
Click UPDATE from the Update Panel.
·
Press TAB until the information to be changed is highlighted.
·
Enter in the correct data and click SAVE. PAYROLL MANAGER will automatically replace the old data.
Removing an Earning Code
Unused deduction codes may be removed from the system provided no activity exists in the account history.
·
Select the individual earning code from the listing.
·
Click DELETE from the Update Panel.
·
PAYROLL MANAGER will ask you āDelete this earning code?ā
·
Click āYesā to remove the code.
·
Click āNo" to keep the code.
Exiting the Earning Code Module
Selecting EXIT will return the user to the PAYROLL MANAGER main screen.
Direct Deposit Banks
The direct deposit banks menu provides the user with the ability to create, edit, and define the different bank codes used in conjunction with direct deposit by the system. Select Maintenance
ą
Direct Deposit Banks from the PAYROLL MANAGER main screen to enter the appropriate bank information. The Available Banks Screen will be displayed, listing all bank codes in alphabetic order.
Adding an Bank
·
Select ADD from the Update Panel.
·
Enter the bank code and press TAB.
·
Enter bank routing number and press TAB.
·
Enter the bank name and press TAB.
·
Enter the bank address and press TAB.
·
Enter the bank contact and phone number and click SAVE to lock in the new information.
Finding a Bank
In order to edit/change or remove a bank, it is necessary to locate it. The SORT method assists the user in locating bank codes by three search options.
CODE Allows the user to type in the bank being searched.
NAME Allows the user to type in the bank name being searched.
CITY Allows the user to type in the city of the bank being searched.
Editing/Changing a Bank
PAYROLL MANAGER provides the user with the ability to edit and change bank codes.
·
Select the bank code from the schedule listing.
·
Click UPDATE from the Update Panel.
·
Press TAB until the information to be changed is selected.
·
Enter in the correct data and click SAVE. PAYROLL MANAGER will automatically replace the old data.
Removing a Bank
Unused bank codes may be removed from the system provided no detail activity exists for the bank code.
·
Select the bank code from the listing.
·
Click DELETE from the Update Panel.
·
PAYROLL MANAGER will ask you āDelete this Bank?ā
·
Click āYesā to remove the code.
·
Click ānoā to keep the bank.
Exiting the Direct Deposit Module
Selecting EXIT will return the user to the PAYROLL MANAGER main screen.
Tax Tables
PAYROLL MANAGER uses tax tables to calculate employee payroll taxes. The user may use either multiple tax tables for employees residing in different municipalities or the standard federal and state tables provided. Each tax table is contained on three complete screens, an Information screen, a Calculation Method screen, and a Tax Table screen.
Select Maintenance
ą
Tax Tables from the PAYROLL MANAGER main screen to enter the tax tables module. The Tax Tables Description Screen will be displayed, listing all tables in alphabetic order.
The Tax Table Screens
There are three tax table screens:
Information This screen lists the different tax tables and their descriptions in alphabetical order. The detail features of the description screen are displayed, and they can be updated. They may be viewed and updated by using the UPDATE command.
Calculation Method This screen defines the applicable tax percentages used in the tax calculation, maximum taxable amounts, and the general ledger account codes used to account for these withholding amounts.
Tax Table This screen defines the withholding allowance amounts of the wage brackets for varying tax brackets.
Switching Tax Table Screens
In order to access the multiple tax table screens, PAYROLL MANAGER enables the user to flip between them by clicking the desired tab.
Editing/Changing a Tax Table Screen
PAYROLL MANAGER provides the user with the ability to edit and change the tax tables as current tax regulations change.
·
Switch to the screen to be changed
Payroll Tips:
0
For a full description of the various fields on each tax table screen please refer to Adding a Tax Table below.
Adding a Tax Table
·
From the information screen, select ADD from the Update Panel.
·
Type the tax table code (up to a maximum of three characters) and press TAB.
·
Enter the type of tax authority and press TAB. Enter F for Federal, S for state, C for city, or F twice for Earned Income Credit.
·
Enter the description and press TAB.
·
Enter your tax reporting identification number.
·
Enter the general ledger account code the tax liability is to be recorded in and press TAB. Click the magnifying glass to select from a list of available accounts.
City Tax Authorities
The following exemption is available for city tax authorities:
City W/H City Withholding Tax
After entering the final response, PAYROLL MANAGER will revert to the Tax Table Description Screen. The calculation method screen and the tax table screen now need to be entered for the new tax table.
Federal Tax Authorities
The following exemptions are available for federal tax authorities:
Fed W/H Federal Withholding Tax
Emp FICA Employee FICA Withholding Tax
Empr FICA Employer FICA Tax Expense
Emp Medi Employee Medicare Withholding Tax
FUI Federal Unemployment Insurance Expense
·
Select the newly created federal tax table from the listing.
·
Select the calculation method tab to switch to the percentage-withholding screen.
·
Click UPDATE from the Update Panel.
·
Enter the employer FICA percentage and press TAB.
·
Enter the employee FICA percentage and press TAB.
·
Enter the maximum FICA wages and press TAB.
·
Enter the employer Medicare percentage and press TAB.
·
Enter the employee Medicare percentage and press TAB.
·
Enter the maximum Medicare wages and press TAB.
·
Enter the general ledger account code the FICA/Medicare expense is to be recorded in and press TAB. Click the magnifying glass to select from the list of available accounts.
·
Enter the general ledger account code the FICA/Medicare liability is to be recorded in and press TAB. Click the magnifying glass to select from the list of available accounts. Enter the federal unemployment insurance percentage and press TAB.
·
Enter the maximum wages subject to federal unemployment insurance and press TAB.
·
Enter the general ledger account code the federal unemployment insurance expense is to be recorded in and press TAB. Click the magnifying glass to select from the list of available accounts.
·
Enter the general ledger account code the federal unemployment insurance liability is to be recorded in and press TAB. Click the magnifying glass to select from the list of available accounts.
State Tax Authorities
The following exemptions are available for state tax authorities:
State W/H State Withholding Tax
SUI State Unemployment Insurance Expense
·
Select the newly created state tax table from the listing.
·
Select the Calculation Method tab from the Update Panel to switch to the percentage-withholding screen.
·
Click UPDATE from the Update Panel.
·
Enter the calculation basis, āDā for directly calculated or āFā for a percentage of the federal tax liability or āSā for state and press TAB.
·
Enter the gross wage cut-off amount, which is the amount over which taxes will not be calculated, and press TAB.
·
Enter the Base Gross percentage and press TAB.
·
Enter the standard gross pay adjustment percentage and press TAB.
·
Enter the federal withholding adjustment percentage and press TAB.
·
If the withholding should be adjusted for the FICA withholding, enter Y for āyesā or N for ānā and press TAB.
·
Enter the minimum standard adjustment and press TAB.
·
Enter the maximum standard adjustment and press TAB.
·
Enter the state unemployment insurance percentage and press TAB.
·
Enter the maximum wages subject to state unemployment insurance and press TAB.
·
Enter the general ledger account code the state unemployment insurance expense is to be recorded in and press TAB. Click the magnifying glass to select from the list of available accounts.
·
Enter the general ledger account code the state unemployment insurance liability is to be recorded in and press TAB. Click the magnifying glass to select from the list of available accounts.
·
Enter the standard single deduction and press TAB.
·
Enter the standard married deduction.
For all Tax Authorities
·
Select the Tax Table tab from the Update Panel to switch to the withholding allowance screen.
·
Click UPDATE from the Update Panel.
·
Enter the withholding allowance amount and press TAB.
·
Enter the supplemental withholding rate and press TAB.
·
Enter the annual single withholding tax table with the withholding amount, percentage rate, and tax bracket limit for each line. Press TAB after each.
·
Enter the annual married withholding tax table with the withholding amount, percentage rate, and tax bracket limit for each line. Press TAB after each.
·
The tax tables are complete. Click SAVE to lock in the new information.
Removing a Tax Table
·
Select the individual tax table from the listing on the Information tab.
·
Click DELETE from the Update Panel.
·
PAYROLL MANAGER will ask you āDelete this tax table?ā
·
Click āYesā to remove the table.
·
Click āNoā to keep the table.
Exiting the Tax Table Module
Selecting EXIT will return the user to PAYROLL MANAGER main screen.
The maintenance module also provides the user with the ability to create, edit, and define individual employee master files. The complete employee file is maintained on eight separate screens. Each screen contains different employee information. User access to the different screens can be limited based upon the userās duties.
Select Employee Information from the PAYROLL MANAGER main screen to enter the employee information module. A list of available employees will be displayed in alphabetical order on the screen.
The Employee Information Screens
There are seven employee information screens:
1-Employee This screen displays a listing of all the employees along with the SORT search feature.
3-Retirement Information This screen lists the employee's retirement information.
4-Earning Information This screen defines the employeeās contracted salary or hourly rate, the pay frequency, and the general ledger account code the payroll expense is to be recorded in.
5-Voluntary Deductions This screen summarizes the employeeās tax withholding and voluntary payroll deductions on a per pay period and annual basis.
6-Direct Deposit This screen lists the direct deposit information, such as bank code, account number, the status of the employee and the date started.
7-Tax Withholding This screen lists the tax with holding for each employee.
Users may access screens two through seven from the Available Employees Screen by selecting the desired employee and desired tab, for the desired screen.
From screen two through seven, the user may select other employees by using the SORT method or by using the scroll bar. The user may also switch from screen to screen for the selected employee by clicking the desired tab, for the desired screen.
Switching Screens
In order to access the multiple employee information screens; PAYROLL MANAGER enables the user to flip between screens two through eight by selecting the desired tab.
Employee Basic Information
To enter the Employee Information click the INFORMATION tab. The Information tab will access the Employee Maintenance screen, which contains the employeeās basic information, such as his/her name, address, and social security number. This is the first screen that must be added when entering a new employee.
Adding an Employee
·
Select ADD from the Update Panel. PAYROLL MANAGER will automatically assign the next available employee number to the new employee.
·
Enter the employeeās name in the following format, last name, comma, space, first name, space, middle initial, and press TAB.
·
Enter the employeeās social security number and press TAB.
·
Select the employeeās gender by clicking on the desired radio button.
·
Enter a Salutation (e.g. - Dr., Mr., Ms., and Mrs.) by clicking on the down arrow and selecting the appropriate greeting and press TAB.
·
Enter the employeeās birth date and press TAB.
·
Enter the employeeās full address, phone number, extension, and private phone indicator (if applicable). Press TAB after each line item. NAME Allows the user to locate by name. Click the NAME radio button and click in the STARTING box and type in the employee name being searched.
SSN Allows the user to locate by social security number. Click the SSN radio button and click in the STARTING box and type in the employeeās social security number being searched.
EMP NUM Allows the user to locate by employee number. Click the EMP NUM radio button and click in the STARTING box and type in the employee number being searched.
STATUS Allows the user to sort the listing by status type.
Editing/Changing an Employeeās Information
PAYROLL MANAGER provides the user with the ability to edit and change employee information files.
·
Select the employee from the available employees listing.
·
Click the Information tab.
·
Click UPDATE from the Update Panel.
·
Either press TAB until the desired information to be changed is selected or use the mouse to click on the desired field you wish to change.
·
Enter in the correct data and click SAVE. PAYROLL MANAGER will automatically replace the old data with the new data.
0
It is no longer necessary to enter through a entire screen in order to SAVE a change.
Employee Notes
PAYROLL MANAGER provides the ability for any unlimited amount of notes to be added and maintained for each employee information screen. To add or view the notes for screen 1, select NOTES from the Update Panel, a yellow note pad icon will appear in the left hand bottom of the screen if notes exist (Please refer to Employee Notes for information on using the notes).
Removing an Employee
·
Select the employee from the available employee listing.
·
Select the Information tab.
·
Click DELETE from the Update Panel.
·
PAYROLL MANAGER will ask you āDelete this employee?ā
·
Click āYesā to remove the employee.
·
Click āNoā to keep the employee.
Payroll Tips:
0 If payroll records exist for the employee the employee may not be deleted.
0 An employeeās data does not have to be removed from PAYROLL MANAGER simply because they have ceased to work for the municipal entity. Employee information for former employees may be reclassified to inactive, retired, or on leave status and relevant information may be retained.
Exiting the Employeeās Information Module
Selecting EXIT from the Update Panel will return the user to the PAYROLL MANAGER main screen.
Employee Notes
The employee information section includes the ability to add and maintain an unlimited amount of notes for each employee on each employee information screen. A yellow note pad icon will appear in the left-hand bottom of the screen if notes already exist.
To add, view, or delete notes for an employee information screen, select NOTES from the Update Panel. PAYROLL MANAGER will display the Employee Notes Screen.
Adding Notes
Notes may be added for any employee on any screen.
·
Click in the Employee Notes textbox.
·
Enter the desired note and click SAVE.
·
Repeat for each desired employee note.
Removing Notes
·
Select the note from the employee notes screen
·
Click DELETE from the Employee Notes Screen Update Panel.
·
PAYROLL MANAGER will ask you āDelete this employee note?ā
·
Click āYesā to remove the note.
·
Click āNoā to keep the note.
Exiting the Employee Notes Screen
Selecting EXIT from the Update Panel will return the user to the current Employee Information Screen.
Retirement
Click the Retirement tab to access Screen 3 - The Retirement Information screen details the employeeās retirement system information.
Adding/Changing Retirement Information
·
Click UPDATE from the Update Panel.
·
Enter the Retirement System Code or click the magnifying glass to select from the Retirement System Look-up browser. Select the retirement code and click OK to return to the Retirement Information screen and press TAB. The retirement number must correspond to the tier number for the employee.
TRS Employee Notes
PAYROLL MANAGER provides the ability for any unlimited amount of notes to be added and maintained for each employee information screen. To add or view the notes for the Retirement screen, select NOTES from the Update Panel. (Please refer to Employee Notes for information on using the notes).
Earnings
The Earnings Information screen can be accessed by clicking on the Earnings tab. This screen details the employeeās salary and contract information. For screen image please click Earnings Information.
Adding an Appointment
An appointment represents a contractual earning, usually supported by the Board of Education.
·
Click the Employee tab to select a specific employee from the list by using the scroll bar or the sort feature.
·
Click the Earnings tab, and then click the appointment button.
·
Click ADD from the update panel.
·
Enter the employee type or click the magnifying glass to select from a list of available employee types and press TAB.
·
Enter the payment method or click the magnifying glass to select from a list of available payment methods.
āAā ā Annualize The employeeās salary is based on an hourly or daily rate, which is totaled to a yearly, base contract. Therefore it acts exactly like a āCā only data entry at the assignment level is different. A period pay is determined by dividing the yearly base contract by the number of checks to be received.
āCā ā Contractual The employeeās salary is based on a yearly total which is used to give a period pay. This amount usually originates from a negotiated salary schedule.
āDā ā Daily The employeeās salary is dependent on the number of days worked in a payroll cycle.
āHā ā Hourly The employeeās salary is dependent on the number of hours worked in a payroll cycle.
āSā ā Supplemental This type allows for extra earnings not directly related to any of the previous types to be added as a flat amount only. An example of this would be payment for chaperoning.
·
Enter the over all FTE% and press TAB.
Payroll Tips:
0 Overall FTE is the Full Time Equivalent Percentage this employee will work. (i.e. If a teacher is expected to teach 5 classes a day and the employee only teaches 3 classes he/she is a 3/5 or 60% FTE.
·
Enter the number of months the employee is expected to work during the year and press TAB.
·
Enter the standard hours, recognized by the retirement system for a specific appointment, and press TAB.
·
Enter the start and end date, this is the date for which this appointment and its assignments will be valid for within the current fiscal year and press TAB.
·
Enter the Board date, this is the date the school board approved this job and press TAB.
·
Enter the Increment date, this is the month and day during the fiscal year that the employee should move up a step.
·
Enter the retirement System Code or click the magnifying glass to select from a list of available codes.
Only for Supplemental Earnings:
·
Select the Tax Method, Normal or Flat, this determines the percentages that will be paid out on supplemental earnings.
·
Enter the Frequency Code or click the magnifying glass to select from the list of available codes.
Edit/Change an Appointment
·
Select the employee appointment to update.
·
Click the UPDATE button from the update panel.
·
Press TAB until the information to be changed is highlighted.
·
Enter the correct data and click SAVE. PAYROLL MANAGER will automatically replace the old data with the new data.
Remove an Appointment
·
Select the employee appointment to be removed.
·
Click the DELETE button from the update panel.
·
PAYROLL MANAGER will ask, āDelete this appointment?ā
·
Click āYESā to delete the appointment or click āNOā to keep the appointment.
Position
The path to the employee position screen is Employee Information
ą
Earnings tab
ą
Position.
Payroll Tips:
0 To enter the position the user must first click one of the employee appointments and then click the Position button.
Adding a Position
·
Click the ADD button from the update panel.
·
Enter the position code or click the magnifying glass to select from a list of available codes and press TAB.
·
Enter the building code or click the magnifying glass to select from a list of available codes and press TAB.
·
Enter the percentage for this position. (i.e. A 3/5 Teacher would be a 60% employee)
·
Enter the start an end date for this position and press TAB.
·
Enter the department code or click the magnifying glass to select from a list of available codes.
·
Enter the Certification code or click the magnifying glass to select from a list of available codes.
·
Enter Tenure Code or click the magnifying glass to select from a list of available codes.
·
Click SAVE to lock in the new information.
Editing/Changing a Position
·
Select the desired position from the listing.
·
Click UPDATE from the update panel.
·
Press TAB until the desired information to be changed is highlighted.
·
Enter the correct data and click SAVE. PAYROLL MANAGER will automatically replace the old data with the new data.
Remove a Position
·
Select the desired Position from the listing.
·
Click the DELETE the button from the update panel.
·
PAYROLL MANAGER will ask you āDelete this position?ā
·
Click āYESā to remove the position or click āNOā to keep the position.
Earnings
The path to the Earnings entries is Employee Information
ą
Earnings tab
ą
Earnings button.
Adding Contractual Earnings
·
The starting and ending fields default to the starting and ending dates for the appointment as defined in Appointment Maintenance. The user can except these dates or enter a new start and end date for the assignment and press TAB.
·
The number of checks field defaults to the number of checks as specified for the employee type in the Employee Type Maintenance function. The user can except this amount of checks or enter the new number of checks the employee will receive and press TAB.
·
The working days field defaults to the number of working days in the contract as specified for the employee type in the Employee Type Maintenance function. The user can except this amount or enter the new number of working days for this employee and press TAB.
·
The hours per day field defaults to the standard number of hours per day as specified for the employee type in the Employee Type Maintenance function. The user can except this amount or enter the new number of hours per day for this employee and press TAB.
·
Enter the Salary Step for the assignment and press TAB.
·
Enter the Level for this assignment and press TAB.
·
Enter the base contract amount and press TAB.
·
Enter the FTE amount or accept the system-calculated amount and press TAB. The FTE Amount is equal to the Base Contract Amount multiplied by the Overall FTE %.
·
Enter the Daily Rate or accept the system-calculated amount and press TAB. The Daily Rate is equal to the FTE Amount divided by the number of Standard Contract Days defined in the Employee Type Maintenance.
·
Enter the Hourly Rate or accept the system-calculated rate and press TAB. The Hourly Rate is equal to the Daily Rate divided by the number of Hrs per Day.
·
Enter the Entitlement Amount or accept the system-calculated amount and press TAB. The Entitlement Amount is equal to the Daily Rate multiplied by the number of Working Days.
·
Enter the Bi-weekly amount or accept the system-calculated pay period amount and press TAB. The Period Pay amount is equal to the FTE amount divided by the # of Checks to be received.
·
Click SAVE to lock in the new information. Employee Notes
PAYROLL MANAGER provides the ability for any unlimited amount of notes to be added and maintained for each employee information screen. To add or view the notes for screen 5, select NOTES from the Update Panel. (Please refer to Employee Notes for information on using the notes).
Removing a Voluntary Deduction
·
Select the earning code from the listing.
·
Select DELETE from the Update Panel.
·
PAYROLL MANAGER will ask you āDelete this deduction?ā
·
Click āYesā to remove the code.
·
Click āNoā to keep the code.
Direct Deposit
Direct Deposit Information
PAYROLL MANAGER can maintain an unlimited number of direct deposit configurations for each employee. The direct deposit configurations may be for a fixed dollar amount or for a percentage of the employeeās net pay. The sum of all direct deposit bank percentages must add up to 100% of the employeeās net pay.
·
Select the DIRECT DEPOSIT tab to access the employeeās Direct Deposit information.
Adding a Direct Deposit Record
·
Click ADD from the Update Panel.
·
Enter the bank code and press TAB. Click the magnifying glass to display a listing of all available bank codes.
·
Enter the employeeās account number and press TAB.
·
Enter the account type, (C) for checking account or (S) for savings account, and press TAB.
·
Indicate if the direct deposit is (I) for inactive or (A) for active and press TAB.
·
Enter the direct deposit type, ā$ā for a fixed amount or ā%ā for a percentage, and press TAB.
·
Enter the direct deposit amount or percentage.
·
If desired, enter the date started and press TAB.
·
Enter the number of pre-notifications to be made to the bank before this direct deposit is transmitted.
·
Click SAVE to lock in the new information.
Payroll Tips:
Editing/Changing a Direct Deposit Record
·
Select the direct deposit from the listing for the employee.
·
Click UPDATE from the Update Panel.
·
Enter in the correct data and click SAVE. PAYROLL MANAGER will automatically replace the old data with the new data.
Viewing a Direct Deposit Record
·
Select the direct deposit from the listing.
·
PAYROLL MANAGER will display the selected direct deposit record on the right side of the screen.
Removing a Direct Deposit Record
·
Select the direct deposit from the listing.
·
Select DELETE from the Update Panel.
·
PAYROLL MANAGER will ask you āDelete this direct deposit record?ā
·
Click āYesā to remove the code.
·
Click āNoā to keep the code.
Tax Withholding
Changing Tax Withholding Information
·
Select the TAX withholding tab to access the employeeās tax withholding information.
· ·
If the employee is exempt from FICA or MEDICARE withholding, click the appropriate check box and press TAB.
·
Enter in the employeeās Federal Withholding Tax deduction status, (M) for married or (S) for single, number of exemptions or dollar amount, and additional withholding amounts in either dollar or percentage amounts. Press TAB after each selection. These amounts should be taken directly from the employeeās Form W-4.
·
Enter in the employeeās State and City Withholding Tax deductions in the same manner. Entering in the new tax table code over the old one can change the default tax table code. Click the magnifying glass to display a listing of available tax codes.
·
If the employee has filed a Form W-5 to claim the Earned Income Credit, click the check box. Enter the marital status credit being claimed, M for married or S for single and press SAVE.
·
Enter the tax divisor for this withholding and press TAB.
·
Enter the building code where the employeeās check will be delivered to or click the magnifying glass to select from a list of available codes and click SAVE.
Payroll Tips:
0 When adding a new employee the TAX DIVISOR field must be filled in with the number of checks or the calculation of the payroll for that employee will fail.
Government Reporting Menu
941 Worksheet
The 941 Worksheet prints a worksheet for the user to use to complete Form 941, Employerās Federal Tax Return.
To prepare a 941 Worksheet, select Utilities
ą
Government Reporting Menu
ą
Print Federal 941 Worksheet.
·
Enter the starting and ending date range for the worksheet
·
Click the OK button to run the routine. The report will be displayed on screen in the report viewer for user verification. If the report is correct the user can: 1) Print the report by clicking the print icon
New York State Reports
The New York State Quarterly Reports Attachment prints a listing that can be attached to the New York State 45-ATT Quarterly Tax Return.
To prepare the New York State Quarterly Reports, select Utilities
ą
Government Reporting Menu
ą
New York State Quarterly Reports.
NYS-45 Report to Printer
·
Enter the starting and ending date range for the worksheet. The system defaults the appropriate ending date based on the specified starting date of the quarter.
·
Click OK to run the report. The report will be displayed on screen in the report viewer for user verification. If the report is correct the user can: 1) Print the report by clicking the print icon Payroll Tips:
0
When run for any of the first three quarters of the year, the NYS form 45-ATT report will only show the employeeās gross wages. The report run for the last quarter of the year will include the Gross Wages, State Wages, and State Taxes. The State Taxes is the combined total of State and City Taxes withheld
NYS-45 Report to Diskette
·
Enter the Creation date of the disk and press TAB.
·
Enter the start and end date and press TAB.
·
Enter the file destination or click the folder icon to browse for the location.
·
Enter the Federal ID number and press TAB.
·
Enter the Name and Address of the school district or municipality.
Unemployment Report by Building
The Unemployment Report by Building analyzes the payroll checks paid for a particular quarter and summarizes the employees working in each building. This summary report may then be used to respond to Unemployment Summary Reports.
To prepare the Unemployment Report by Building, select Utilities
ą
Government Reporting Menu
ą
Unemployment Report by Building.
·
Enter the quarter ending date
·
Enter the date range for month of the reports you would like to generate (up to three months).
·
Click OK to run the report. The report will be displayed on screen in the report viewer for user verification. If the report is correct the user can: 1) Print the report by clicking the print icon
New Hire Report
The New York State Tax Department requires that all new or re-hired employees be reported to the State New Hire Processing Unit within 15 days of the first day of work or the first pay date.
To prepare the New Hire report, select Utilities
ą
Government Reporting Menu
ą
New York State New Hire Report.
·
Enter the date range for the report and press TAB.
·
Select to sort the report by the hire date or by date paid.
·
Sect to have the report sent to the printer or save to a file.
·
Click OK to run the report. The report will be displayed on screen in the report viewer for user verification. If the report is correct the user can: 1) Print the report by clicking the print icon
Creating the W-2 File
Select Utilities
ą
Government Reporting Menu
ą
Create the W-2 History File. This will summarize the W-2 data of each employee for the selected calendar year.
·
Enter the year you wish to create a history for.
·
Click OK to run the routine.
Modifying the W-2 File
·
Select Utilities
ą
Government Reporting Menu
ą
Modify Employee W-2 Information.
Finding an Existing Employee
In order to edit/change or remove an employeeās information, it is necessary to locate the employee. From the Employee tab the SORT method assists the user in locating employee files.
NAME Allows the user to locate by name, click the NAME radio button and click in the STARTING box and type in the employee name being searched.
EMP NUM Allows the user to locate by employee number, click the EMP NUM radio button and click in the STARTING box and type in the employee number being searched.
SSN Allows the user to locate by social security number, click the SSN radio button and click in the STARTING box and type in the employeeās social security number being searched.
YEAR Allows the user to sort the listing by year.
Viewing the Employeeās Information
·
Select the employee from the Employee tab.
·
Click the View tab to display the employeeās information.
Editing/Changing an Employeeās information
·
In order to UPDATE or DELETE an employeeās information, you must supply the supervisor password. Any modified information is marked with the time, date, and user identification to maintain an accurate audit trail.
·
Select the employee from the listing on the Employee tab and click the Change tab.
·
Enter the proper password and press ENTER.
·
Click UPDATE OR DELETE from the Update Panel.
·
If UPDATE is clicked then press TAB until the information to be changed is highlighted.
·
Enter the new information and click SAVE to lock in the changes.
·
Select EXIT to return to the PAYROLL MANAGER main screen.
·
If DELETE is clicked FINANCE MANAGER will ask, āDelete this W-2 information?ā, click āYESā to remove it or click āNOā to keep the information.
Print Dot-Matrix W-2 Form
·
Select Utilities
ą
Government Reporting Menu
ą
Print Dot-Matrix W-2 Form.
·
Enter the desired tax year to print and press TAB.
·
Enter the starting and ending employee number or leave blank for all.
·
Click the appropriate radio button to have the report sorted by Name, Department or Building.
·
Enter the Municipality Information, Name and Address and press Tab.
·
Enter the Fenderal Tax ID number and click OK to print the form.
Creating File for Laser W-2 Printing
·
Select Utilities
ą
Government Reporting Menu
ą
Creat File for Laser W-2 Printing.
·
Read the pop-up message and click YES to proceed or NO to cancel
·
Enter the year for the creation of the file and press TAB.
·
Enter the path in which to save the file or click the folder icon to browser for the destination.
·
Click OK to run the routine.
Create File for SSA Reporting
·
Enter the Tax table year to report and press TAB.
·
Enter the Reporting Name of the Municipality and press TAB.
·
Enter the mailing address and press TAB.
·
Enter the Contact Person or press TAB.
·
Enter the Contact Personās phone number and press TAB.
·
Enter the Reporting Tax Identification Number and press TAB.
·
Enter the path in which to save the file or click the folder icon to browse for the destination and press TAB.
·
Select the āYESā radio button if the Transmitter and Employer Information are the same.
·
Click OK to run the routine.
Check Items Menu
Manual Checks by Date
To prepare a report of manual and voided checks, select Utilities
ą
Check Items Menu
ą
Manual Checks by Date.
·
Enter the starting and ending date range for the report.
·
Click OK to run the report. The report will be displayed on screen in the report viewer for user verification. If the report is correct the user can: 1) Print the report by clicking the print icon
Voided Checks by Date
To prepare a report of voided checks, select Utilities
ą
Check Items Menu
ą
Voided Checks by Date.
·
Enter the starting and ending date range for the report.
·
Click OK to run the report. The report will be displayed on screen in the report viewer for user verification. If the report is correct the user can: 1) Print the report by clicking the print icon
Transfer Entries by Date
To prepare a report of payroll transfer entries, select Utilities
ą
Check Items Menu
ą
Transfer Entries by Date.
·
Enter the starting and ending date range for the report.
·
Click OK to run the report. The report will be displayed on screen in the report viewer for user verification. If the report is correct the user can: 1) Print the report by clicking the print icon
Check Reconciliation File
Setting the Reconciliation Header Information
·
Enter the header information as provided by your financial institution.
·
Enter the default location to save the file or click the folder icon to browse for the location.
·
Select the transmission method either via floppy disk or modem and click SAVE.
·
Please contact FINANCE MANAGER Support for further assistance in setting up the header information
Generating the Check Information
·
Enter the starting and ending date range for the checks and press TAB.
·
Enter the creation date of the file and press TAB.
·
Enter the file name and destination of the file or click the folder icon to browse for the location and click SAVE. The file must end in ācheck.datā
·
After the report has been generated to the media type select YES or NO to run the report. The report will be displayed on screen in the report viewer for user verification. If the report is correct the user can: 1) Print the report by clicking the print icon
Prior Fiscal Earning Menu
Prior Earnings by Account Listing
The path to the Prior Earnings by Account Listing is Utilities
ą
Prior Fiscal Earnings Menu
ą
Prior Earnings by Account Listing.
·
Select the Account Code(s) to be included in the report. Click the select all checks check box to select all accounts.
·
Click the OK button to run the report. The report will be displayed on screen in the report viewer for user verification. If the report is correct the user can: 1) Print the report by clicking the print icon
Prior Earnings by Employee Listing
The path to the Prior Earnings by Employee Listing is Utilities
ą
Prior Fiscal Earnings Menu
ą
Prior Earnings by Employee Listing.
·
Click OK to run the report. The report will be displayed on screen in the report viewer for user verification. If the report is correct the user can: 1) Print the report by clicking the print icon
Year-to-Utility Menu
Clear Quarter to Date Amounts
The Clear Quarter to Date Amounts routine will reset the quarter earnings totals in the employeeās earning history. To run the routine, select Utilities
ą
Year-to-Date Utility Menu
ą
Clear Quarter to Date Amounts.
Re-Calculate Quarter to Date Amounts
The Re-Calculate Quarter to Date Amounts routine will recalculate the quarter earnings totals in the employeeās earning history. To run the routine, select Utilities
ą
Year-to-Date Utility Menu
ą
Re-Calculate Quarter to Date Amounts.
·
Enter the desired quarter date range and press TAB
·
Enter the employee range and click OK to run the routine.
Clear Fiscal Year-to-Date Amounts
The Clear Fiscal Year to Date Amounts routine will reset the fiscal year earnings totals in the employeeās earning history. To run the routine, select Utilities
ą
Year-to-Date Utility Menu
ą
Clear fiscal Year to Date Amounts.
·
To clear the amounts click the OK button.
Clear Calendar Year-to-Date Amounts
The Clear Calendar Year to Date Amounts routine will reset the calendar year and quarter earnings totals in the employeeās earning history. To run the routine, select Utilities
ą
Year-to-Date Utility Menu
ą
Clear Calendar Year to Date Amounts.
·
To clear the amounts click the OK button.
Employee Balances
The Employee Balances routine provides the ability to view Calendar, Fiscal, or Quarter to date totals for a selected employee. This routine is intended for users to view the initial employee balances when they begin using PAYROLL MANAGER.
To enter an employeeās balances, select Utilities
ą
Year-to-Date Utility Menu
ą
Employee Balances.
·
Select the employee from the Available Employees listing.
·
Select the VIEW folder to display the current balances.
Year End Deduction Totals
The Year-End Deduction report details and prepares year-end deduction letters for selected employees. To run the routine, select Utilities
ą
Year-to-Date Utility Menu
ą
Year-End Deducation Reports.
·
Enter the desired selection criteria and press ENTER
Transfer Earnings Between Accounts
Transfer Between Accounts
The transfer balances routine provides for the transfer of earnings from one account to another. To enter the transfer routine, select Utilities
ą
Transfer Earnings between accounts.
·
Enter the employee number or click the magnifying glass to select from a list of available employees.
·
Enter the effective date of the transfer and press TAB.
Payroll Tips:
0
The date of the transfer should be the next payroll date. This will cause the transfer to appear on the Payroll Transaction Journal for the next payroll. The effect of the transfer will be reflected in the budget accounts after the entry is posted. If dated accordingly, no additional accounting entry will be necessary to record the transfer.
·
Enter the account to transfer from or click the magnifying glass to view a list of available accounts, select the account from the listing and click OK.
·
Enter the amount to be transferred and press TAB.
·
Enter the account to transfer to or click the magnifying glass to view a list of available accounts, select the account from the listing and click OK
·
Enter the amount to be transferred and press TAB.
·
Repeat the process for any supplemental or processed earnings to transfer
·
Click OK to run the routine.
Substitute Payroll
Substitute Payroll Routine
Generate Substitute Listing
The first step in the substitute payroll utility is to generate the listing of substitutes to be paid. The routine will use the sliding scale for the employee type, if available, or the employeeās daily rate as defined on Employee Information Screen - Earnings Information.
·
Enter the date range of the absences to be paid.
·
Enter the default payroll account or click the magnifying glass to select from a list of available accounts.
·
Click OK to run the routine.
Printing the Substitute Listing
After generating or modifying the listing of substitutes to be paid, a listing can be printed for review.
·
Click āOKā to run the report. The report will be displayed on screen in the report viewer for user verification. If the report is correct the user can:
1)
Print the report by clicking the print icon 2)
Saving to a file by clicking the save icon Modify the Substitute Listing
Once generated and reviewed, the substitute listing can be modified to correct any discrepancies.
·
Select the desired employee by using the SORT feature.
·
Select the View tab to view the information for the employee.
·
Select the Change tab to correct the pay rate, the units, or the account code to be paid.
·
Click UPDATE from the update panel.
·
Press TAB until the information to be changed is highlighted.
·
Enter the correct information and click SAVE. PAYROLL MANAGER will automatically replace the old data with the new data.
Removing a Substitute Listing
·
Select the desired employee from the Employee TAB.
·
Select DELETE from the update panel to remove a substitute from the listing.
·
PAYROLL MANAGER will ask you āDelete this substitute?ā
·
Click āYESā to delete the substitute or click to keep it.
After modifying data, the substitute information should be printed to ensure that it is accurate.
Transferring the Substitute Data to Payroll
Once the substitute data has been generated and verified, it may be imported into the current payroll.
·
Click āYESā to import the substitute information and click āOK to run the routine.
PAYROLL MANAGER will import the data to the current payroll and clear out the substitute listing.
Substitute Payroll Utility
Substitute Types Maintenance
For each employee type designated as having substitutes, a sliding pay scale may be defined. The scale uses a category defined by the user, the minimum number of days worked to obtain that rate, and the rate of pay. The rates must be entered in ascending order. If such a scale is available, it will be used in the substitute payroll generation process.
·
Select option T from the Substitute Payroll Routine Menu to enter the Sub Type Maintenance
·
Select the desired substitute type. If the desired type is not present, return to the Payroll Maintenance Menu and modify the employee type, making sure the substitute field is set to YES
·
Select CHANGE from the Control Bar to modify the sub type
·
Enter the sub type description and press ENTER
·
Enter the default account code to pay subs in this employee type and press ENTER
·
Enter up to five sub payment levels. Enter any desired Pay Level label, the minimum units necessary to earn the pay, and the pay rate
·
Repeat for each desired pay level
Re-Calculate Sub Days Worked
To recalculate the number of days each substitute worked, use the Recalculate Sub Days routine.
·
Select āYESā to proceed with the routine.
·
Click āOKā to run the routine.
Re-Print Sub Payroll Listing after Transfer to Payroll
This report is similar, yet not identical, to the Substitute Listing report. It has a dynamic date range, drawing on data from previously posted payrolls.
·
Select the employee type(s) to be included in the report.
·
Select the building type(s) to be included in the report.
·
Select the department type(s) to be included in the report.
·
Enter name range to be displayed in the report.
·
Select āYESā or āNO to include the following in the report, Active employees, Inactive employees, Retired employees, On leave employees and Temporary employees.
·
Enter the date range and press TAB.
·
Select the sort method either by name or by building.
·
Click āOKā to run the report. The report will be displayed on screen in the report viewer for user verification. If the report is correct the user can:
1)
Print the report by clicking the print icon 2)
Saving to a file by clicking the save icon
Special Deductions Utility Menu
Change Deduction Amount or Limit
This utility makes changes to active deduction amounts and limits.
·
Select the Employee Type(s) to process.
·
Enter the deduction code or click the magnifying glass to select from a list of available codes.
·
Select āYesā or āNoā to change the Amount /Percentage.
·
If you select āYESā enter the old Amount/Percentage and the new Amount/Percentage
·
Select āYes or āNoā to change the Limit.
·
Enter the old and New Limit.
·
Click āOKā to run the routine.
Change Deduction Frequency
This utility makes changes to an active deductionās frequency.
·
Select the Employee Type(s) to process.
·
Enter the deduction code or click the magnifying glass to select from a list of available codes.
·
Enter the Old Frequency or click the magnifying glass to select from list of available frequency codes.
·
Enter the New Frequency or click the magnifying glass to select from list of available codes.
·
Click āOKā to run the routine.
Activate/Inactivate Deduction
This utility makes global changes to a deductionās active status.
·
Select the Employee Type(s) to process
·
Select the deduction types(s).
·
Select to have the status set as active or inactive.
·
If you select active then you must select to activate all deduction or just the deduction from the payroll date.
·
Click āOKā to run the report.
Change Earning Amount or Limit
This utility makes global changes to supplemental appointments for the current fiscal year.
·
Select the Employee Type(s) to process.
·
Enter the Earnings Code or click the magnifying glass to select from a list of available codes.
·
Click the Yes or No radio button for the set earnings to default frequency to set the earnings to a default frequency.
·
If NO is selected enter the old frequency or click the magnifying glass to select from a list of available frequencies. Select the frequency and click Ok to return to the Global Supplemental Earning Change screen and press TAB.
·
Enter the new Frequency or click the magnifying glass to select from a list of available frequencies. Select the frequency and click Ok to return to the Global Supplemental Earning Change screen.
·
Click āOKā to run the routine.
Bond Deduction Utilities
These utilities allow the municipality to maintain savings bond deductions and current balances. The utilities require that bond deduction codes, structured as āBOND####ā where #### is a left-justified dollar amount, exists for each desired employee. The Bond utilities are based on the concept of bond purchases at one-half face value.
The utilities allow the following:
Balance Input Utility Provide for entering a starting balance for each employee for the desired BOND#### deduction code specified
Calculation Utility This utility is run after a payroll is calculated, printed and posted. It will determine how much was withheld for the current payroll period and print a report of necessary bond purchases
Posting Utility If there are no exceptions to the printed report, the bond amounts must be posted into the deduction records
Please contact FINANCE MANAGER Support for the latest saving bond deduction steps.
Bond Input Utility
The path to the Bond Input Utility is
ą
Utilities
ą
Special Deduction Utilities Menu
ą
Bond Input Utility. This routine allows the user to update the selected employees Bond balance and Bonds year to date received.
·
Select the desired employee from the Employee tab or use the sort feature. The sort feature allows the user to search for the employee using three categories:
Name Allows the user to enter the first few letters of the employeeās last name.
Number Allows the user to enter the employeeās number.
SSN Allows the user to enter the first few numbers of the employeeās social security number.
Input Tab
·
Click the Input tab. (All employees are displayed on the employee tab listing, not just the ones with bond deductions. If after selecting the employee and clicking the Input tab the update buttons are grayed out this employee does not have any bond deductions and you must select another employee or enter a bond deduction.)
·
Click the UPDATE button.
·
Enter the Bond Balance and press TAB.
·
Enter the Bonds year to date. This is Bond amount the employee has acquired up to this point.
·
Click the SAVE button to lock in the information.
Bond Calculation Utility
The path to the Bond Calculation Utility is Utilities
ą
Special Deduction Utilities Menu
ą
Bond Calculation Utility. This utility is run after a payroll is calculated, printed and posted. It will determine how much was withheld for the current payroll period and print a report of necessary bond purchases.
·
Enter the starting and ending payroll dates.
·
Click the OK button to run the routine.
Bond Posting Utility
The path to the Bond Posting Utility is Utilities
ą
Special Deduction Utilities Menu
ą
Bond Posting Utility. This routine will post the bond amounts into the deduction records. In order to run this routine the Bond Calculation Utility must be run first.
·
Enter the starting and ending dates.
·
Click the OK button to run the routine.
Supervisor Utilities
The supervisor utilities are a series of utilities to be used by trained technical support staff personnel or only upon the instruction of the FINANCE MANAGER Support Staff. A Supervisor password is required for access.
Custom Utility Menu
The Custom Utility Menu allows each user to call upon special custom utilities provided to the user by FINANCE MANAGER.
The path to the Custom Utility Menu is Utilities
ą
Custom Utility Menu.
·
Select the desired utility by using the cursor-up, cursor-down keys or the mouse.
·
Select RUN from the Control Bar to run the report
Prior to Printing Checks
Contract and Earnings Listing
The Contract & Earnings Listing provides a detail of the contract, hourly, daily, and supplemental earnings for each employee in the current payroll period. The report lists all employees in alphabetical order. Totals for the period are also provided for the report.
To create a Contract and Earnings Listing, select Reports
ą
Prior to Printing Checks
ą
Contract and Earnings Listing. The report may be displayed on the screen or printed out.
·
Click "OK" to generate the report.
·
The report will be displayed on screen in the report viewer for user verification. If the report is correct the user can:
1) Print the report by clicking the print icon 2) Saving to a file by clicking the save icon Hourly Earnings Listing
The Hourly Earnings Listing creates and prints an edit listing which details for each hourly employee the number and dollar amount of hours worked for all regular, overtime, double-time, holiday, vacation, differential, and stand-by time.
To create and print an Hourly Earnings Listing, select Reports
ą
Prior to Printing Checks
ą
Hourly Earnings Listing.
·
Click "OK" to generate the report.
·
The report will be displayed on screen in the report viewer for user verification. If the report is correct the user can:
1) Print the report by clicking the print icon 2) Saving to a file by clicking the save icon
Transaction Journal
The Payroll Transactions Journal provides a detail of the current periodās payroll period data for an employee or range of employees. The journal gives the employeeās gross salary, along with the deductions, and net pay for both the selected period and for the year-to-date. The journal also details the supplemental earnings and voluntary deductions and includes the general ledger account codes the earnings and deductions are coded to. A Payroll Settings Report is generated at the end of the report.
To produce a Transactions Journal, select reports
ą
Prior to Printing Checks
ą
Payroll Transactions.
·
Enter the starting payroll check date and press TAB.
·
Enter the ending payroll check date and press TAB. The last payroll is the default beginning and ending dates.
·
Enter the starting employee number and press TAB.
·
Enter the ending employee number and press TAB. Leave both blank to select all employees.
·
Select the transaction level, summary or detail and click "OK" to generate the report on screen. The report will be displayed on screen in the report viewer for user verification. If the report is correct the user can:
1) Print the report by clicking the print icon 2) Saving to a file by clicking the save icon Payroll Tips:
0
The Prior to Printing Checks Transaction Journal will not include check numbers or employee year-to-date information. The Summary report will display only the totals for the selected payroll. The Detail Transaction Journal will display the detail for each employee. On the extreme right of the report, the following flags may be displayed: āPNā indicating that there are Pre-Notes prior to actual Direct Deposit, āDDā indicating Direct Deposit, or ā**ā indicating that the employment status is currently inactive.
Deduction Register
The Deduction Register allows the user to print a listing of each deduction for the current payroll period. To generate a Deduction Register, select Reports
ą
Prior to Printing Checks. For screen image please click Deduction Register.
·
Select the desired deductions from the pick list.
·
Enter the beginning and ending employee range and press TAB.
·
Enter the desired Payroll check date and press TAB. The default date is the current payroll period.
·
Click "OK" to generate the report. The report will be displayed on screen in the report viewer for user verification. If the report is correct the user can:
1) Print the report by clicking the print icon 2) Saving to a file by clicking the save icon Earnings Register
The Earnings Register allows the user to print a listing of each earning for the current payroll period. To generate an Earning Register, select Reports
ą
Prior to Printing Checks
ą
Earnings Register.
·
Select the desired earnings from the list.
·
Enter the beginning and ending employee range and press TAB.
·
Select āYes" or "No" to separate pages by type and press TAB.
·
Enter the desired Payroll check date and press TAB. The default date is the current payroll period.
·
Click "OK" to generate the report. The report will be displayed on screen in the report viewer for user verification. If the report is correct the user can:
1) Print the report by clicking the print icon 2) Saving to a file by clicking the save icon
Account Distribution
The Payroll Account Distribution allows the user to print the account code distribution of the current payroll period. To generate a Payroll Account Distribution, select Reports
ą
Prior to Printing Checks
ą
Accounts Distribution.
·
Click "OK" to generate the report. The report will be displayed on screen in the report viewer for user verification. If the report is correct the user can:
1) Print the report by clicking the print icon 2) Saving to a file by clicking the save icon
Direct Deposit Proof Listing
The Direct Deposit Proof Listing allows the user to print the direct deposit proof for the current payroll period. To generate a Direct Deposit Proof Listing, select Reports
ą
Prior to Printing Checks
ą
Direct Deposit Proof Listing.
·
Click "OK" to generate the report. The report will be displayed on screen in the report viewer for user verification. If the report is correct the user can:
1) Print the report by clicking the print icon 2) Saving to a file by clicking the save icon
Payroll Setting Report
The Payroll Settings Report details the payroll dates, direct deposit status, payroll frequency status, employee type status for contract and supplemental generation, and deduction code status. To generate a Payroll Settings Report, select Reports
ą
Prior to Printing Checks
ą
Payroll Settings Report.
·
Click "OK" to generate the report. The report will be displayed on screen in the report viewer for user verification. If the report is correct the user can:
1) Print the report by clicking the print icon 2) Saving to a file by clicking the save icon
After Checks Printed
Transactions Journal
The Payroll Transactions Journal provides a detail of a selected periodās payroll period data for an employee or range of employees. The journal gives the employeeās gross salary, along with the deductions, and net pay for both the selected period and for the year-to-date. The journal also details the supplemental earnings and voluntary deductions and includes the general ledger account codes the earnings and deductions are coded to.
To produce a Transactions Journal, select Reports
ą
After Checks Printed
ą
Payroll Transactions.
·
Enter the starting payroll check date and press TAB.
·
Enter the ending payroll check date and press TAB. The last payroll is the default beginning and ending dates.
·
Enter the starting employee number and press TAB
·
Enter the ending employee number and press TAB. Leave both blank to select all employees.
·
Select the transaction level, summary or detail.
·
Select "Yes" or "No" to print the Bureau information for this journal. If āYesā was selected you must also select āYesā or āNoā to have the Bureau Information printed with details by location and employee type.
·
Click "OK" to generate the report. The report will be displayed on screen in the report viewer for user verification. If the report is correct the user can:
1) Print the report by clicking the print icon 2) Saving to a file by clicking the save icon Payroll Tips:
0
The detail transaction journal will display the detail for each employee. The summary will display only the totals for the selected payroll. The After Printing Checks Transaction Journal will include check numbers and employee year-to-date information.
Check Register
The Check Register allows the user to print a sequential listing of checks for any posted payroll period. To generate a Check Register, select Reports
ą
After Checks Printed
ą
Check Register.
·
Enter the starting payroll check date and press TAB.
·
Enter the ending payroll check date and press TAB.
·
Enter the first check number from which to start.
·
Enter the last number of the checks.
·
Click "OK" to generate the report. The report will be displayed on screen in the report viewer for user verification. If the report is correct the user can:
1) Print the report by clicking the print icon 2) Saving to a file by clicking the save icon
After Checks Printed Deduction Register
The Deduction Register allows the user to print a listing of each deduction for any posted payroll period. To generate a Deduction Register, select Reports
ą
After Checks Printed
ą
Deduction Register. For screen image please click Deduction Register.
·
Select the desired deductions from the pick list.
·
Enter the beginning and ending employee range and press TAB.
·
Enter the desired Payroll check date range. The default date is the current payroll period.
·
Click "OK" to generate the report. The report will be displayed on screen in the report viewer for user verification. If the report is correct the user can:
1) Print the report by clicking the print icon 2) Saving to a file by clicking the save icon
After Checks Printed Earnings Register
The Earnings Register allows the user to print a listing of each earning for any posted payroll period. To generate an Earnings Register, select Reports
ą
After Checks Printed
ą
Earnings Register. For screen images please click Earnings Register.
·
Select the desired deductions from the pick list.
·
Enter the beginning and ending employee name and press TAB.
·
Select "Yes" or "No" to separate pages by type.
·
Enter the desired Payroll check date range. The default date is the current payroll period.
·
Click "OK" to generate the report. The report will be displayed on screen in the report viewer for user verification. If the report is correct the user can:
1) Print the report by clicking the print icon 2) Saving to a file by clicking the save icon Account Register
The Payroll Account Distribution allows the user to print the account code distribution of any posted payroll period. To generate a Payroll Account Distribution, select Reports
ą
After Checks Printed
ą
Account Distribution.
·
Enter the desired Payroll check date range. The default date is the current payroll period.
·
Click "OK" to generate the report. The report will be displayed on screen in the report viewer for user verification. If the report is correct the user can:
1) Print the report by clicking the print icon 2) Saving to a file by clicking the save icon
Check Sign-in Sheet
To generate a check sign-in sheet separated by building for the current payroll, select Reports
ą
After Checks Printed
ą
Check Sign-in Sheet.
·
Enter the payroll check date and press TAB.
·
Enter the first check number and press TAB.
·
Enter the last check number and press TAB.
·
Indicate if direct deposit stubs are to be included in the listing.
·
Enter the number of lines to skip between persons in the report.
·
Click "OK" to generate the report. The report will be displayed on screen in the report viewer for user verification. If the report is correct the user can:
1) Print the report by clicking the print icon 2) Saving to a file by clicking the save icon
Direct Deposit Submenu
Setting the Direct Deposit Header Information
·
Select Direct Deposit Header Information from the Direct Deposit Submenu to access the header information.
·
Click UPDATE from the Update Panel to enter or change information.
·
Enter the header information as provided by your financial institution.
The header information includes the following:
Immediate Origin Name: The User Name
Immediate Origin Code: 1 + the Userās Tax ID Number
Home District Name: The User Name
Immediate Destination: The Transmitting Bank Name
Immediate Destination Code: The Transmitting Bankās Routing Number
Home District ID#: 1 + The Userās Tax ID Number
Originating Bank Code: The first 8 digits of the Transmitting Bankās Routing Number
Bank Routine: The direct deposit file for your specific financial institution
Bank Account Number: The payroll bank account number
Bank Reference Code: The last header record, defined by the bank
Sign-on Line: A special mainframe signon line required by some banks. Leave blank if not required.
Add Line: A special mainframe processing line required by some banks. Leave blank if not required.
Local Default File: The destination file name for the NACHA file
Please contact FINANCE MANAGER Support for further assistance in setting up the header information
Participant Listing
To generate a listing of all direct deposit candidates, select Reports
ą
After Check Printed
ą
Direct Deposit Submenu
ą
Direct Deposit Participant Listing.
·
Click "OK" to generate the report. The report will be displayed on screen in the report viewer for user verification. If the report is correct the user can:
1) Print the report by clicking the print icon 2) Saving to a file by clicking the save icon
Proof Listing
To generate a proof listing of all direct deposit employees for the current payroll, select Reports
ą
After Checks Printed
ą
Direct Deposit Submenu
ą
Direct Deposit Proof Listing.
·
Click "OK" to generate the report. The report will be displayed on screen in the report viewer for user verification. If the report is correct the user can:
1) Print the report by clicking the print icon 2) Saving to a file by clicking the save icon Create the NACHA File
To create the NACHA file for the current payroll, select Reports
ą
After Checks Printed
ą
Direct Deposit Submenu
ą
Create Direct Deposit NACHA File Listing.
·
Enter the effective date of the direct deposit, the creation date, and the destination file name. NOTE: the destination file must equal NACHA.DAT. To browse for the file click the folder icon.
Payroll Tips:
0
The effective date of the direct deposit is the date the funds will be transferred into the employeeās account and traditionally the payroll date. The creation date is the date the file is created.
Printing the NACHA File Listing
To generate a copy of the NACHA direct deposit transmission file for the current payroll, select Reports
ą
After Checks Printed
ą
Direct Deposit Submneu
ą
Direct Deposit NACHA File Listing.
·
Enter the Direct Deposit effective date.
·
Click "OK" to generate the report. The report will be displayed on screen in the report viewer for user verification. If the report is correct the user can:
1) Print the report by clicking the print icon 2) Saving to a file by clicking the save icon
Retirement Reports
Monthly ERS Report Menu
Monthly ERS Report
The Monthly Employeesā Retirement System (ERS) Report provides a monthly summary of employeesā earnings for submission to local or state agencies for reporting purposes. The user can generate the report information, modify the information for other non-salary items, and finally print the report.
To create a Monthly ERS Report, select Reports
ą
Retirement Reports
ą
Monthly ERS Report Menu. PAYROLL MANAGER will display the Monthly Employeesā Retirement Report Menu.
Generate ERS Report Information
The path to the Monthly ERS Report Information is Reports
ą
Retirement Reports
ą
Monthly ERS Report Menu
ą
Generate Report Information.
·
Enter the monthās ending date and press TAB.
·
Enter the employee range or accept the default to include all employees.
·
Select the method of payment Bi-weekly or Semi- monthly.
·
Enter the maximum number of days for one, two, and three checks.
·
Select āYESā or āNOā to include ERS back payments into normal contributions.
·
Click āOKā to run the report. The report will be displayed on screen in the report viewer for user verification. If the report is correct the user can:
1) Print the report by clicking the print icon 2)
Saving to a file by clicking the save icon Modify ERS Report Information
The path to Modify report is Reports
ą
Retirement Reports
ą
Monthly ERS Report Menu
ą
Modify Report Information.
Add
·
Select ADD from the update panel
·
Enter the Employee number or click the magnifying glass to select from a list of available employees.
·
Enter the retirement number and press TAB.
·
Enter the Tier number and press TAB.
·
Enter the number of check the employee received over the month.
·
Enter the number of days the employee worked this month.
·
Enter the current monthly salary received and press TAB.
·
Enter the current monthly contributions and press TAB.
·
Enter the current monthly loan payments and press TAB.
·
Enter the current monthly arrears payments and press TAB.
·
Click SAVE to save the new information.
Update
·
Select the employee from the listing using the SORT feature or the scroll bars.
·
Select UPDATE from the update panel.
·
Press TAB until the information to be changed is highlighted.
·
Enter the correct information and click SAVE. PAYROLL MANAGER will automatically replace the old date with the new data.
Remove
·
Select the employee from the list.
·
Click the DELETE button from the update panel.
·
PAYROLL MANAGER will ask you, āDelete this record?ā
·
Click āYESā to delete the record or āNOā to keep it.
Print ERS Report
The path to the Monthly ERS Print Report is Reports
ą
Retirement Reports
ą
Monthly ERS Report Menu
ą
Print Report.
·
Enter the Monthās ending date and Click āOKā to run the report. The report will be displayed on screen in the report viewer for user verification. If the report is correct the user can:
1) Print the report by clicking the print icon 2) Saving to a file by clicking the save icon Create ERS Magnetic Media Disk
The data file provides a monthly summary of employee earning for submission to local or state agencies. The path to the Create ERS Magnetic Media Disk is Reports
ą
Retirement Reports
ą
Monthly ERS report Menu
ą
Create ERS Magnetic Media Disk.
·
Enter the monthās ending date and press TAB.
·
Enter the ERS report code as assigned by the retirement system.
·
Enter the location code as assigned by the retirement system.
·
Enter the path a file name where the file will be saved to or click the folder icon to browse for the location.
·
Click āOKā to run the routine.
Semi-Annual TRS Report Menu
Generate TRS Report Information
·
Enter the end date of the month for this report.
·
Select āYESā or āNOā to have the report include TRS back payments into normal contributions.
·
Click āOKā to generate the report. The report will be displayed on screen in the report viewer for user verification. If the report is correct the user can:
1) Print the report by clicking the print icon 2) Saving to a file by clicking the save icon Modify TRS Report Information
The path to Modify report is Reports
ą
Retirement Reports
ą
Semi-Annual TRS Report Menu
ą
Modify Report Information.
Add
·
Select ADD from the update panel
·
Enter the Employee number or click the magnifying glass to select from a list of available employees.
·
Enter the retirement number and press TAB.
·
Enter the Tier number and press TAB.
·
Enter the number of check the employee received over the month.
·
Enter the number of days the employee worked this month.
·
Enter the current monthly salary received and press TAB.
·
Enter the current monthly contributions and press TAB.
·
Enter the current monthly loan payments and press TAB.
·
Enter the current monthly arrears payments and press TAB.
·
Click SAVE to save the new information.
Update
·
Select the employee from the listing using the SORT feature or the scroll bars.
·
Select UPDATE from the update panel.
·
Press TAB until the information to be changed is highlighted.
·
Enter the correct information and click SAVE. PAYROLL MANAGER will automatically replace the old date with the new data.
Remove
·
Select the employee from the list.
·
Click the DELETE button from the update panel.
·
PAYROLL MANAGER will ask you, āDelete this record?ā
·
Click āYESā to delete the record or āNOā to keep it.
Print TRS Report
The path to the Print the Semi-Annual TRS Report is Reports
ą
Retirement Reports Menu
ą
Print Report.
·
Enter the monthās ending date.
·
Enter the location code.
·
Click āOKā to run the report. The report will be displayed on screen in the report viewer for user verification. If the report is correct the user can:
1) Print the report by clicking the print icon 2)
Saving to a file by clicking the save icon
Create TRS Magnetic Media Disk
The path to the Create TRS Magnetic Media Disk is Reports
ą
Retirement Reports
ą
Semi-Annual TRS Report Menu
ą
Create TRS Magnetic Media Disk.
·
Enter the monthās ending date and press TAB.
·
Enter the location code as assigned by the retirement system and press TAB.
·
Enter the destination of the file or click the folder icon to browse for the location.
·
Click āOKā to run the routine.
Other Reports
Fiscal Report Menu
Year End Check Listing
The path to the Year-End Check listing is Reports
ą
Other Reports
ą
Fiscal Reports
ą
Year-End Check Listing.
·
Click "OK" to generate the report. The report will be displayed on screen in the report viewer for user verification. If the report is correct the user can:
1) Print the report by clicking the print icon 2)
Saving to a file by clicking the save icon
Year End Pennies Report
The path to the Year-End Pennies Report is Reports
ą
Other Reports
ą
Fiscal Reports
ą
Year-End Pennies Report.
·
Select the employee type(s), building(s) and department(s) to be included in the report or accept the automatic default of all for each category.
·
Enter the name for the starting and ending employee or leave blank to select all.
·
Select Yes or No to include the following categories in the report:
Active Employees
Inactive Employees
Retired Employees
On Leave Employees
Temporary Employees
·
Enter the date range for the report.
·
Click "OK" to generate the report. The report will be displayed on screen in the report viewer for user verification. If the report is correct the user can:
1) Print the report by clicking the print icon 2) Saving to a file by clicking the save icon
Earnings
Earnings by Account
The path to the Earnings by Account report is Reports
ą
Other Reports
ą
Fiscal Reports
ą
Earnings
ą
by Account.
·
Select the account code or account codes from the listing, to select all account codes click the Select All Account Codes check box.
·
The user can locate the employees by using the two sort features:
Account Allows the user to enter the account code being searched
Name Allows the user to type in the first few letters of the employeeās name
·
Click āOKā to run the report. The report will be displayed on screen in the report viewer for user verification. If the report is correct the user can:
1) Print the report by clicking the print icon 2)
Saving to a file by clicking the save icon Earnings by Employee
The path to the Earnings by Employee report is Reports
ą
Other Reports
ą
Fiscal Reports
ą
Earnings
ą
by Employee.
·
Select the employee or employees from the listing, to select all employees click the Select All Employees check box.
·
The user can locate the employees by using the two sort features:
Name Allows the user to type in the first few letters of the employeeās name
Number Allows the user to enter the employeeās number
·
Click "OK" to generate the report. The report will be displayed on screen in the report viewer for user verification. If the report is correct the user can:
1) Print the report by clicking the print icon 2)
Saving to a file by clicking the save icon
Diagnostic Report Menu
Contract and Rate Report
The Contract & Rate Report details the contract salary and included longevity, and the respective daily, hourly, and bi-weekly rates for the employees in the selected employee types. All information for this report is taken from Employee Screen - Earnings Information. To produce a Contract & Rate Report, select Reports
ą
Other Reports
ą
Diagnostic Report Menu
ą
Contract and Rate Report.
·
Select the employee types to print.
·
Select "Yes" or "No" to include temporary employees in the report.
·
Indicate if the report should be sorted by employee name or employee type.
·
Click "OK" to generate the report. The report will be displayed on screen in the report viewer for user verification. If the report is correct the user can:
1) Print the report by clicking the print icon 2)
Saving to a file by clicking the save icon
Supplemental Salary Report
The Supplemental Salary Report details the different supplemental pays for the employees in the selected employee types. All information for this report is taken from Employee Screen 4 - Earnings Information.
To produce a Supplemental Salary Report, select Reports
ą
Other Reports
ą
Diagnostic Report Menu
ą
Supplemental Salary Report.
·
Select the employee types to print.
·
Select "Yes" or "No" to include temporary employees in the report.
·
Indicate if the report should be sorted by employee name or employee type.
·
Click "OK" to generate the report. The report will be displayed on screen in the report viewer for user verification. If the report is correct the user can:
1) Print the report by clicking the print icon 2)
Saving to a file by clicking the save icon
Account Code Breakdown Report
The Account Code Breakdown Report details each employee sorted by their budgetary account codes. All information for this report is taken from Employee Screen - Earnings Information.
To produce the Account Code Breakdown Report, select Reports
ą
Other Reports
ą
Diagnostic Report Menu
ą
Account Code Breakdown.
·
Select "Yes" or "No" to include temporary employees in the report.
·
Click "OK" to generate the report. The report will be displayed on screen in the report viewer for user verification. If the report is correct the user can:
1) Print the report by clicking the print icon 2) Saving to a file by clicking the save icon Master Deduction Listing
The Master Deduction Listing lists by deduction code the employees currently with that deduction. All information for this report is taken from Employee Screen 5 - Deduction Information. To produce a Master Deduction Listing, select Reports
ą
Other Reports
ą
Diagnostic Report Menu
ą
Master Deduction Listing.
·
Select the deduction codes to print.
·
Select to have the report sorted by name or code.
·
Select "Yes" or "No" to include Active Deduction in the report.
·
Select "Yes" or "No" to include Inactive Deduction in the report.
·
Select "Yes" or "No" to include temporary employees in the report.
·
Click "OK" to generate the report. The report will be displayed on screen in the report viewer for user verification. If the report is correct the user can:
1) Print the report by clicking the print icon 2)
Saving to a file by clicking the save icon
Tax Withholding Status Report
The Tax Withholding Status Report details the tax withholding status for the selected employee types. All information for this report is taken from the tax information portion of Employee Screen 7 - Tax Withholding.
To produce a Tax Withholding Status Report, select Reports
ą
Other Reports
ą
Diagnostic Report Menu
ą
Tax Withholding Status Report.
·
Select the employee types to print.
·
Select "Yes" or "No" to include temporary employees in the report.
·
Indicate if the report should be sorted by employee name or type.
·
Click "OK" to generate the report. The report will be displayed on screen in the report viewer for user verification. If the report is correct the user can:
1) Print the report by clicking the print icon 2)
Saving to a file by clicking the save icon Direct Deposit Listing
The Direct Deposit Listing lists the employees currently having direct deposit with their respective bank routing and account number information for those districts with Direct Deposit. All information for this report is taken from the direct deposit portion of Employee Screen 6 - Deduction Information. To produce a Direct Deposit Listing, select Reports
ą
Other Reports
ą
Diagnostic Report Menu
ą
Direct Deposit Listing.
·
Click "OK" to generate the report. The report will be displayed on screen in the report viewer for user verification. If the report is correct the user can:
1) Print the report by clicking the print icon 2) Saving to a file by clicking the save icon Retirement System Listing
The Retirement System Listing lists all employees in the selected retirement system sorted either by employee name or by retirement system tier. The respective deduction percentage is also shown.
To produce a Retirement System Listing, select Reports
ą
Other Reports
ą
Diagnostic reports Menu
ą
Retirement System Listing.
·
Select the employee types to print.
·
Select the retirement system the report will be based upon.
·
Indicate if the report should include temporary employees.
·
Indicate if the report should sort by retirement tier or by name.
·
Click "OK" to generate the report. The report will be displayed on screen in the report viewer for user verification. If the report is correct the user can:
1) Print the report by clicking the print icon 2)
Saving to a file by clicking the save icon
TSA (403b) Limitation Report
The TSA (403b) Limitation Report lists all employees with 403(b) TSA deductions and the cumulative calendar year-to-date amount. This amount is one of three components needed to determine the calendar limit the employee may legally withhold and treat as exempt from wages. This report does not certify that the employee has not exceeded any legal limitations imposed by the Internal Revenue Code.
To produce a TSA (403b) Limitation Report, select Reports
ą
Other reports
ą
Diagnostic Report Menu
ą
TSA (403b) Limitation Report.
·
Enter the desired date range and calculation percentage to use and press TAB.
·
Enter the Employee Elective Deferral Cap (402g).
·
Indicate if the report should include temporary employees.
·
Click "OK" to generate the report. The report will be displayed on screen in the report viewer for user verification. If the report is correct the user can:
1) Print the report by clicking the print icon 2)
Saving to a file by clicking the save icon
W-2 Proof Listing
The W-2 Proof Listing lists in detail or summary the taxable withholding totals for all employees for the selected calendar year. All errors in wages are noted on the report.
To produce a W-2 Proof Listing, select Reports
ą
Other Reports
ą
Diagnostic reports Menu
ą
W-2 Proof Listing.
·
Select the employee types to print.
·
Enter the Report Selection Criteria.
·
Click "OK" to generate the report. The report will be displayed on screen in the report viewer for user verification. If the report is correct the user can:
1) Print the report by clicking the print icon 2)
Saving to a file by clicking the save icon W-2 Detail Analysis
The W-2 Detail Analysis lists in detail the W-2 errors for selected employees for the selected calendar year.
To produce a W-2 Detail Analysis, select Reports
ą
Other Reports
ą
Diagnostic Reports Menu
ą
W-2 Detail Analysis.
·
Select the employee number range.
·
Enter the Payroll Check Date Range.
·
Indicate if the report should display a message if no errors were found.
·
Click "OK" to generate the report. The report will be displayed on screen in the report viewer for user verification. If the report is correct the user can:
1) Print the report by clicking the print icon 2)
Saving to a file by clicking the save icon
Custom Report Menu
The Custom Report Menu allows each user to call upon special custom reports provided to the user by FINANCE MANAGER.
The path to the Custom Reports Menu is Reports
ą
Other Reports
ą
Custom Report Menu.
·
Select the desired Report by using the cursor-up, cursor-down keys or the mouse.
·
Select the RUN button to run the report. The report will be displayed on screen in the report viewer for user verification. If the report is correct the user can:
1)
Print the report by clicking the print icon 2)
Saving to a file by clicking the save icon The query menu provides another method for the user to access information. The query menu allows for a quick search of the existing payroll data for the desired information.
To enter the query menu module, select Queries from the PAYROLL MANAGER Main Menu. PAYROLL MANAGER will display the Payroll Query Menu Screen.
Employee Earnings History C/F
The Employee Earnings History C/F provides a summary of the calendar and fiscal totals for the selected employee. The history may be displayed individually on screen or printed in a report.
To view an employeeās earnings history, select Queries
ą
Employee Earnings History C/F.
·
Select the employee type(s), building(s) and department(s) to be included.
·
Enter the employee name range or leave blank to include all employees.
·
Select YES or NO to include the following:
Active Employees
Inactive Employees
Retired Employees
On Leave Employees
Temporary Employees
·
Click "OK" to generate the report. The report will be displayed on screen in the report viewer for user verification. If the report is correct the user can:
1) Print the report by clicking the print icon 2)
Saving to a file by clicking the save icon
Employee Earnings History C/Q
The Employee Earnings History C/Q provides a summary of the calendar and quarter to date totals for the selected employee. The history may be displayed individually on screen or printed in a report
To view an employeeās earnings history, select Queries Ć Employee Earnings History C/Q.
·
Select the employee type(s), building(s) and department(s) to be included.
·
Enter the employee name range or leave blank to include all employees.
·
Select YES or NO to include the following:
Active Employees
Inactive Employees
Retired Employees
On Leave Employees
Temporary Employees
·
Click "OK" to generate the report. The report will be displayed on screen in the report viewer for user verification. If the report is correct the user can:
1) Print the report by clicking the print icon 2)
Saving to a file by clicking the save icon Employee Earnings Summary
The Employee Earnings Summary provides a report with one line for each payroll check received during the selected date range. It provides full account code and deduction code totals.
To view an employeeās earnings history, select Queries
ą
Employee Earnings Summary.
·
Select the employee type(s) to be included.
·
Enter the starting and ending date for the report.
·
Select YES or NO to have the report group and break by employee type.
·
Select YES or NO to have each employee print on a separate page.
·
Click "OK" to generate the report. The report will be displayed on screen in the report viewer for user verification. If the report is correct the user can:
1) Print the report by clicking the print icon 2)
Saving to a file by clicking the save icon
Employee Deduction History
The Employee Deduction History provides a summary of the voluntary deductions for the selected employee. To print an employeeās deduction history, select Queries Ć Employee Deduction History.
·
Enter the range of employee numbers to print.
·
Click "OK" to generate the report. The report will be displayed on screen in the report viewer for user verification. If the report is correct the user can:
1) Print the report by clicking the print icon 2)
Saving to a file by clicking the save icon Employee Attendance Balances
The Employee Attendance Balances provides a summary of the employees who have a negative balance in their attendance banks. These employees may be subject to having their wages docked for the negative amount. To print an attendance balance report, select Queries
ą
Employee Attendance Balances.
·
Enter the desired date range.
·
Select YES or NO to include Temporary employees.
·
Click "OK" to generate the report. The report will be displayed on screen in the report viewer for user verification. If the report is correct the user can:
1) Print the report by clicking the print icon 2)
Saving to a file by clicking the save icon Employee Mailing Labels
The Employee Earnings History provides a summary of the calendar, fiscal, and quarter to date totals for the selected employee. The history may be displayed individually on screen or printed in a report. To print employee-mailing labels, select Queries
ą
Employee Mailing Labels.
·
Select the employee type(s), building(s) and department(s) to be included.
·
Enter the employee name range or leave blank to include all employees.
·
Select YES or NO to include the following:
Active Employees
Inactive Employees
Retired Employees
On Leave Employees
Temporary Employees
·
Select the printer type dot matrix or laser.
·
Click "OK" to generate the report. The report will be displayed on screen in the report viewer for user verification. If the report is correct the user can:
1) Print the report by clicking the print icon 2)
Saving to a file by clicking the save icon
On Leave Status Report
To print the On Leave Status Report, select Queries
ą
On Leave Status Report.
·
Enter the beginning and ending dates to be searched.
·
Select YES or NO to include returned employees only included in the report.
·
Select YES or NO to include temporary employees.
·
Click "OK" to generate the report. The report will be displayed on screen in the report viewer for user verification. If the report is correct the user can:
1) Print the report by clicking the print icon 2)
Saving to a file by clicking the save icon
Employee Salary History
The Employee Salary History screen displays individual employee appointments and earn codes for those appointments. The path to Employee Salary History is Queries
ą
Employee Salary History.
Finding an Existing Employee
In order to view an employeeās information, it is necessary to locate the employee. From the Employee tab the SORT method assists the user in locating employee files.
NAME Allows the user to locate by name, click the NAME radio button and click in the STARTING box and type in the employee name being searched.
SSN Allows the user to locate by social security number, click the SSN radio button and click in the STARTING box and type in the employeeās social security number being searched.
NUMBER Allows the user to locate by employee number, click the NUMBER radio button and click in the STARTING box and type in the employee number being searched.
STATUS Allows the user to sort the listing by status type.
Appointment
·
After selecting the employee from the Employee tab, click the Appointment tab to display all the employeeās appointments.
·
To view the employeeās earn codes, select the desired appointment from the appointment tab.
·
Click the Earn Code tab to display the earn codes for the selected appointment.
Paycheck History
The Payroll Check History provides a detail of the payroll checks for the selected employee. The checks may be displayed individually on screen or printed in a report.
To view an employeeās payroll check history, select Queries
ą
Payroll Check History
ą
Display Payroll Check History.
·
Select the employee from the Available Employees listing. Use the Sort function to assist in locating an employee.
·
Click the CHECKS tab to display a listing of the employeeās checks.
·
Select the desired check from the check listing.
·
Click the VIEW tab to view a listing of voluntary deductions and the employees pay stub.
·
Click the Details tab to display the supplemental deductions for the check selected from the checks tab.
·
Click EXIT button to return to the PAYROLL MANAGER main screen.
To print an employeeās payroll check history, select Queries
ą
Payroll Check History
ą
Print Payroll Check History. For screen image please click Payroll Check History by Employee.
·
Enter the range of employee numbers to print and press TAB.
·
Enter the date range for payroll period to print.
·
Select the transaction level, summary or detail.
·
Click "OK" to generate the report. The report will be displayed on screen in the report viewer for user verification. If the report is correct the user can:
1) Print the report by clicking the print icon 2)
Saving to a file by clicking the save icon
·
Click OK to run the Payroll Settings Report.
·
The report will be displayed on screen in the report viewer for user verification. If the report is correct the user can: 1) Print the report by clicking the print icon
The W-2 Preparation Menu routine prepares the employee payroll data for completing the W-2s. The routine takes five steps, creating a W-2 history file, reviewing the W-2 information, printing the W-2 proof totals, comparing the W-2 totals to those reported on the Form 941s, and creating a floppy disk for W-2 printing.
·
Select Utilities
ą
Government Reporting Menu
ą
Print the W-2 Proof Totals.
·
Select the employee types to be included in the report.
·
Enter the year you wish to use.
·
Select the type of report Detail or Summary.
·
Select āYESā or āNOā to have the report break by employee type.
·
Click OK to run the report. The report will be displayed on screen in the report viewer for user verification. If the report is correct the user can: 1) Print the report by clicking the print icon
·
Select Utilities
ą
Government Reporting Menu
ą
Print the W-2 / 941Proof Report.
·
Enter the Starting and Ending period dates.
·
Click OK to run the report. The report will be displayed on screen in the report viewer for user verification. If the report is correct the user can: 1) Print the report by clicking the print icon
0
1
The Payroll Process
Payroll ModulesPayroll
Maintenance
Information
The output module provides a variety of standard reports that the user may display on screen, print to a text file, or print to a printer. Output reports are broken down into the categories Prior to Printing Checks, After Printing Checks, Retirement Reports, and Other Reports. Possible output includes contract & earnings listings, edit listings, transaction journals, check registers, account distribution reports, and all state employee retirement system reports. The output module also provides a Query function that allows the user to search for Information for a specific data item or items, such as an individual employee or pay period. The user can define the search criteria to customize the search or select the built in defaults and query all payroll entries.
Setting the Payroll Parameters
Shifting the Periods
Setting the Payroll Frequencies
Employee Type
Generating Payroll
Timesheets
Timesheet Input Utility
Data Entry
Printing
Maintenance
Transfer
Utilities
Timesheet Data
Set the Show radio button to ALL to display all timesheets associated with the selected entry method.
Set the Show radio button to Account, Earnings, Building, Department, or Employee Type Code to restrict the entries to those associated with one specific account, earnings, building, department, or employee type. Then enter the appropriate code or use the lookup window to choose from a listing of valid codes.
4. To enter pay units, click on the Units field. Enter the appropriate number of units to be paid for each employee and press Enter. The system multiplies the number of units by the pay rate and automatically calculates the extended pay amount.
NOTE: If the Units and Amount fields are highlighted in red, the values have already been transferred to payroll. In this case, update to the units and amount values are not permitted. Use the Additional Earnings function to make any necessary changes.
5. Once all the units have been specified, use the Calculate Totals button to display a running total of the entries for the selected group and for all timesheet records.
NOTE: Once timesheet data has been transferred to the current payroll and checks are printed and posted, the Units and Amount values are zeroed out. When appropriate, the units for the next pay period may be entered.
Printing Timesheet Data
Printing Timesheet Data
The Printing folder is used to print completed timesheet data in order to verify your entries. It is important to review all entries and make any necessary changes before timesheet data is transferred to the current payroll.

To Use the Print Timesheet Window:
1. Use the buttons on the left-hand side of the window to indicate how the timesheet data is being grouped and printed. Employee timesheet records can be sorted in any one of the following methods: by Account Code, Earnings Code, Building, Department, Employee Type, or Employee Number.
2. Once the timesheet print method has been specified, use the browser to select specific entries to be printed.
Select the criteria from the browser list by clicking on the data to be included in the printed timesheets. Each selection is highlighted. (To deselect an item, click on the item to remove the highlight.)
OR
Check the Select All box if you wish to print all timesheet data associated with the selected group.
3. Use the Sort field to change the sort order of the information contained in the browser. Use the Starting field to change the starting point of information contained in the browser.
44. Define the timesheet reporting criteria.
Include All Entries Even if Amount is Zero ā
Flag the YES radio button if you wish to include all timesheet entries including those that have zero amounts.
Flag the NO radio button if you only wish to include those timesheet entries where the amount is not zero.
Include Entries for Date(s) ā
Flag the Specific radio button if you wish to include timesheet data that was entered during a specific date range. Then indicate the timesheet entry date range.
Flag the All radio button if you wish to include all timesheet entries regardless of their entry dates.
5. Select the OK push button to generate the report.
Timesheet Data Maintenance
Field
Description
Employee
The number that uniquely identifies the employee. If necessary, use the Employee Lookup browser to select the appropriate employee. The system defaults the employee name and social security number.
Current Payroll Check Date
This field defaults to the current pay period check date as defined in the Payroll Parameters File and is not modifiable.
Emp Type
This field defaults to the employee type associated with the hourly or daily appointment. If no hourly or daily appointment exists, this field defaults to the employee type defined on the Information window in Employee Maintenance. You may change the default value if necessary. If needed, use the Employee Type Lookup browser to select the appropriate code.
Building
This field defaults to the building code defined on the Information window in Employee Maintenance. You may change the default value if necessary. If needed, use the Building Code Lookup browser to select the appropriate code.
Dept
This field defaults to the department code defined on the Information window in Employee Maintenance. You may change the default value if necessary. If needed, use the Department Code Lookup browser to select the appropriate code.
Entry Date
This field defaults to the current system date and may be changed if necessary.
Earning
Enter the appropriate earnings code for the employee. Valid codes are:
Account
This field is used to indicate the account number to which the earning is being expensed.
Units
The number of units to be paid to the employee. Based on the earnings code, enter the number of days or hours.
Pay Rate
This field is used to indicate the employeeās hourly or daily pay rate.
NOTE: If the employee is to be paid a flat dollar amount, enter 1 (one) in the Units field and the flat dollar amount in the Pay Rate field.
Amount
This field is for display purposes only and is not modifiable. The system multiplies the number of units by the pay rate and automatically calculates the extended pay amount.
Retire System
This field defaults to the employeeās retirement system code, as defined on the Retirement window in Employee Maintenance.
Adding a Timesheet Record
Finding a Timesheet Record
Editing a Timesheet Record
Deleting a Timesheet Record
Exiting from Timesheet Maintenance
Transfer Timesheet Data
Timesheet Utilities
Setup Entries Utility
Use the Sort field to change the sort order of the information contained in the browser. Use the Starting field to change the starting point of information contained in the browser.
Select the criteria from the browser list by clicking on the selected account(s), earning(s), building(s), department(s), employee type(s), or employee(s). Each selection is highlighted. (To deselect an item, click on the item to remove the highlight.)
OR
Check the Select All box if you wish to set up a timesheet entry for all employees associated with the selected group.
3. Select the Setup Entries radio button.
4. Indicate the starting and ending date range. The system will create a timesheet record for each hourly and per diem employee who does not already have an existing timesheet record.
5. Press the OK button. An Information window displays stating that the initialization is complete.
The timesheet entry can be viewed on the Data Entry and Maintenance folders.
Initialize Entries Utility
Initialize Entries Utility
This utility sets all units to zero for selected or all Hourly or Per Diem employees or those associated with selected accounts, earnings, buildings, departments, or employee types.
1. Use the buttons on the left-hand side of the window to indicate which timesheet entries are to be initialized. Employee timesheet records can be initialized in any one of the following methods: by Account Code, Earnings Code, Building, Department, Employee Type, or Employee.
2. Once the initialization method or group has been specified, use the browser to select specific criteria for the initialization process.
Use the Sort field to change the sort order of the information contained in the browser. Use the Starting field to change the starting point of information contained in the browser.
Select the criteria from the browser list by clicking on the selected account(s), earning(s), building(s), department(s), employee type(s), or employee(s). Each selection is highlighted. (To deselect an item, click on the item to remove the highlight.)
OR
Check the Select All box if you wish to initialize the timesheet record for all employees associated with the selected group.
3. Select the Initialize Entries radio button.
4. Press the OK button. An Information window displays stating that the initialization is complete.
The Data Entry and Maintenance folders display the Units field as 0.00.
Purge Entries Utility
Purge Entries Utility
This utility removes all timesheet entries for selected or all Hourly or Per Diem employees or those associated with selected accounts, earnings, buildings, departments, or employee types.
1. Use the buttons on the left-hand side of the window to indicate which timesheet entries are to be purged. Employee timesheet records can be purged in any one of the following methods: by Account Code, Earnings Code, Building, Department, Employee Type, or Employee.
2. Once the purge method or group has been specified, use the browser to select specific criteria for the purge process.
Use the Sort field to change the sort order of the information contained in the browser. Use the Starting field to change the starting point of information contained in the browser.
Select the criteria from the browser list by clicking on the selected account(s), earning(s), building(s), department(s), employee type(s), or employee(s). Each selection is highlighted. (To deselect an item, click on the item to remove the highlight.)
OR
Check the Select All box if you wish to purge the timesheet entries for all employees associated with the selected group.
3. Select the Purge Entries radio button.
4. Press the OK button. A Message window displays asking you to confirm that you wish to proceed with the timesheet purge process at this time. Select YES if you wish to purge timesheet records. Otherwise, select NO.
5. If you chose to purge timesheet records, an Information window displays stating that the purge is complete.
The timesheet records are removed from the Data Entry and Maintenance folders.
Print Blank Input Sheets
This utility prints blank timesheet input worksheets for selected or all Hourly or Per Diem employees or those associated with selected accounts, earnings, buildings, departments, or employee types.
1. Use the buttons on the left-hand side of the window to indicate which timesheet input worksheets are to be printed. Employee timesheet worksheets can be printed in any one of the following methods: by Account Code, Earnings Code, Building, Department, Employee Type, or Employee.
2. Once the print method or group has been specified, use the browser to select specific criteria for the print blank timesheets process.
Use the Sort field to change the sort order of the information contained in the browser. Use the Starting field to change the starting point of information contained in the browser.
Select the criteria from the browser list by clicking on the selected account(s), earning(s), building(s), department(s), employee type(s), or employee(s). Each selection is highlighted. (To deselect an item, click on the item to remove the highlight.)
OR
Check the Select All box if you wish to print blank timesheets for all employees associated with the selected group.
3. Select the Print Blank Input Sheets radio button.
4. Press the OK button.
The Blank Timesheets display the employee number, employee name, account number, earning type (Reg Pay, Per Diem, OT Pay, etc.), and pay rate. Use the worksheets to enter the appropriate number of units worked for each employee. Once the worksheets have been completed, these worksheets may be used to quickly input timesheet data on the Timesheet Data Entry window.
The Blank Timesheets display the employee number, employee name, account number, earning type (Reg Pay, Per Diem, OT Pay, etc.), and pay rate. Use the worksheets to enter the appropriate number of units worked for each employee. Once the worksheets have been completed, these worksheets may be used to quickly input timesheet data on the Timesheet Data Entry window.
Enter Additional Earnings
Enter Additional Earnings
Adding Current Payroll Data
Adding Current Payroll Data
Current Payroll Checks to Be Paid will list all of the current checks that have been created for the current payroll period. Generating contractual employees automatically creates a check for the employee and displays it in the listing.

If the employee is not contractual, a check does not exist for them in the listing and must be created for them. To create a check:
·
Select ADD from the Update Panel.
·
Enter the employeeās number and press TAB (Click the magnifying glass to view a list of all available employees).
Entering Additional Wages
Calculating Payroll
Display/Modify Payroll Checks
Contractual Earnings
Processed Earnings
Deductions
Direct Deposit
Printing the Payroll Checks
![]() to enter the employee type message screen.
to enter the employee type message screen.
Update Employee Type Messages
Printing the Checks
Re-running the Payroll Checks
Printing Direct Deposit Stubs
Re-running Direct Deposit Stubs
Post the Checks
Void and Reissue Payroll Checks
Select the Void ONLY option if you wish to void all selected checks.
OR
Select the Void and Reissue option if you wish to void all selected regular-type checks that were not directly deposited.
The system displays a listing of those checks having the specified check date. Checks are displayed in numerical ascending order by check number. The list also includes the Employee Number, Employee Name, Net Pay Amount, and Check Status. The net pay amount is highlighted in red lettering to indicate that the check is a direct deposit check. The Status column reflects the following check status indicators: CK (Regular Check), DD (Direct Deposit), or PN (Pre-Notes prior to actual Direct Deposit).
4. Select the check that you wish to void or void and reissue by highlighting the appropriate check record. You may highlight one or multiple check records or check the Select All Checks option to void/reissue all checks. (NOTE: To deselect a check record, click on the check in the browser to remove the highlight.)
5. After all checks have been selected, choose the OK button.
Void ONLY Option
Void ONLY Option
If you chose the Void ONLY option, the system will display an Information window indicating the number of checks selected and the action that was performed.
Void and Reissue Option
Void and Reissue Option
If you chose the Void and Reissue option, the system will first search to see if any nonposted, sequence 1 checks exist for the employees selected.
If nonposted checks do not exist for any of the selected employees, the system displays an Information window indicating the number of checks selected and the action that was performed. NOTE: If you select the Void and Reissue option along with a range of records that includes both standard and direct deposited checks, the system only voids the direct deposited checks. All other checks are voided and reissued.
The voided check is ready for reissue and can be seen using the Display/Modify function. At this point, you may reissue the check as previously printed without recalculating checks or you may have to recalculate in the situation where a deduction flag was turned off when it should have been turned on.
If nonposted checks do exist for any of the selected employees, the system displays an error message indicating so and the Void and Reissue process is terminated. You must print any existing nonposted checks first before the Void and Reissue process can be completed.
If nonposted checks do exist for any of the selected employees, the system displays an error message indicating so and the Void and Reissue process is terminated. You must print any existing nonposted checks first before the Void and Reissue process can be completed.
Manual Checks
Manual Checks
Entering the Manual Payroll Checks
Entering the Manual Payroll Checks
At times it becomes necessary to issue a manual payroll check to an employee. The Manual Payroll Check Maintenance function is used to record a previously handwritten check into the Payroll System. Once the manual check has been recorded, the check can be posted through the Check Posting process.

Check EntryField
Description
Employee
(Required) The number that uniquely identifies the employee. If necessary, use the Employee Lookup browser to select the appropriate employee. The system defaults the employee name and social security number upon entry of the employee number.
Check Num
(Required) The number of the manual check.
Check Date
This field defaults to the current date and may be changed if necessary. Enter the date of the manual check.
Post Date
(Required) Enter the posting date of the manual check.
Net Pay
Enter the net pay amount.

Earnings
Field
Description
Type
Enter the earnings type as either Contract, Supplemental, Hourly, or Per Diem.
Code
Enter the appropriate earnings code based on the earnings type.
Account
Enter the account code to which the earning is to be expensed. Use the lookup browser to display and choose from a listing of valid account codes for the selected employee.
Units
Enter the number of units to be paid to the employee. Based on the earnings code, enter the number of days or hours.
Rate
This field is used to indicate the employeeās contract pay, hourly/daily pay rate, or supplemental earnings pay amount.
NOTE: If the employee is to be paid a flat dollar amount, enter 1 (one) in the Units field and the flat dollar amount in the Rate field.
Amount
This field is for display purposes only and is not modifiable. The system multiplies the number of units by the pay rate and automatically calculates the extended pay amount. NOTE: For Docked entries, the system automatically creates a negative dollar amount.
Ret System
This field defaults to the employeeās retirement system code, as defined on the Retirement window in Employee Maintenance. If the employee is a member of two different retirement systems, use the lookup browser to select the appropriate retirement system code.
Adding Earnings Information
Deleting an Earnings Record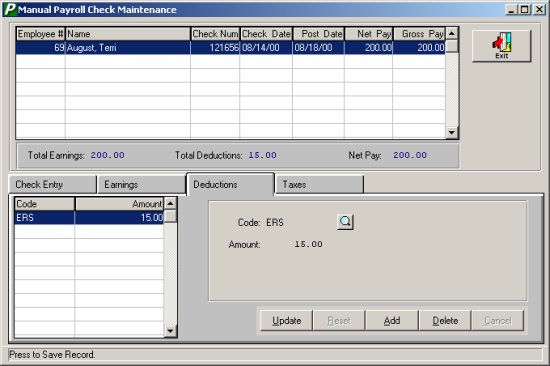
Field
Description
Code
Enter the deduction code or use the lookup browser to display and choose from a listing of the employeeās existing deduction codes.
Amount
Enter the dollar amount being deducted.
Adding Deductions Information
Taxes
Field
Description
FICA
Enter the FICA tax being deducted. (6.2% of FICA Wages)
Fed
Enter the Federal tax being deducted.
Medi
Enter the Medicare tax being deducted. (1.45% of Medicare Wages)
State
Enter the State tax being deducted.
EIC
This field is enabled only if the Earned IC flag is checked on the Tax Withholding folder in Employee Maintenance. Enter the Earned Income tax being deducted.
City
Enter the City tax being deducted.
Adding Tax Deductions
Maintenance
Employee Types
Employee Type Health
![]()
Employee Type Salary Schedule
![]()
Attendance Codes
Departments
Buildings
Chart of Accounts
Deduction Codes
Pay Frequencies
Earning Codes
Direct Deposit Banks
Tax Tables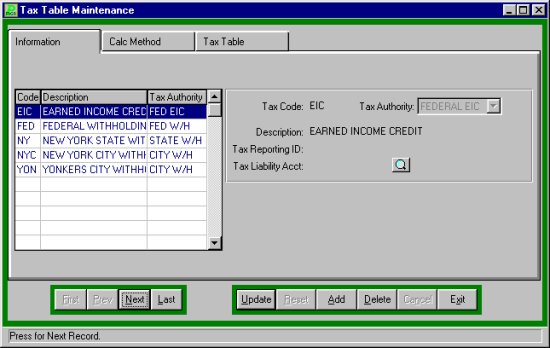

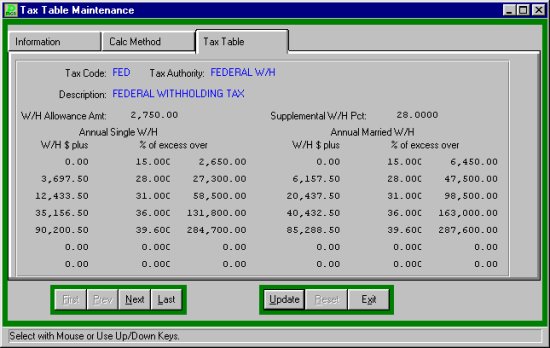
Employee Information
 2-Information This screen lists the basic employee payroll information, such as name, address, and employee type.
Employee Basic Information
NOTE: If the Private phone field is checked, the employeeās phone number displays as UNLISTED on the Employee Directory Listing that can be generated from the Human Resources Reports
®
Employee Lists drop-down menu.
·
Select the marital status by clicking the down arrow and press TAB.
·
Select the employeeās status: āAā for Active, āIā for Inactive, āRā for Retired, āLā for On Leave, or āTā for Temporary and press TAB. The Employment Status Code may be used throughout the system to locate a specific employee record or to restrict reports to employees of a particular status.
NOTE: If the Employment Status is changed to Inactive and an unposted payroll check exists for that employee, a warning message displays indicating so. You may either ignore the warning and leave the unposted check to be printed or delete the check using the Display/Modify Current Payroll Checks function.
·
Enter in the employeeās date of hire and press TAB.
·
If an employee has been terminated select the Employeeās termination reason from the drop down list.
·
Enter the employeeās termination date, if applicable, and press TAB.
·
Enter the employeeās rehire date if applicable and press TAB.
·
Enter the employee type or click the magnifying glass to select from a list of available employee types. Select the type and click OK to return to the employee information screen and press TAB.
·
The Building Field defaults to N/A (none assigned). If you use Building Codes enter the building code the employee will be working at or click the magnifying glass to select from a list of available building codes. Select the building and click OK to return to the employee information screen and press TAB. The Building Code is used to help categorize or group employees by building for Payroll and Personnel Report sorting purposes. You may also choose to print payroll checks by building.
·
The Department field defaults to N/A (none assigned). If you use Department Codes enter the department code or click the magnifying glass to select from a list of available codes. Select the department and click OK to return to the employee information screen and press TAB. The Department Code is used to help categorize or group employees by department for Payroll and Personnel Report sorting purposes. You may also choose to print payroll checks by department.
·
Select the employeeās ethnicity code from the drop down list and press TAB. Click the magnifying glass to display a list of available ethnic codes. Ethnicity codes are needed for Equal Employment Opportunity (EEOC) reporting purposes.
·
Click SAVE to lock in the new information.
Payroll Tips:
0 Every employee must have a Social Security Number. The system will not allow you leave this field blank. If you try to save the employee information, the system will prompt you for the SSN entry. The user must then enter a valid SSN for that employee or enter a ā?ā in the field by pressing āShiftā and ā?ā, then clicking CANCEL to cancel the entire employee information entry.
0 Every employee must be assigned to an employee type. Employee types allow for the classification of all similar employees into a single group. Employee types allow the user to change certain basic defaults, such as number of sick days, number of vacation days, and number of payroll checks, for the entire employee type population.
Finding an Existing Employee
In order to edit/change or remove an employeeās information, it is necessary to locate the employee. From the Employee tab the SORT method assists the user in locating employee files.
Employee Notes
Retirement
If the employee is entered into the Teachersā Retirement System, the retirement number is a 6-digit number. Tiers are arrived at according to the retirement number assigned to the employee. Tiers 1 and 2 are noncontributory. Tiers 3 and 4 are contributory at a rate of 3% of pay.
Retirement Number Range
Tier
000000 through 599999
1
600000 through 649999
2
650000 through 701737
3
701738 through 999999
4
If the employeeās retirement number is not known the following codes may be used:
FULL Teachers whose membership is MANDATORY and whose membership number is UNKNOWN
PART Teachers whose membership is OPTIONAL and who are NOT KNOWN to be TRS members
RETD Teachers receiving a RETIREMENT ALLOWANCE from TRS or any other NYS Public Retirement System
ERS
If the employee is entered into the Employeesā Retirement System, the retirement number is an 8-digit number. Tiers are arrived at according to the retirement number assigned to the employee. Tiers 1 and 2 are noncontributory. Tiers 3 and 4 are contributory at a rate of 3% of pay.
Retirement Number Range
Tier
00000000 through 12999999
1
13000000 through 29999999
2
30000000 through 33340799
3
33340800 through 99999999
4
·
Enter the Retirement number and press TAB.
·
Enter the date that the employee entered the retirement system and press TAB.
·
Enter the tier number for the employee.
·
Enter the number of months to be worked.
·
If a second retirement system exists for this employee enter the information in the same way as above.
·
After entering retirement information, select āYESā or āNOā if the employee is a veteran and press TAB.
·
Enter the employeeās anniversary date and click SAVE to save the new information.
Earnings
Position
Earnings
Payroll Tips:
0 After Earnings have been entered, the user must remember to select the account that the funds will be distributed from for this appointment. An error window displays to remind you. If this happens click OK and then click the ACCOUNT button to enter the Employee Earn Codes screen. Enter the information and click SAVE.
Editing/Changing an Earning
·
Select the desired Earning from the listing.
·
Click UPDATE from the update panel.
·
Press TAB until the desired information to be changed is highlighted.
·
Enter the correct data and click SAVE. PAYROLL MANAGER will automatically replace the old data with the new data.
Payroll Tips:
0 If you change any $ amount figure, you must also update the account information under the ACCOUNT button.
Removing an Earning
·
Select the desired Earning from the listing.
·
Click the DELETE the button from the update panel.
·
PAYROLL MANAGER will ask you āDelete this Earning?ā
·
Click āYESā to remove the position or click āNOā to keep the Earning.
Other Earnings
Other Earnings
The path to the Other Earnings button is Employee Information
ą
Earnings tab
ą
Other Earnings button.

Adding Other Earnings
·
Select the Type of Earning from the drop down list, Longevity, Credit Hours, Differential or Other.
Longevity and Differentialā¦
·
Enter the start and end date.
·
Enter the number of checks to be paid.
·
Enter the number of working days.
·
Enter the salary step.
·
Enter the salary level.
·
Enter the base contract amount.
·
Click Save to save the new information.
Credit Hoursā¦
·
All of the entries above.
·
Enter the number of credits.
·
Enter the appropriate daily rate, if different than the default.
Otherā¦
Otherā¦
·
Enter the start and end date.
·
Enter the earning code or click the magnifying glass to select from a list of available codes.
·
Enter the number of checks to be paid.
·
Enter the number of working days.
·
Enter the base contract amount.
Editing/Changing an Other Earning
·
Select the desired Earning from the listing.
·
Click UPDATE from the update panel.
·
Press TAB until the desired information to be changed is highlighted.
·
Enter the correct data and click SAVE. PAYROLL MANAGER will automatically replace the old data with the new data.
Removing an Earning
·
Select the desired Earning from the listing.
·
Click the DELETE the button from the update panel.
·
PAYROLL MANAGER will ask you āDelete this Earning?ā
·
Click āYESā to remove the position or click āNOā to keep the Earning.
Account
Account
The path to the Account button is Employee Information
ą
Earnings tab
ą
Account button.

Adding an Earn Code Account
·
Enter the account number or click the magnifying glass to select from a list of available account numbers.
·
Enter the percent and press TAB.
·
The earn limit and amount per check amounts are automatically filled in.
·
Click the SAVE button to save the new information.
Updating an Earn Code Account
·
Select the desired Earning from the listing.
·
Click UPDATE from the update panel.
·
Press TAB until the desired information to be changed is highlighted.
·
Enter the correct data and click SAVE. PAYROLL MANAGER will automatically replace the old data with the new data.
Payroll Tips:
0 The account code cannot be modified if FTD Earnings exist. If FTD Earnings exist, you may change the Percent, Earn Limit, and/or Amt/Chk.
Removing an Earn Code Account
·
Select the desired Earning from the listing.
·
Click the DELETE the button from the update panel.
·
PAYROLL MANAGER will ask you āDelete this earnings account record?ā
·
Click āYESā to remove the position or click āNOā to keep the Earning.
Payroll Tips:
0
If the Account code has Fiscal Earnings, the earn code account cannot be deleted.
Deductions
Deductions
Voluntary Deductions
Voluntary Deductions
The Voluntary Deductions screen details the employeeās voluntary deduction information. The deductions, which may be active or inactive, are listed in alphanumeric order.

Adding a Voluntary Deduction
·
Click ADD from the Update Panel.
·
Enter the star and end date or accept the defaults.
·
Enter the deduction code and press TAB. Click the magnifying glass to display a listing of all available deduction codes.
·
Enter the deduction type, either $ for dollar amount or % for percentage of earnings, and press TAB.
·
Enter the percentage or dollar amount per pay period and press TAB.
·
Enter the deduction frequency and press TAB. Click the magnifying glass to display a listing of all available deduction frequencies.
·
Indicate if the deduction is (I) for inactive or (A) for active and press TAB.
·
If the deduction code requires a bank account number, it will automatically be entered based on the deduction code.
·
Enter the type of year the earning is to be paid over, (C) for calendar year or (F) for fiscal year, and press TAB.
·
Enter the deduction limitation for the earnings and press SAVE. A zero should be entered if there is no deduction limitation.
·
Place a check the in the check box if the deduction is renewable.
Editing/Changing a Voluntary Deduction
·
Select the deduction code from the listing of the employeeās deductions.
·
Select UPDATE from the Update Panel.
·
Enter in the correct data and click SAVE. PAYROLL MANAGER will automatically replace the old data with the new data.
Viewing a Voluntary Deduction
·
Select the deduction code from the listing of the employeeās deductions
·
PAYROLL MANAGER will display the selected deduction information on the right side of the screen.
Direct Deposit
Direct Deposit Information
0 An employeeās pay can be deposited into multiple different accounts. Letās say that an employee wants $100.00 to be deposited into their checking account and the remainder deposited into their savings account. In this situation, add two direct deposit records as illustrated in the example below:
Bank Code
Account
Chck/Sav
Type
Amount/ Percent
Citibank
183471
C
$
100.00
Citibank
1823498
S
%
100.00
Tax Withholding
Changing Tax Withholding Information Select UPDATE from the Update Panel.
Utilities
Government Reporting Menu
941 Worksheet![]() or 2) Saving to a file by clicking the save icon
or 2) Saving to a file by clicking the save icon ![]() .
.
New York State Reports
![]() or 2) Saving to a file by clicking the save icon
or 2) Saving to a file by clicking the save icon ![]() .
.

Unemployment Report by Building
![]() or 2) Saving to a file by clicking the save icon
or 2) Saving to a file by clicking the save icon ![]() .
.
New Hire Report
![]() or 2) Saving to a file by clicking the save icon
or 2) Saving to a file by clicking the save icon ![]() .
.
Creating the W-2 File
Modifying the W-2 File
Print Dot-Matrix W-2 Form
Creating File for Laser W-2 Printing
Create File for SSA Reporting
Check Items Menu
Manual Checks by Date
![]() or 2) Saving to a file by clicking the save icon
or 2) Saving to a file by clicking the save icon ![]() .
.
Voided Checks by Date
![]() or 2) Saving to a file by clicking the save icon
or 2) Saving to a file by clicking the save icon ![]() .
.
Transfer Entries by Date
![]() or 2) Saving to a file by clicking the save icon
or 2) Saving to a file by clicking the save icon ![]() .
.
Check Reconciliation File
Setting the Reconciliation Header Information
Generating the Check Information
![]() or 2) Saving to a file by clicking the save icon
or 2) Saving to a file by clicking the save icon ![]() .
.
Prior Fiscal Earning Menu
Prior Earnings by Account Listing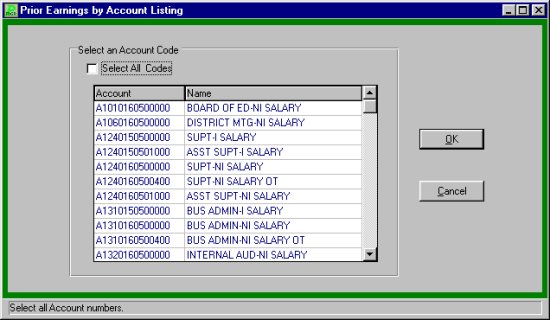
![]() or 2) Saving to a file by clicking the save icon
or 2) Saving to a file by clicking the save icon ![]() .
.
Prior Earnings by Employee Listing Select the Employee(s) to be included in the report. Click the select all check box to select all employees.
![]() or 2) Saving to a file by clicking the save icon
or 2) Saving to a file by clicking the save icon ![]() .
.
Year-to-Utility Menu
Clear Quarter to Date Amounts To clear the amounts click OK.
Re-Calculate Quarter to Date Amounts
Clear Fiscal Year-to-Date Amounts
Clear Calendar Year-to-Date Amounts
Employee Balances

Year End Deduction Totals
Transfer Earnings Between Accounts
Transfer Between Accounts
Substitute Payroll
Substitute Payroll Routine
Generate Substitute Listing
Printing the Substitute Listing![]() or
or
![]() .
.
Modify the Substitute Listing
Transferring the Substitute Data to Payroll
Substitute Payroll Utility
Substitute Types Maintenance
Re-Calculate Sub Days Worked
Re-Print Sub Payroll Listing after Transfer to Payroll .
.
![]() or
or
![]() .
.
Special Deductions Utility Menu
Change Deduction Amount or Limit
Change Deduction Frequency
Activate/Inactivate Deduction
Change Earning Amount or Limit
Bond Deduction Utilities
Bond Input Utility Employee Tab
Bond Calculation Utility
Bond Posting Utility
Supervisor Utilities
Custom Utility Menu
Reports
Prior to Printing Checks
Contract and Earnings Listing![]() or
or
![]() .
.
Hourly Earnings Listing![]() or
or
![]() .
.
Transaction Journal
![]() or
or
![]() .
.
Deduction Register
![]() or
or
![]() .
.
Earnings Register
![]() or
or
![]() .
.
Account Distribution
![]() or
or
![]() .
.
Direct Deposit Proof Listing![]() or
or
![]() .
.
Payroll Setting Report![]() or
or
![]() .
.
After Checks Printed
Transactions Journal
![]() or
or
![]() .
.
Check Register
![]() or
or
![]() .
.
After Checks Printed Deduction Register![]() or
or
![]() .
.
After Checks Printed Earnings Register![]() or
or
![]() .
.
Account Register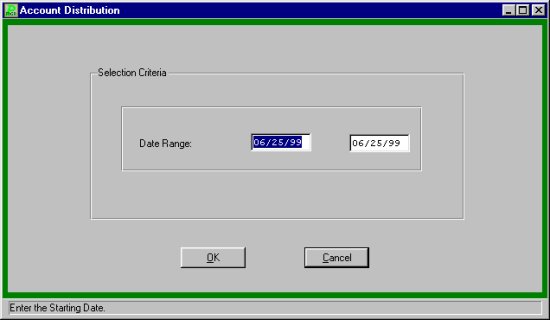
![]() or
or
![]() .
.
Check Sign-in Sheet
![]() or
or
![]() .
.
Direct Deposit Submenu
Setting the Direct Deposit Header Information For screen image please click Direct Deposit Header Information.
Participant Listing![]() or
or
![]() .
.
Proof Listing![]() or
or
![]() .
.
Create the NACHA File
Printing the NACHA File Listing
![]() or
or
![]() .
.
Retirement Reports
Monthly ERS Report Menu
Monthly ERS Report
Generate ERS Report Information
![]() or
or
![]() .
.
Modify ERS Report Information
Print ERS Report
![]() or
or
![]() .
.
Create ERS Magnetic Media Disk
Semi-Annual TRS Report Menu
Generate TRS Report Information
![]() or
or
![]() .
.
Modify TRS Report Information
Print TRS Report
![]() or
or
![]() .
.
Create TRS Magnetic Media Disk
Other Reports
Fiscal Report Menu
Year End Check Listing![]() or
or
![]() .
.
Year End Pennies Report
![]() or
or
![]() .
.
Earnings
Earnings by Account
![]() or
or
![]() .
.
Earnings by Employee .
.
![]() or
or
![]() .
.
Diagnostic Report Menu
Contract and Rate Report

![]() or
or
![]() .
.
Supplemental Salary Report
![]() or
or
![]() .
.
Account Code Breakdown Report
![]() or
or
![]() .
.
Master Deduction Listing
![]() or
or
![]() .
.
Tax Withholding Status Report
![]() or
or
![]() .
.
Direct Deposit Listing![]() or
or
![]() .
.
Retirement System Listing
![]() or
or
![]() .
.
TSA (403b) Limitation Report
![]() or
or
![]() .
.
W-2 Proof Listing
![]() or
or
![]() .
.
W-2 Detail Analysis
![]() or
or
![]() .
.
Custom Report Menu
![]() or
or
![]() .
.
Query Menu
Employee Earnings History C/F
![]() or
or
![]() .
.
Employee Earnings History C/Q
![]() or
or
![]() .
.
Employee Earnings Summary
![]() or
or
![]() .
.
Employee Deduction History
![]() or
or
![]() .
.
Employee Attendance Balances
![]() or
or
![]() .
.
Employee Mailing Labels
![]() or
or
![]() .
.
On Leave Status Report
![]() or
or
![]() .
.
Employee Salary History
 Earn Code

Paycheck History

![]() or
or
![]() .
.
Print the Payroll Settings Report
![]() or 2) Saving to a file by clicking the save icon
or 2) Saving to a file by clicking the save icon ![]() .
.
W-2 Preparation Routine
Printing the W-2 Proof Totals

![]() or 2) Saving to a file by clicking the save icon
or 2) Saving to a file by clicking the save icon ![]() .
.
Printing the W-2 / 941 Proof Report

![]() or 2) Saving to a file by clicking the save icon
or 2) Saving to a file by clicking the save icon ![]() .
.